April 24th, 2024 by Holly McMillen
Happy Wednesday!
Today is a special day. It’s my best friend of 50+ years’ birthday. Happy Birthday, Vanessa!
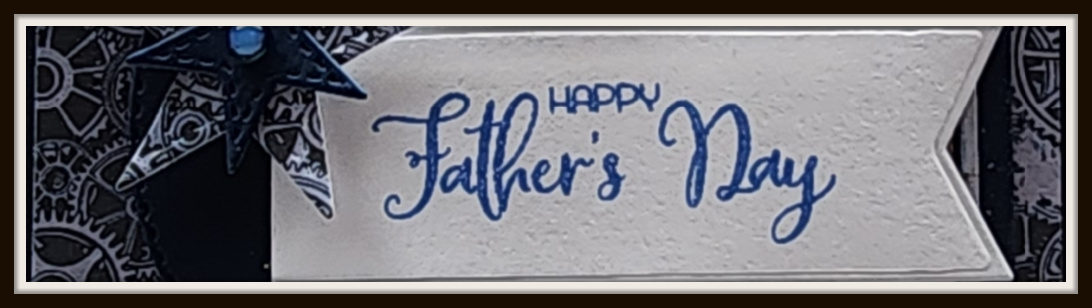
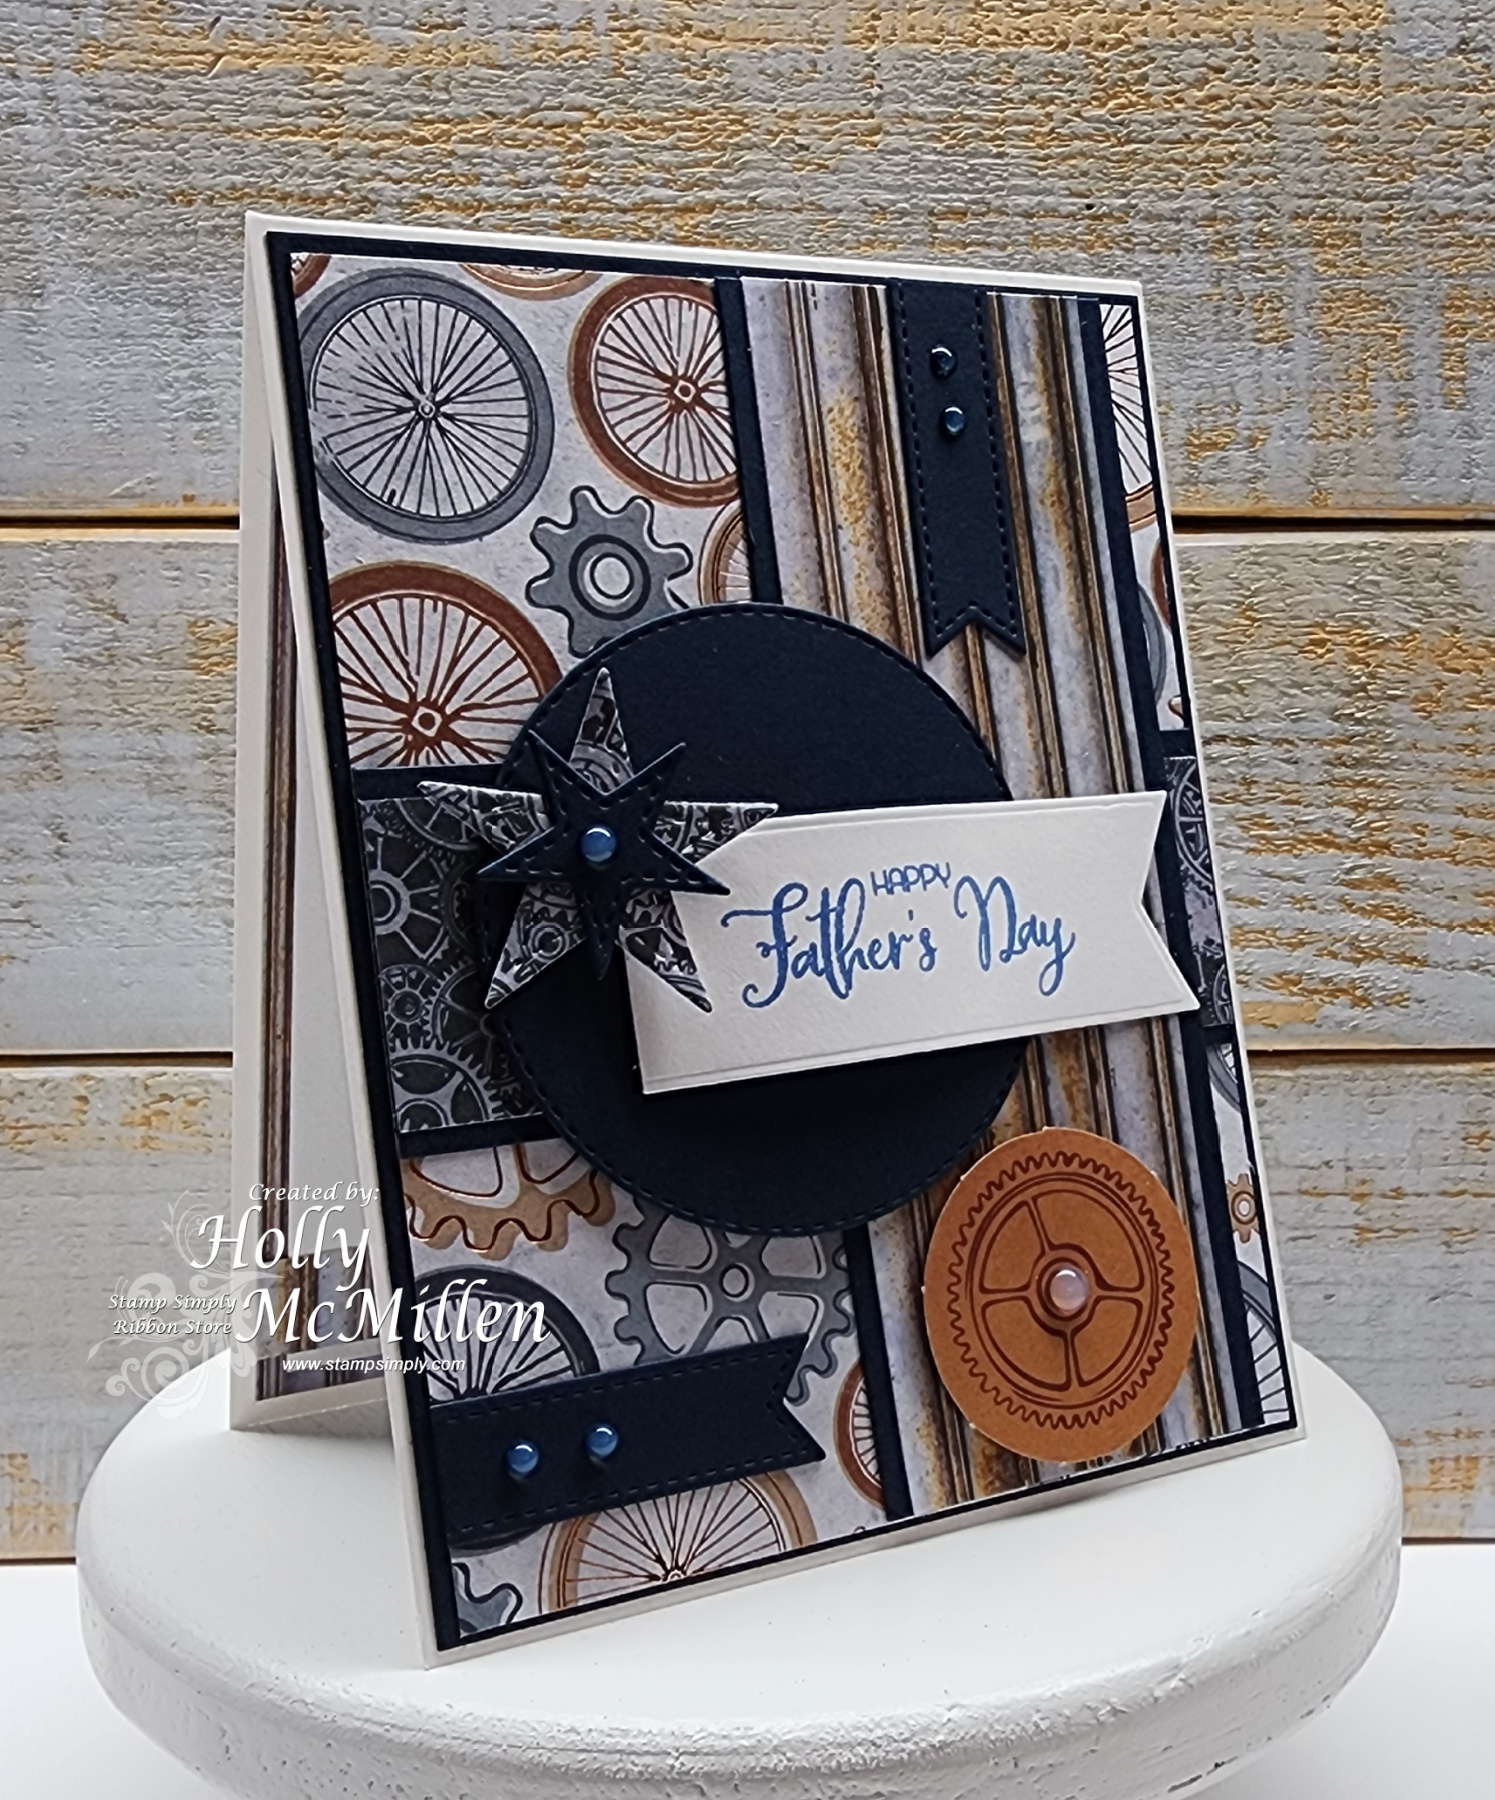
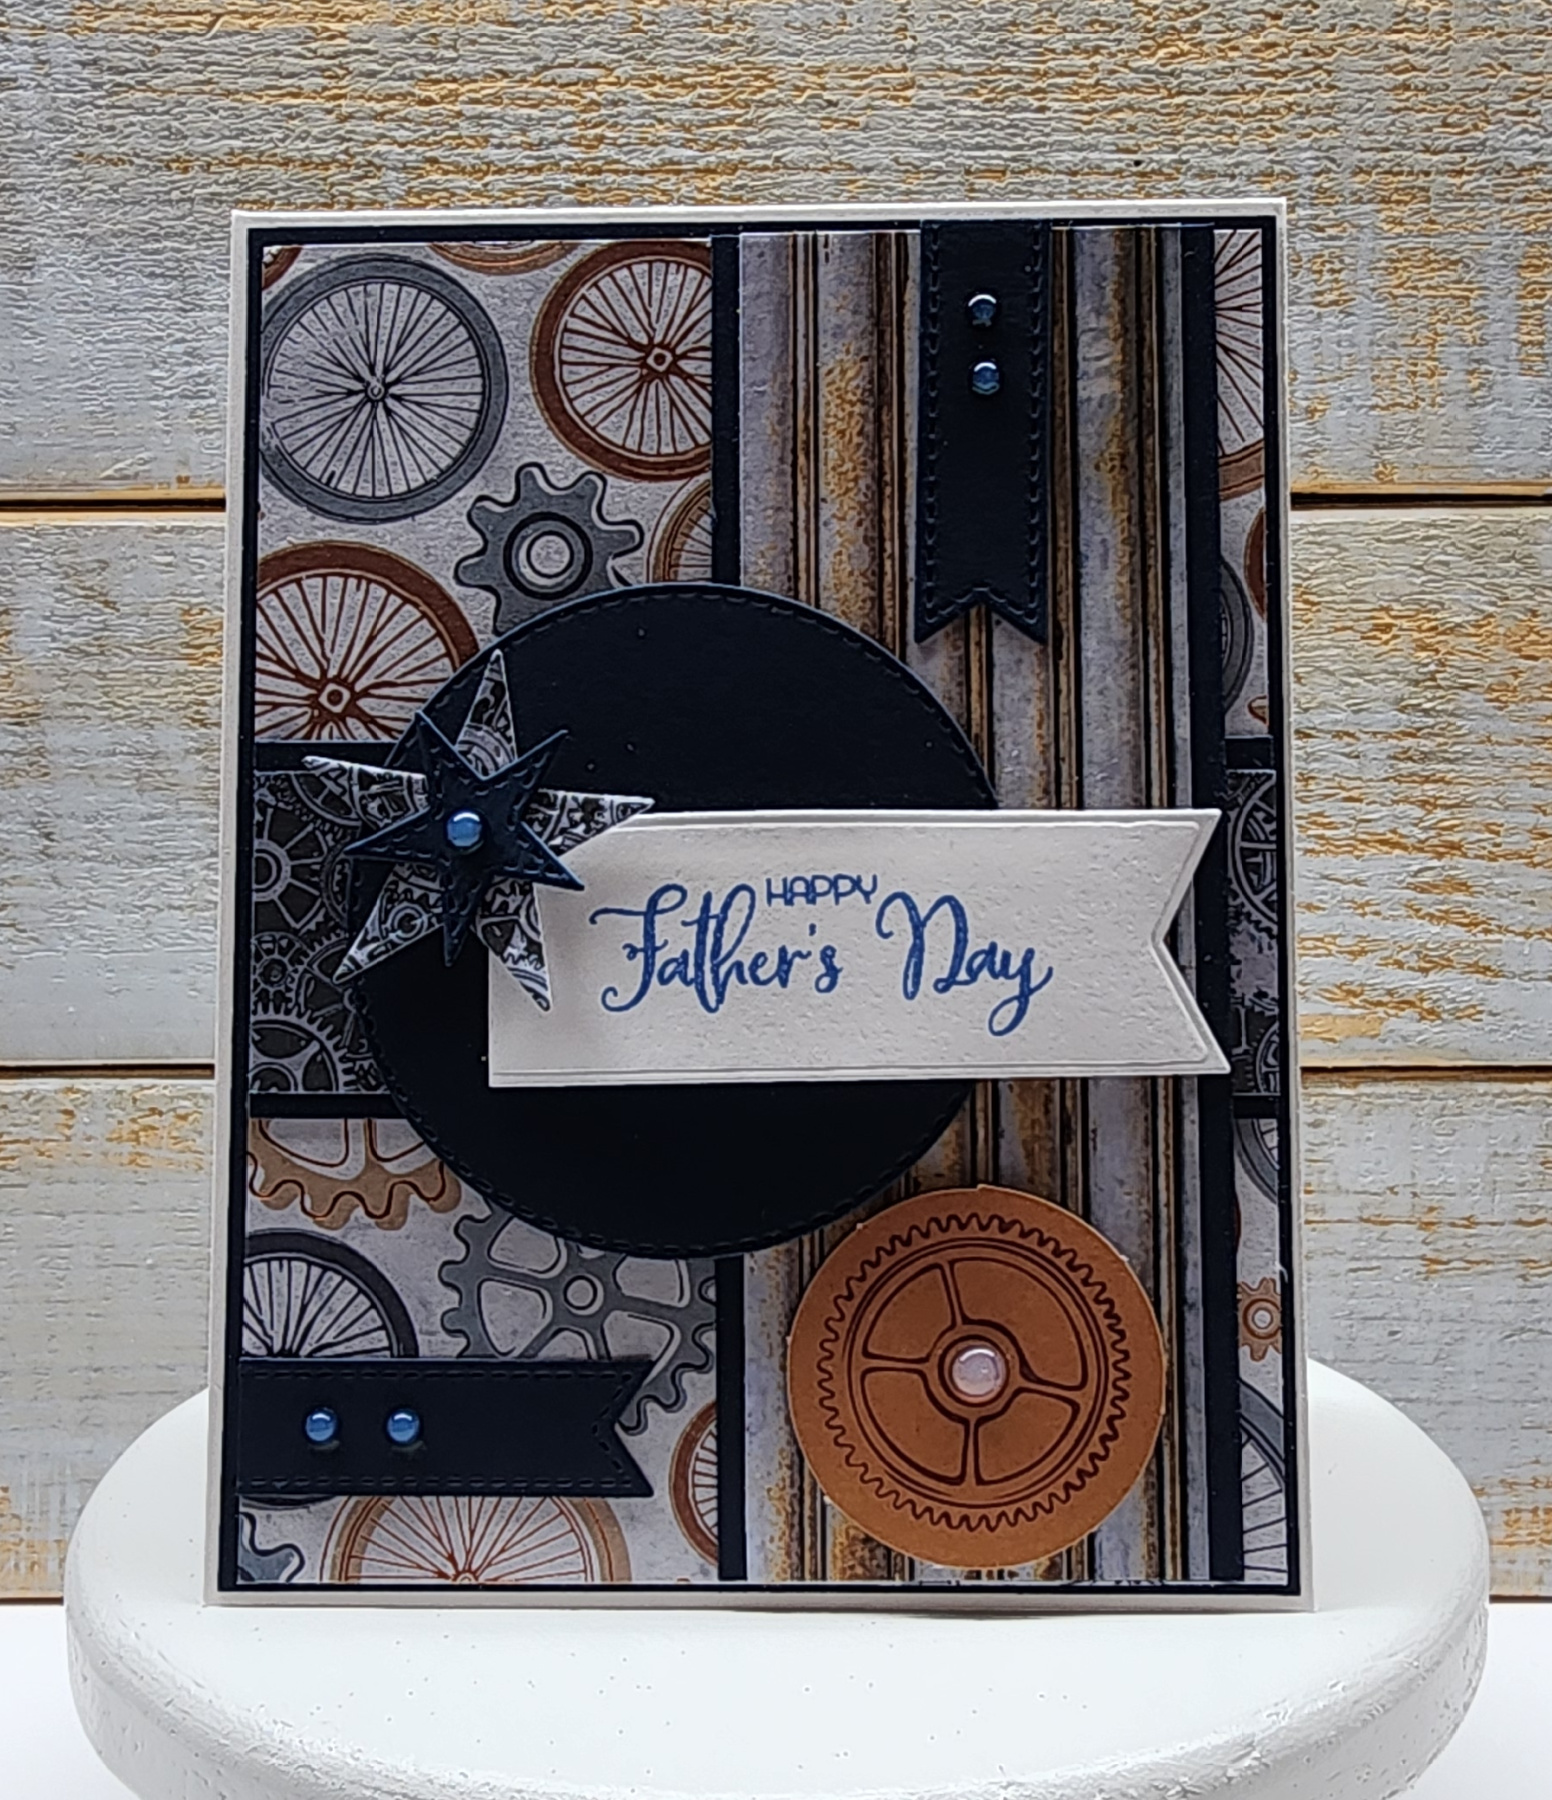
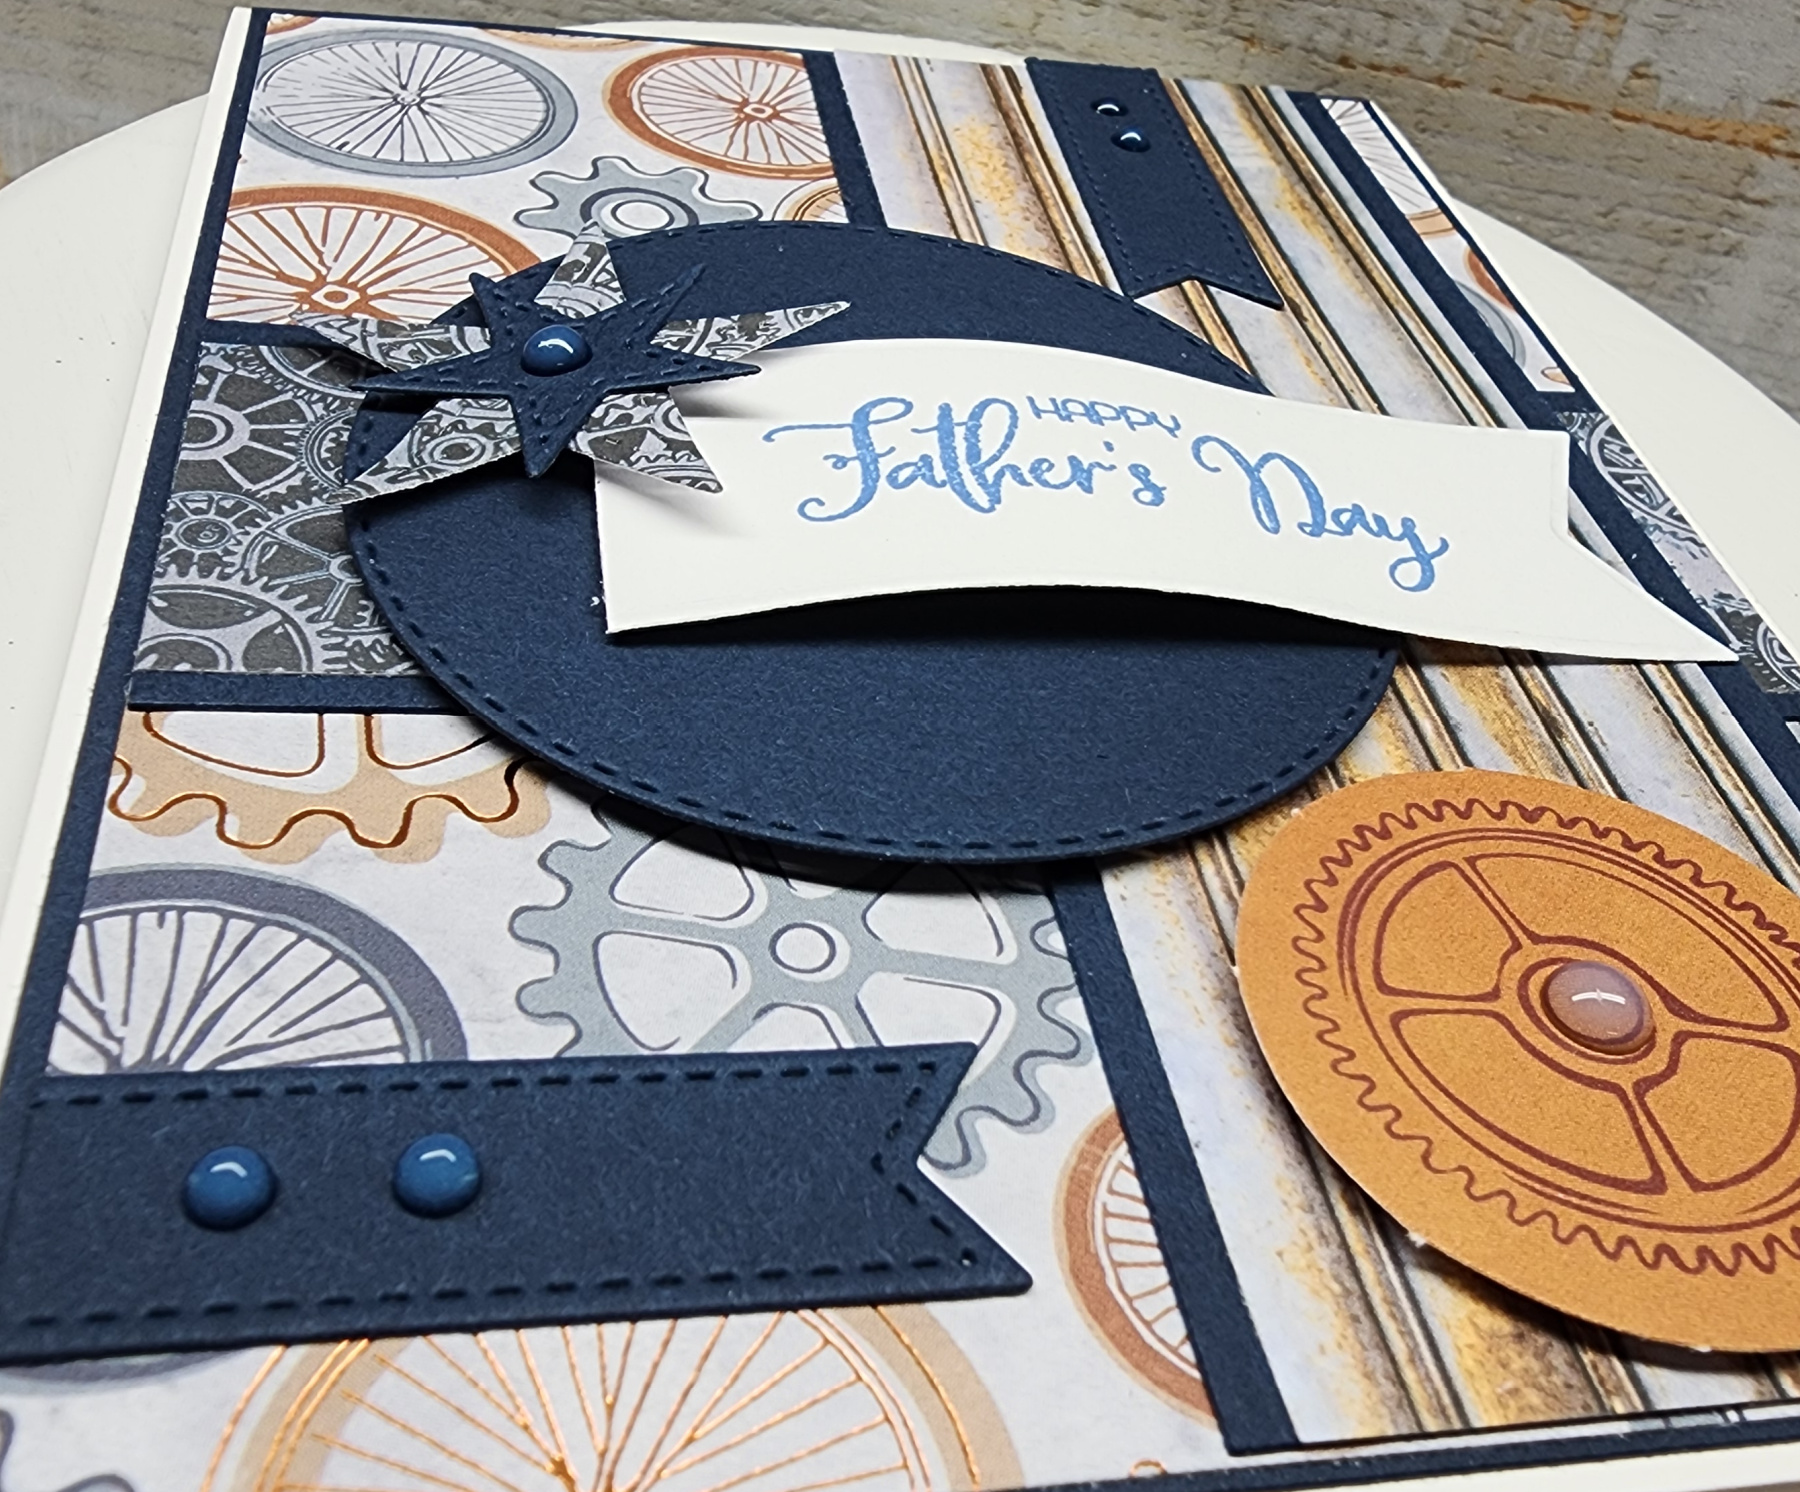
I’m sharing a Father’s Day card today. I used a card kit (paper and emphera) to make this card, so we’re talking super easy. I only had to stamp the sentiment!
I so love mixing patterned paper! As long as there are similar colors, it can be so forgiving. I chose 3 different patterns for this card. Note: the recipient of this card is a gearhead.
The sentiment is curved and popped up so that it bows in the middle….
I used:
Stamp Simply Clear Stamps – A Man of Knowledge
Stamp Simply Steel Dies – Fishtail Sentiment Banners
Stamp Simply Steel Dies – Patriotic Stars & Stripes
Kaisercraft 6.5×6.5″ Paper Bundle #7 – Workshop
*****
Memento – Danube Blue dye ink
Novu drops – clear
3M dimensional tape
~*~*~*~
Items linked above are courtesy of Stamp Simply.
Thanks for stopping by! ~ Holly
Posted in Uncategorized | No Comments »
April 17th, 2024 by Holly McMillen
Happy Wednesday!
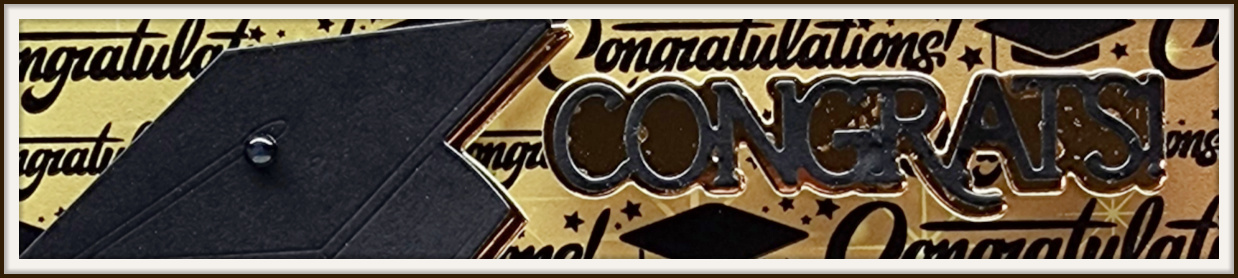
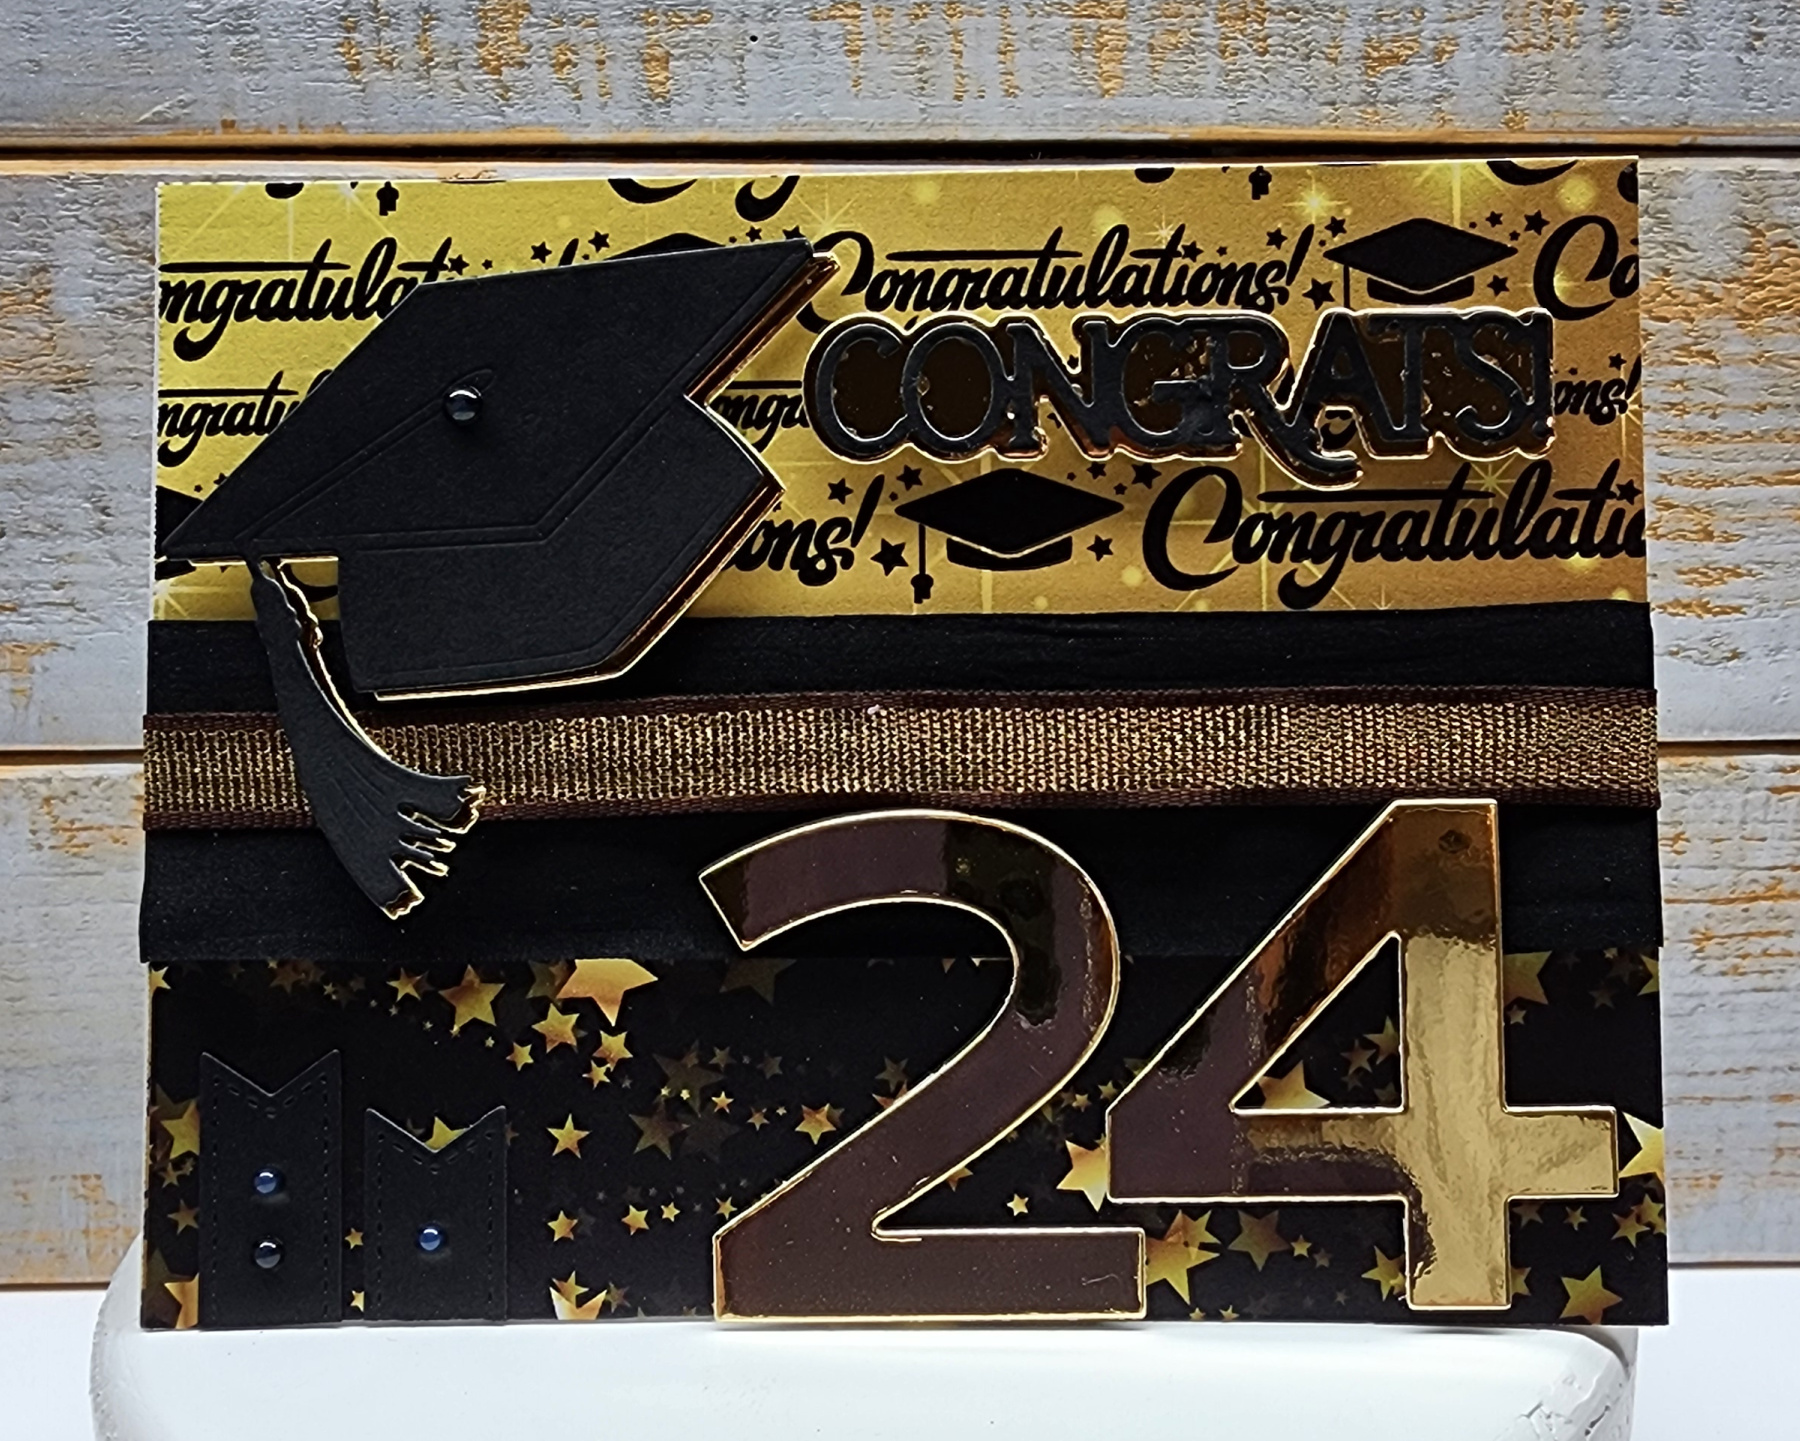
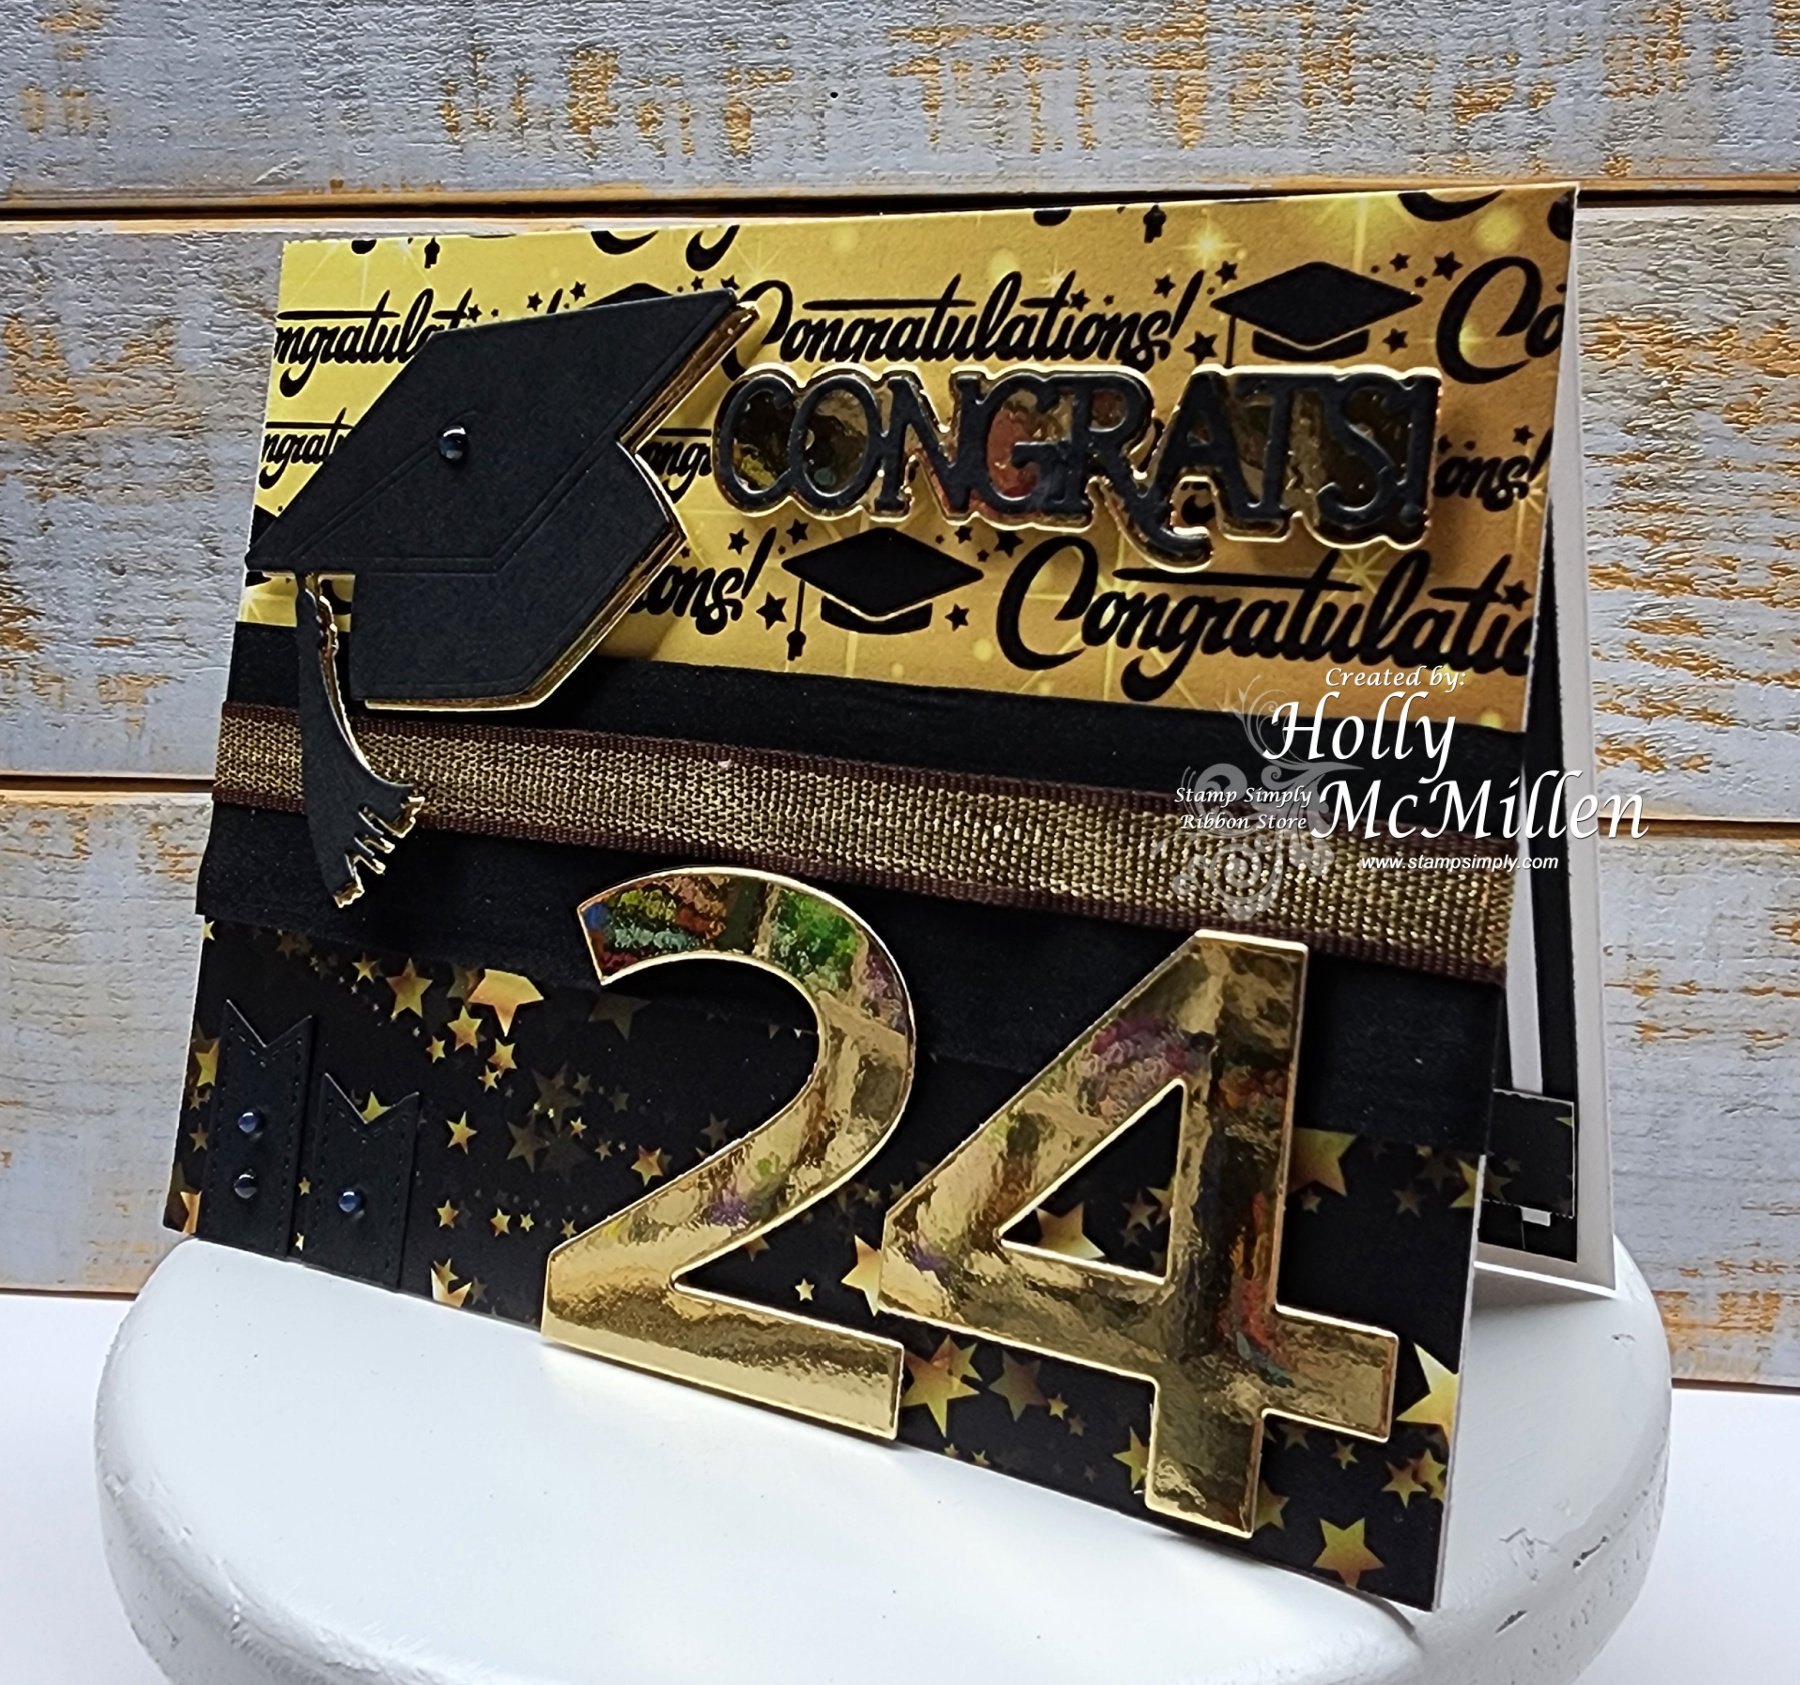
Graduation season is upon us! For me, I have no one graduating in 2024, but I still had to make a grad card as they are so fun!
I want to preface that I am looking around for a friend of a friend or a friend of anyone to gift this card to. Don’t want it to go to waste, though I could switch the 4 out for a 5 and use it next year! Oh, and please be kind to my photos. Photographing gold metallic paper is a true challenge. You can probably see me reflected in the card!
It’s a super shiny card with lots of texture.
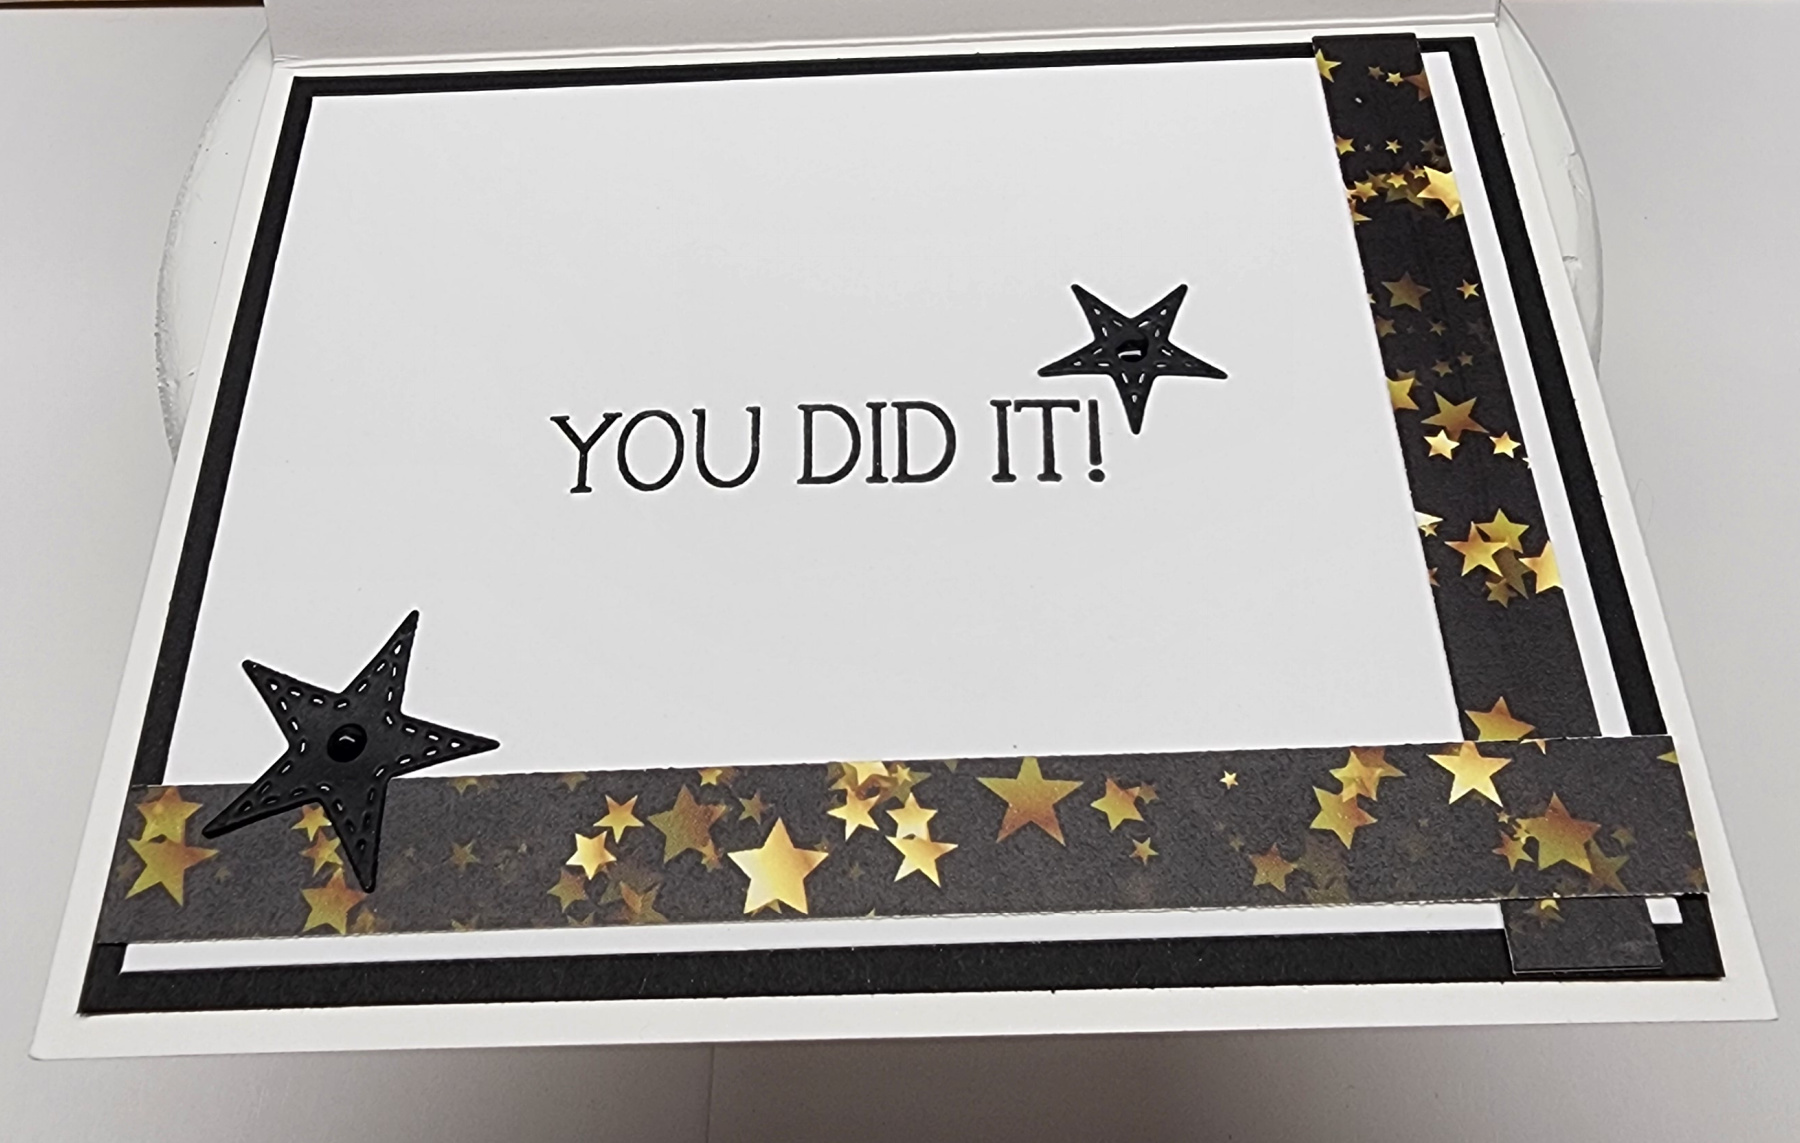
Inside:
I used:
Stamp Simply Clear Stamps – Graduation Sentiments
Stamp Simply Steel Dies – Congrats Grad
Reminisce Graduation Paper Pack –
Sizzix Thinlits – Countdown
Silk Ribbon – Black
Luxury Pearlescent Metallic 105# Cardstock
Versafine – Onyx Black dye ink
******
black cardstock
Nuvo clear drops
~*~*~*~
Items linked above are courtesy of Stamp Simply.
Thanks for stopping by! ~Holly
Posted in Uncategorized | No Comments »
April 10th, 2024 by Holly McMillen
Happy Wednesday! What can I say? Spring has sprung in Northern Colorado. True that the mornings are still quite chilly, but we’re heading into the upper 70s later this week. Perfect weather for visiting kids/grandkids this weekend!
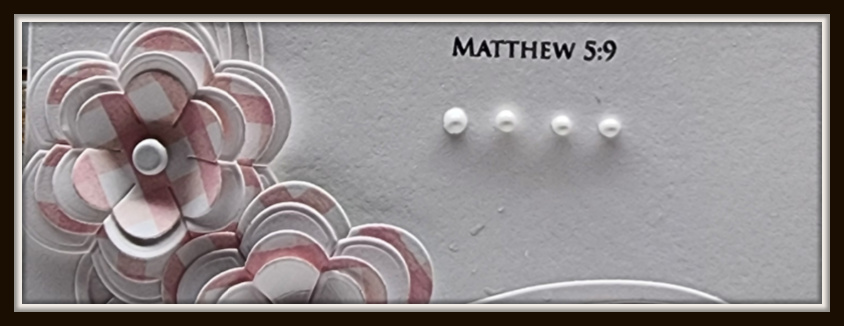
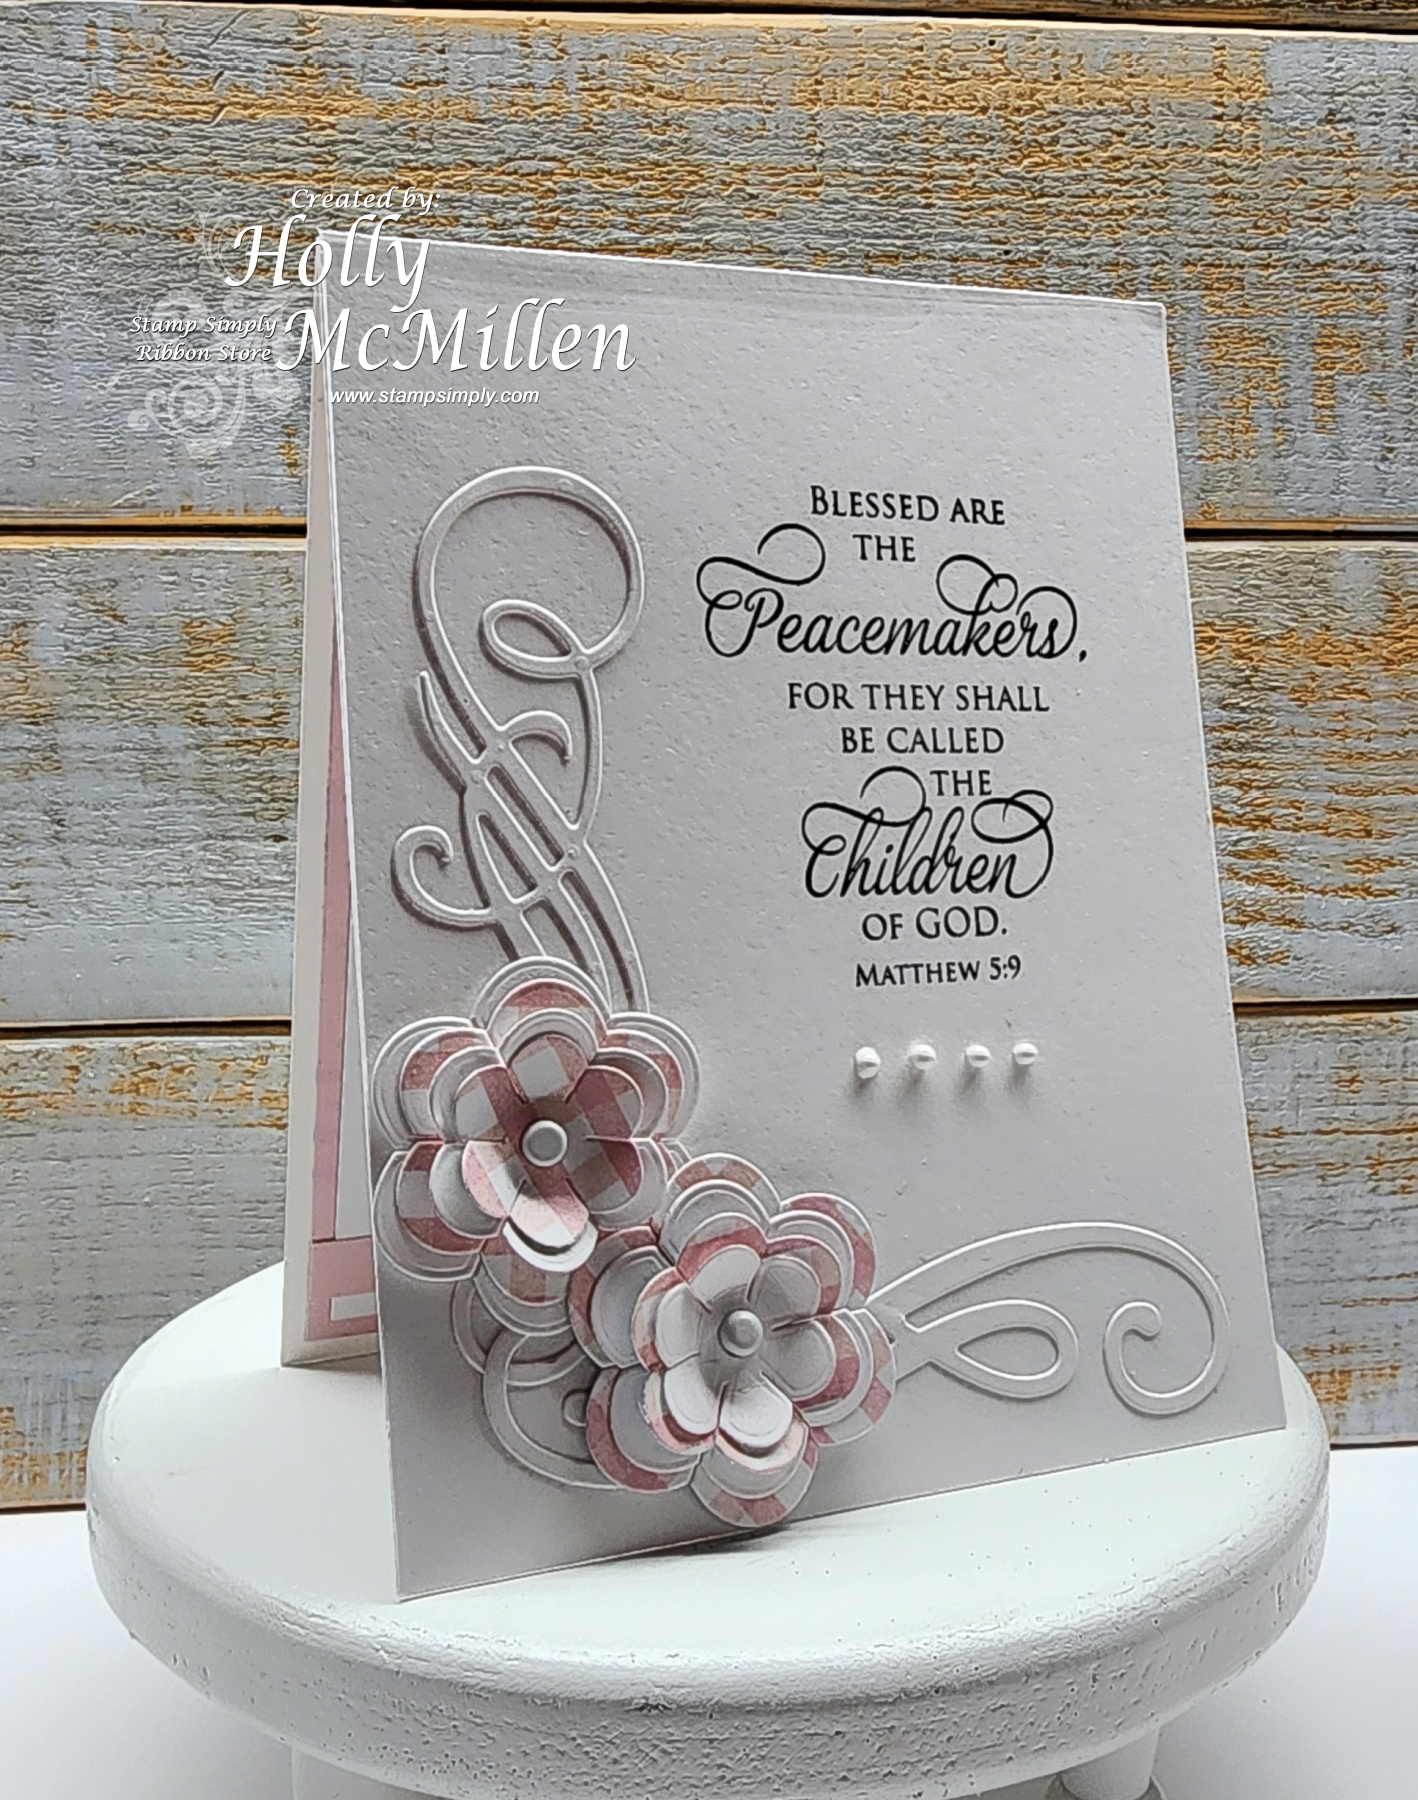
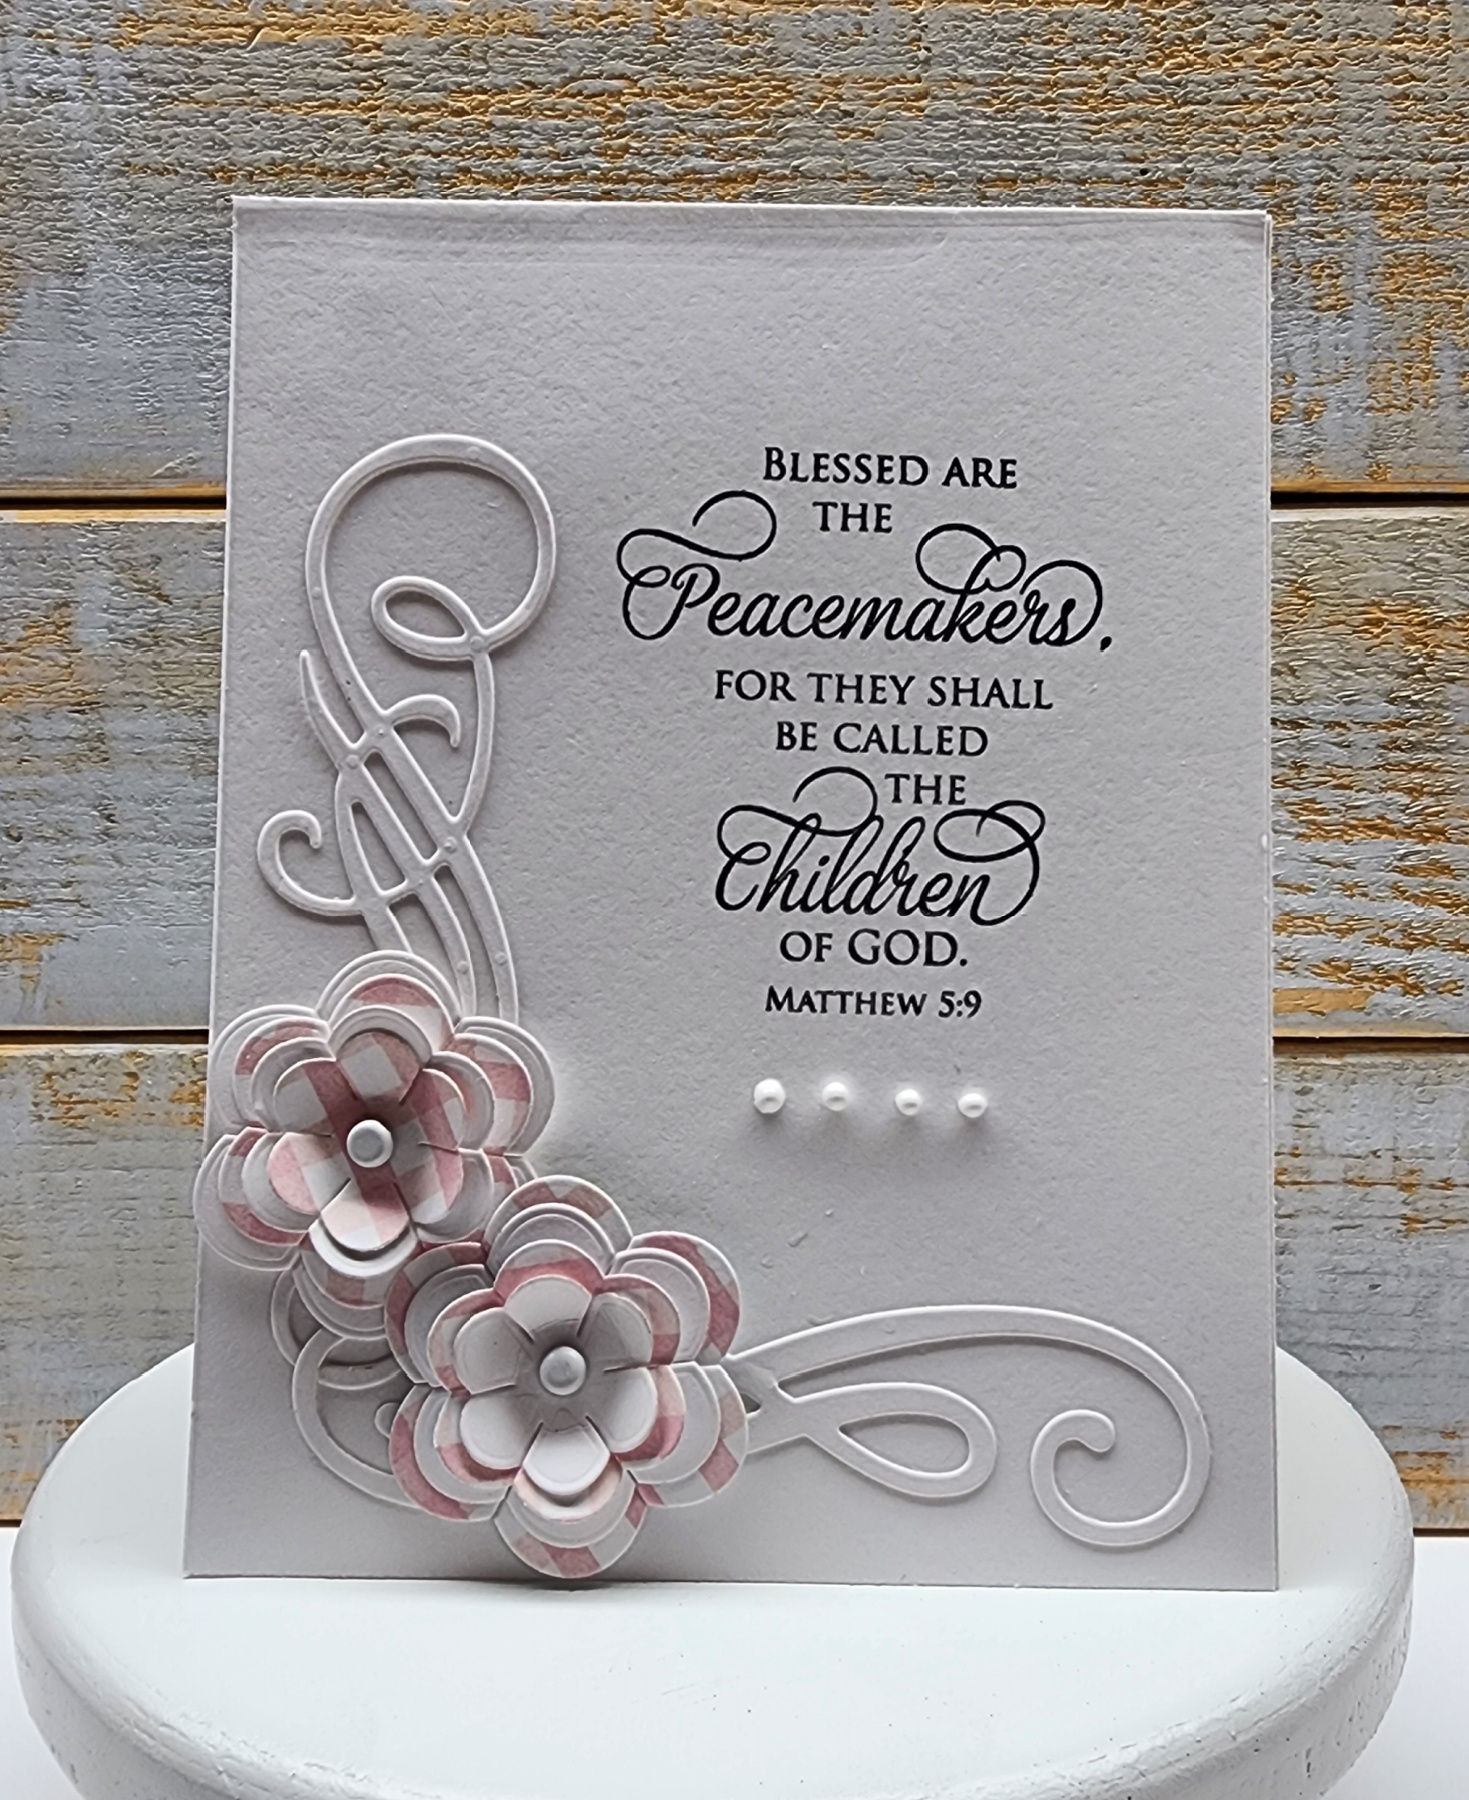
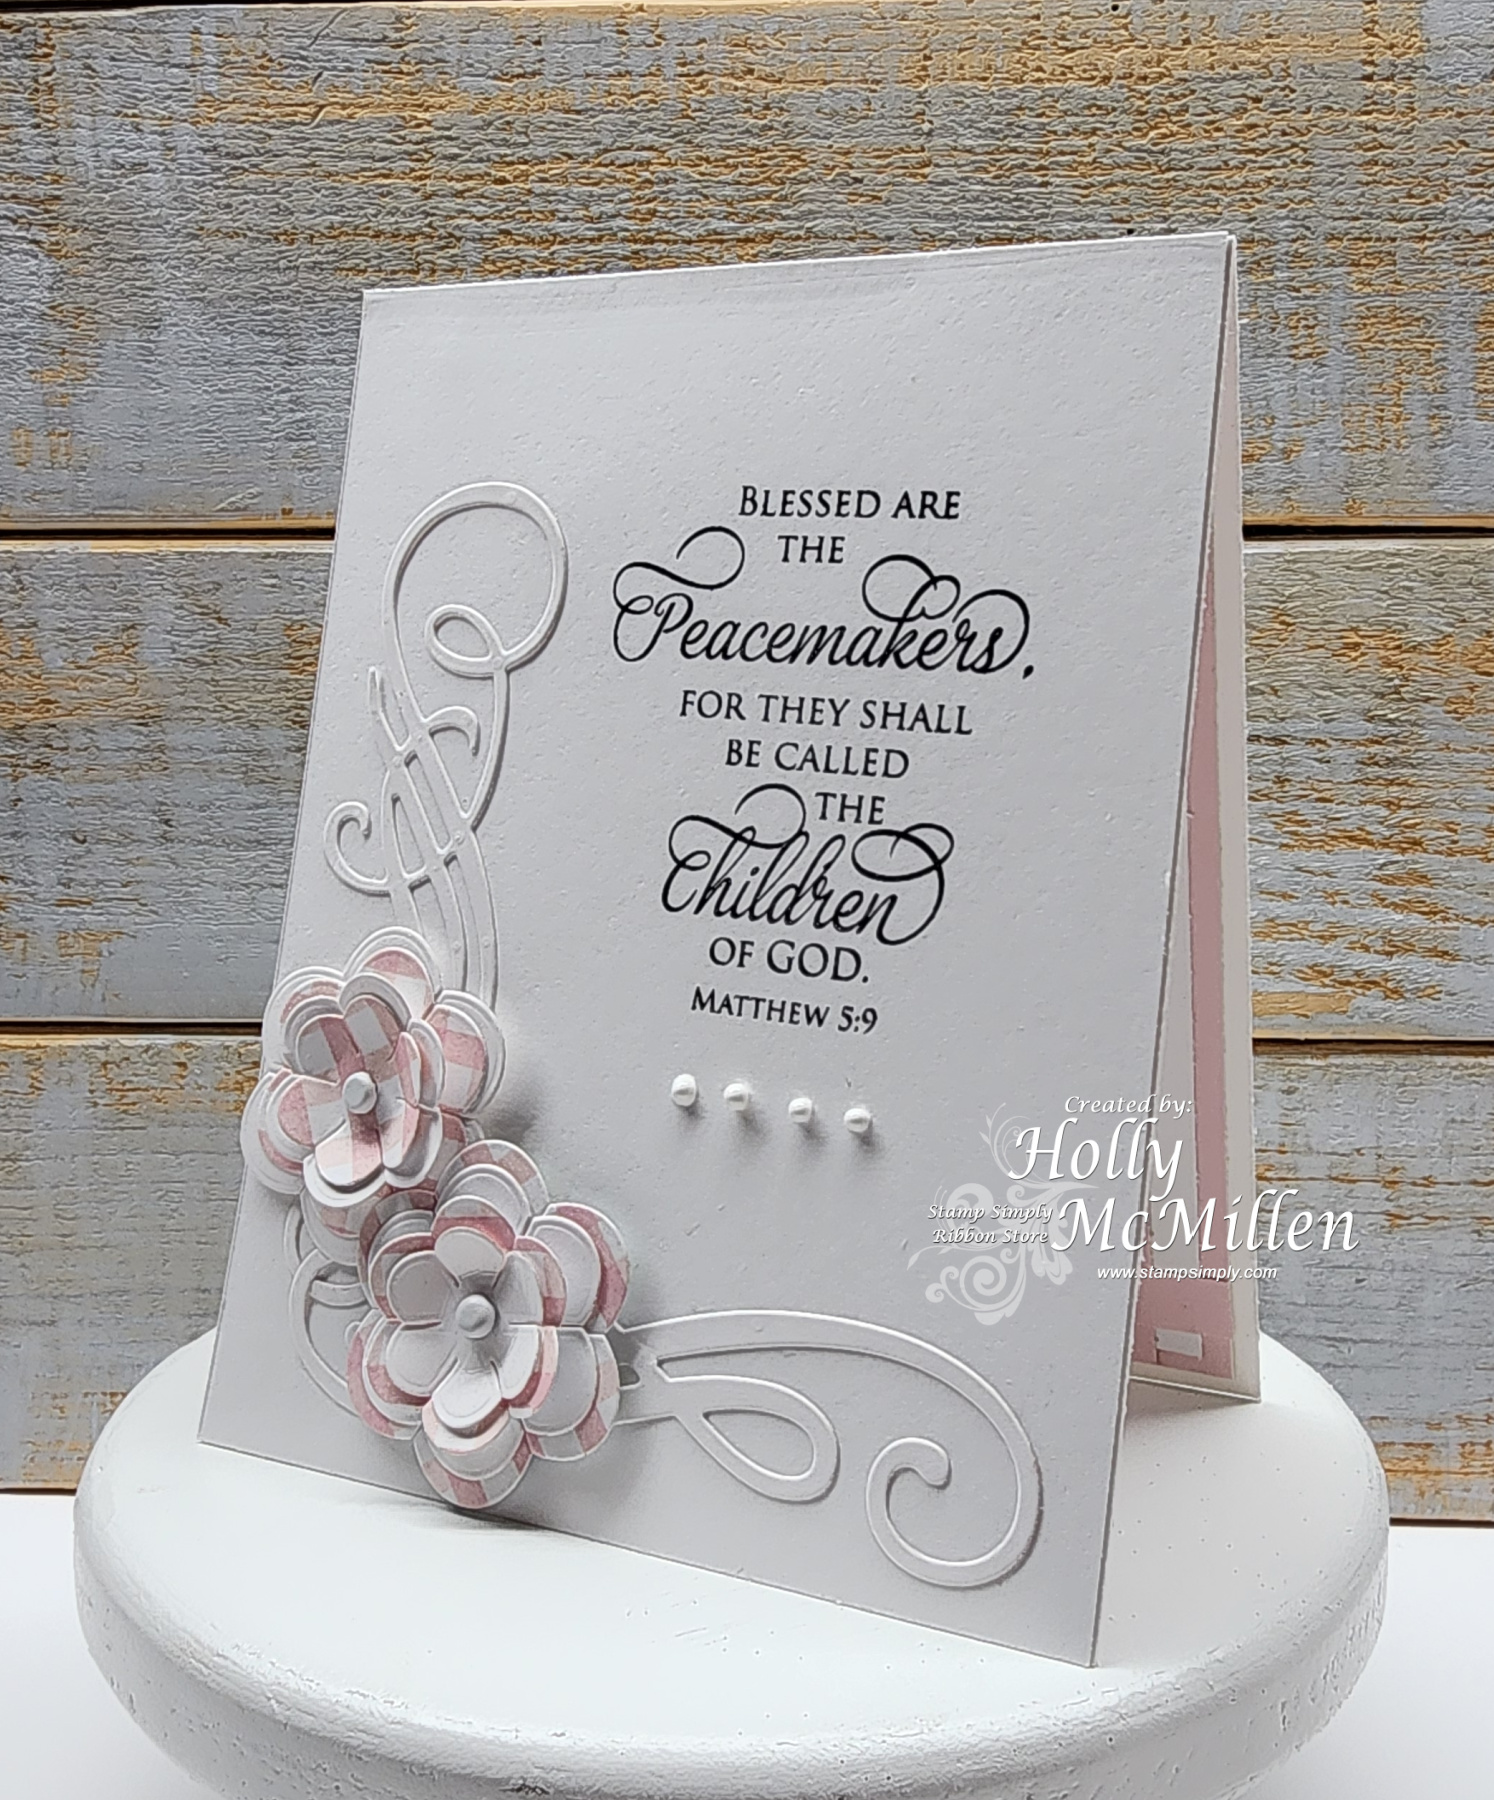
When I first started stamping, I was always intrigued by white on white cards; however, I could not make one look decent for the life of me. This week I’m sharing a white on white with a little pop of pink!
I am pretty pleased with how this turned out. Now, to figure out who should receive this creation!
~*~*~*~
I used:
Stamp Simply Clear Stamps – Blessings/Beatitudes 2
Spellbinders – Cinch and Go Flowers
Echo Park – My favorite Spring
Versafine – Onyx Black
*****
white brads
Nuvo drops
~*~*~*~
Products highlighted above are courtesy of Stamp Simply.
Thanks for stopping by! ~ Holly
Posted in Uncategorized | No Comments »
April 3rd, 2024 by Holly McMillen
Happy Wednesday!
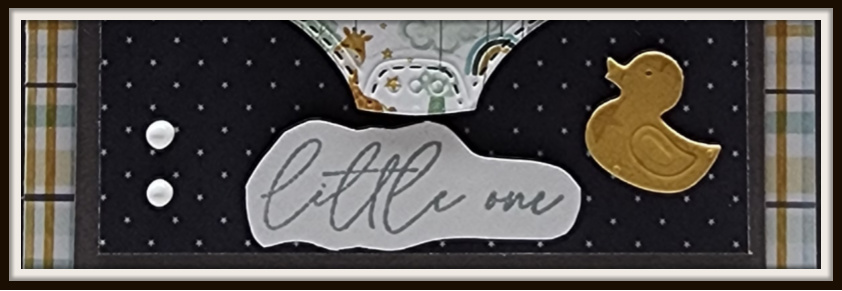
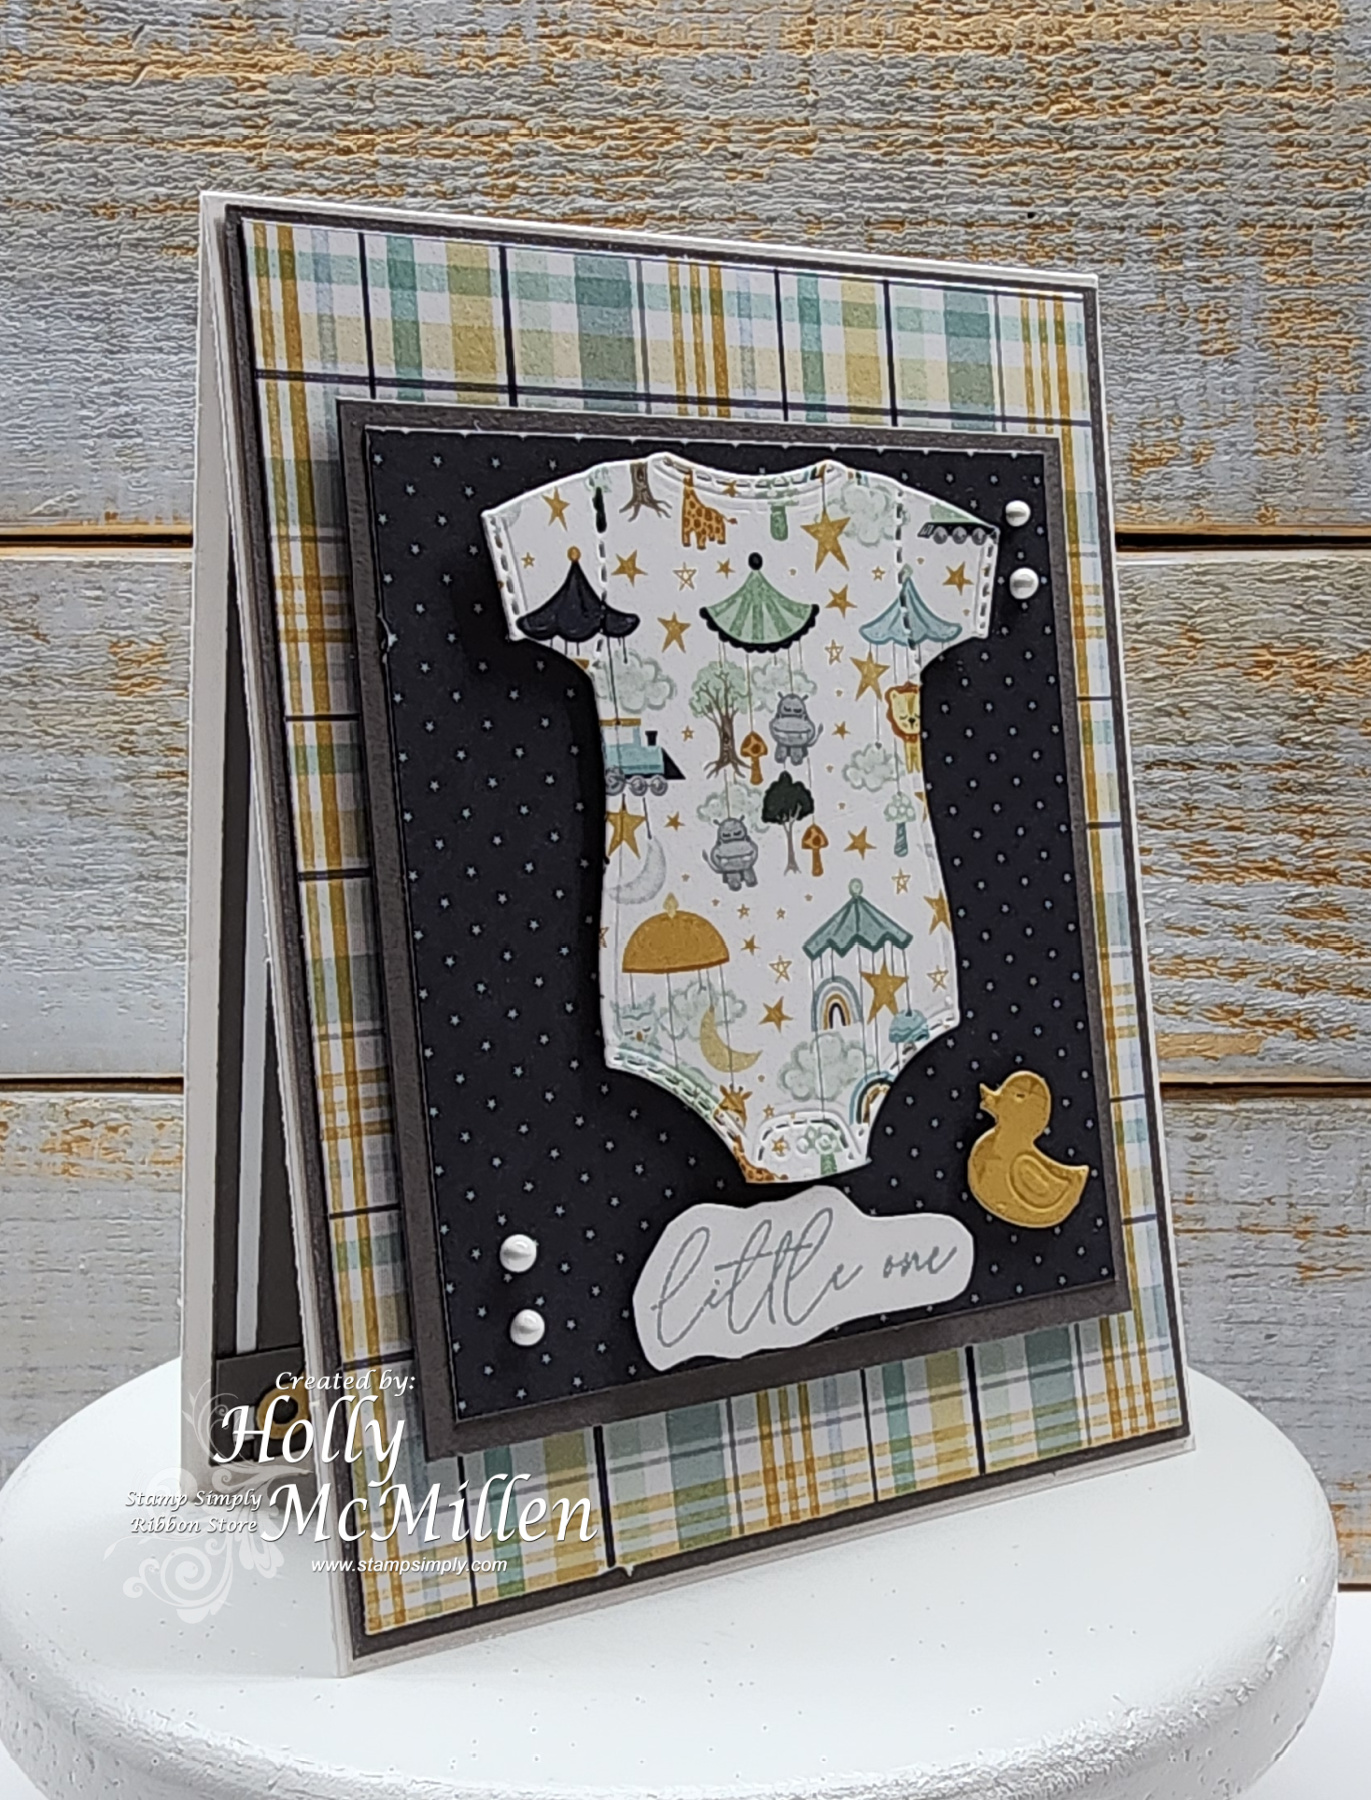
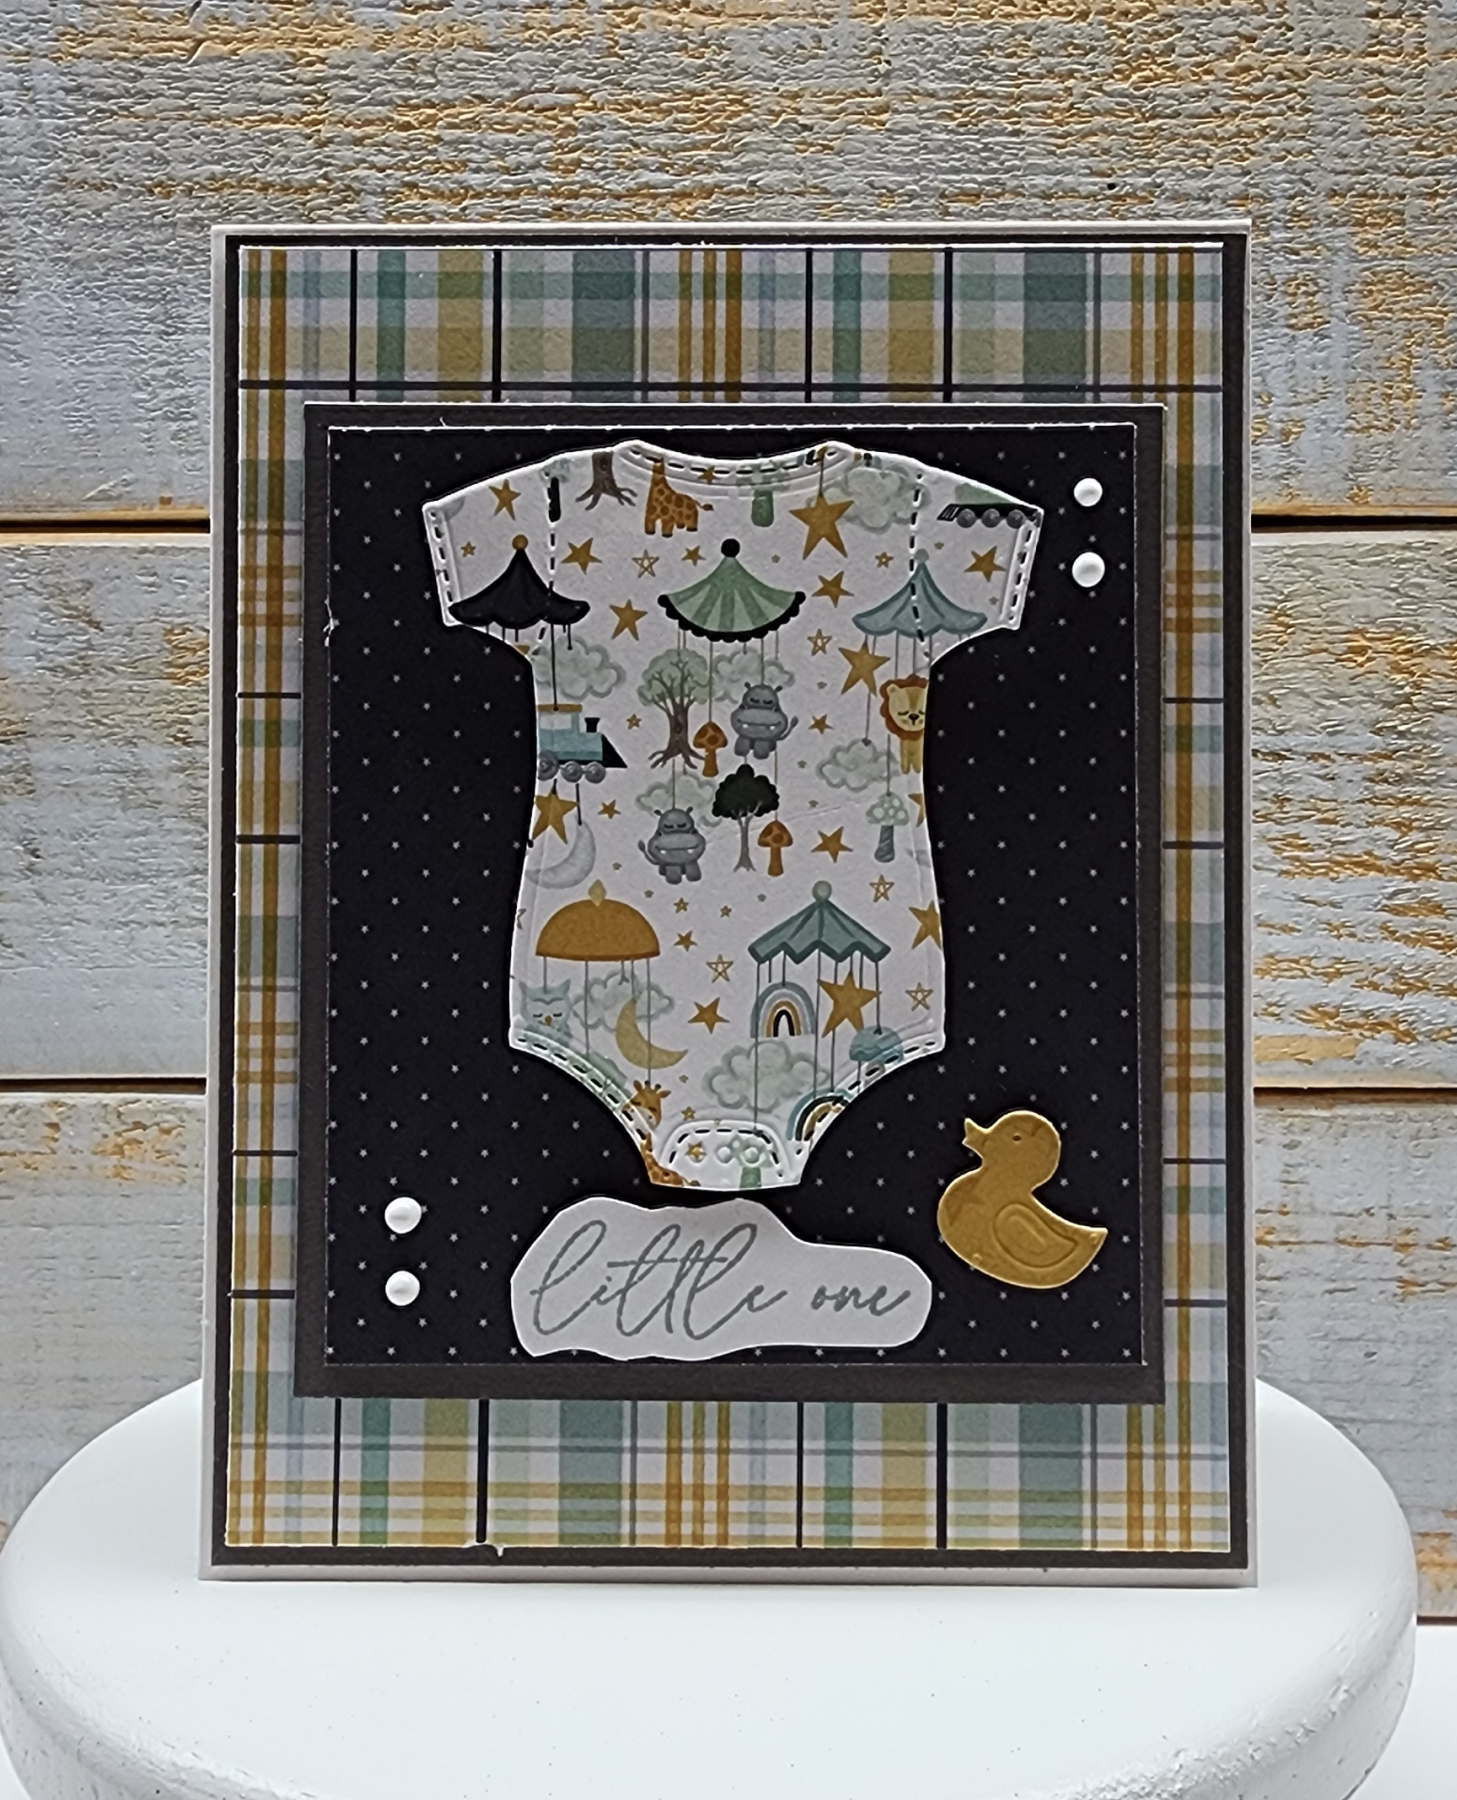
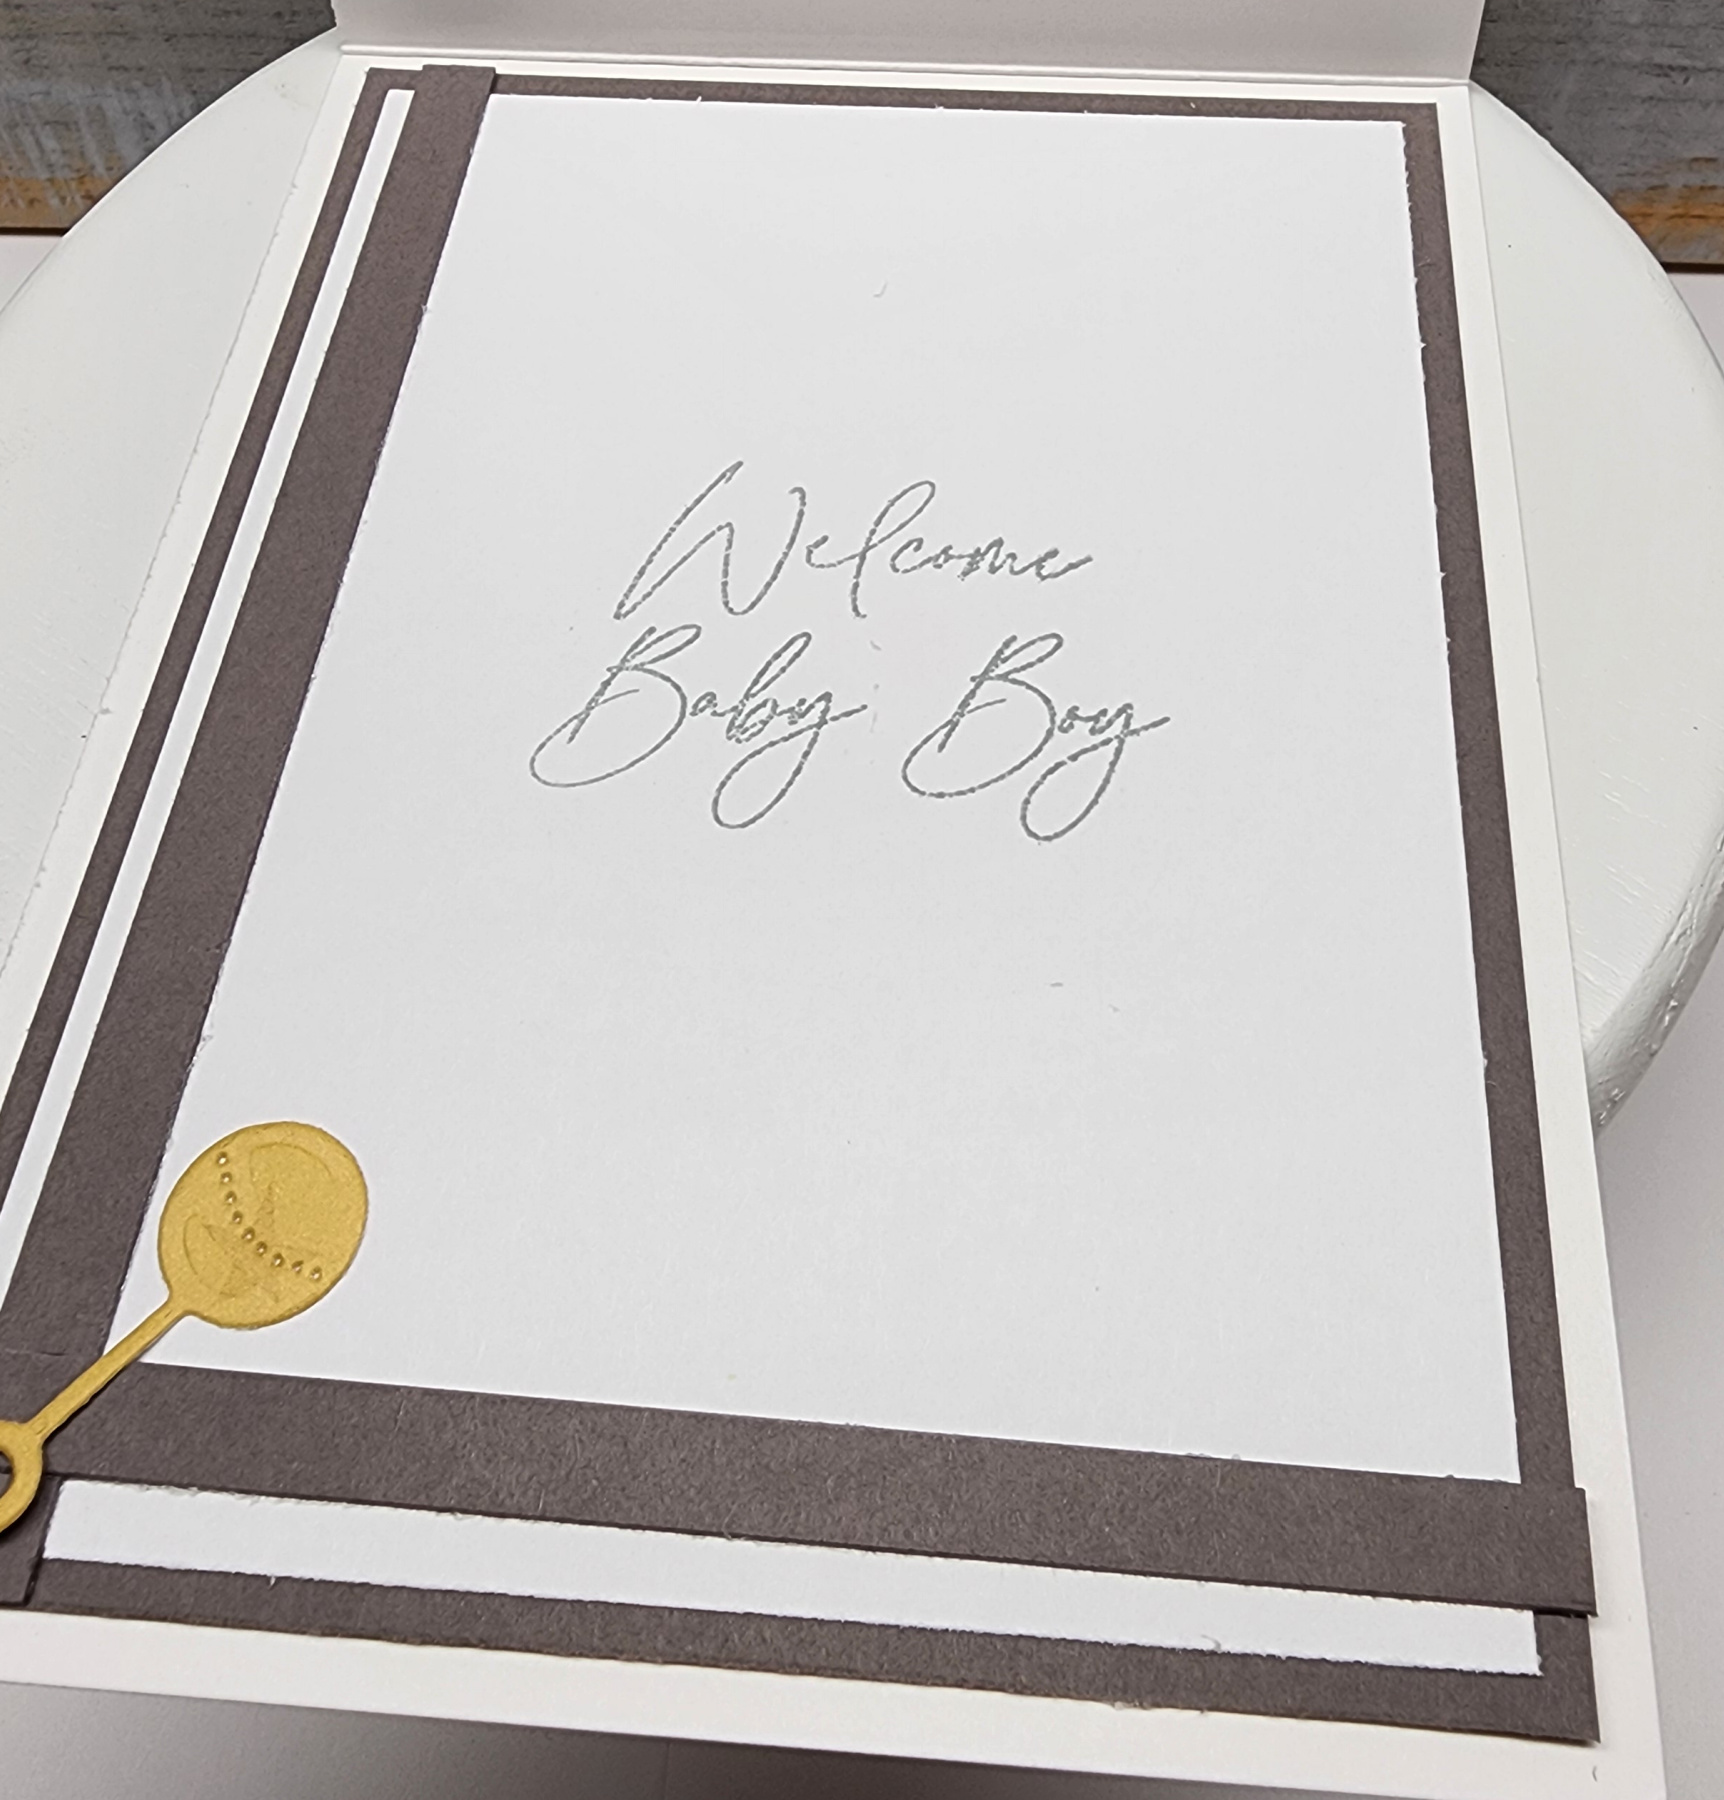
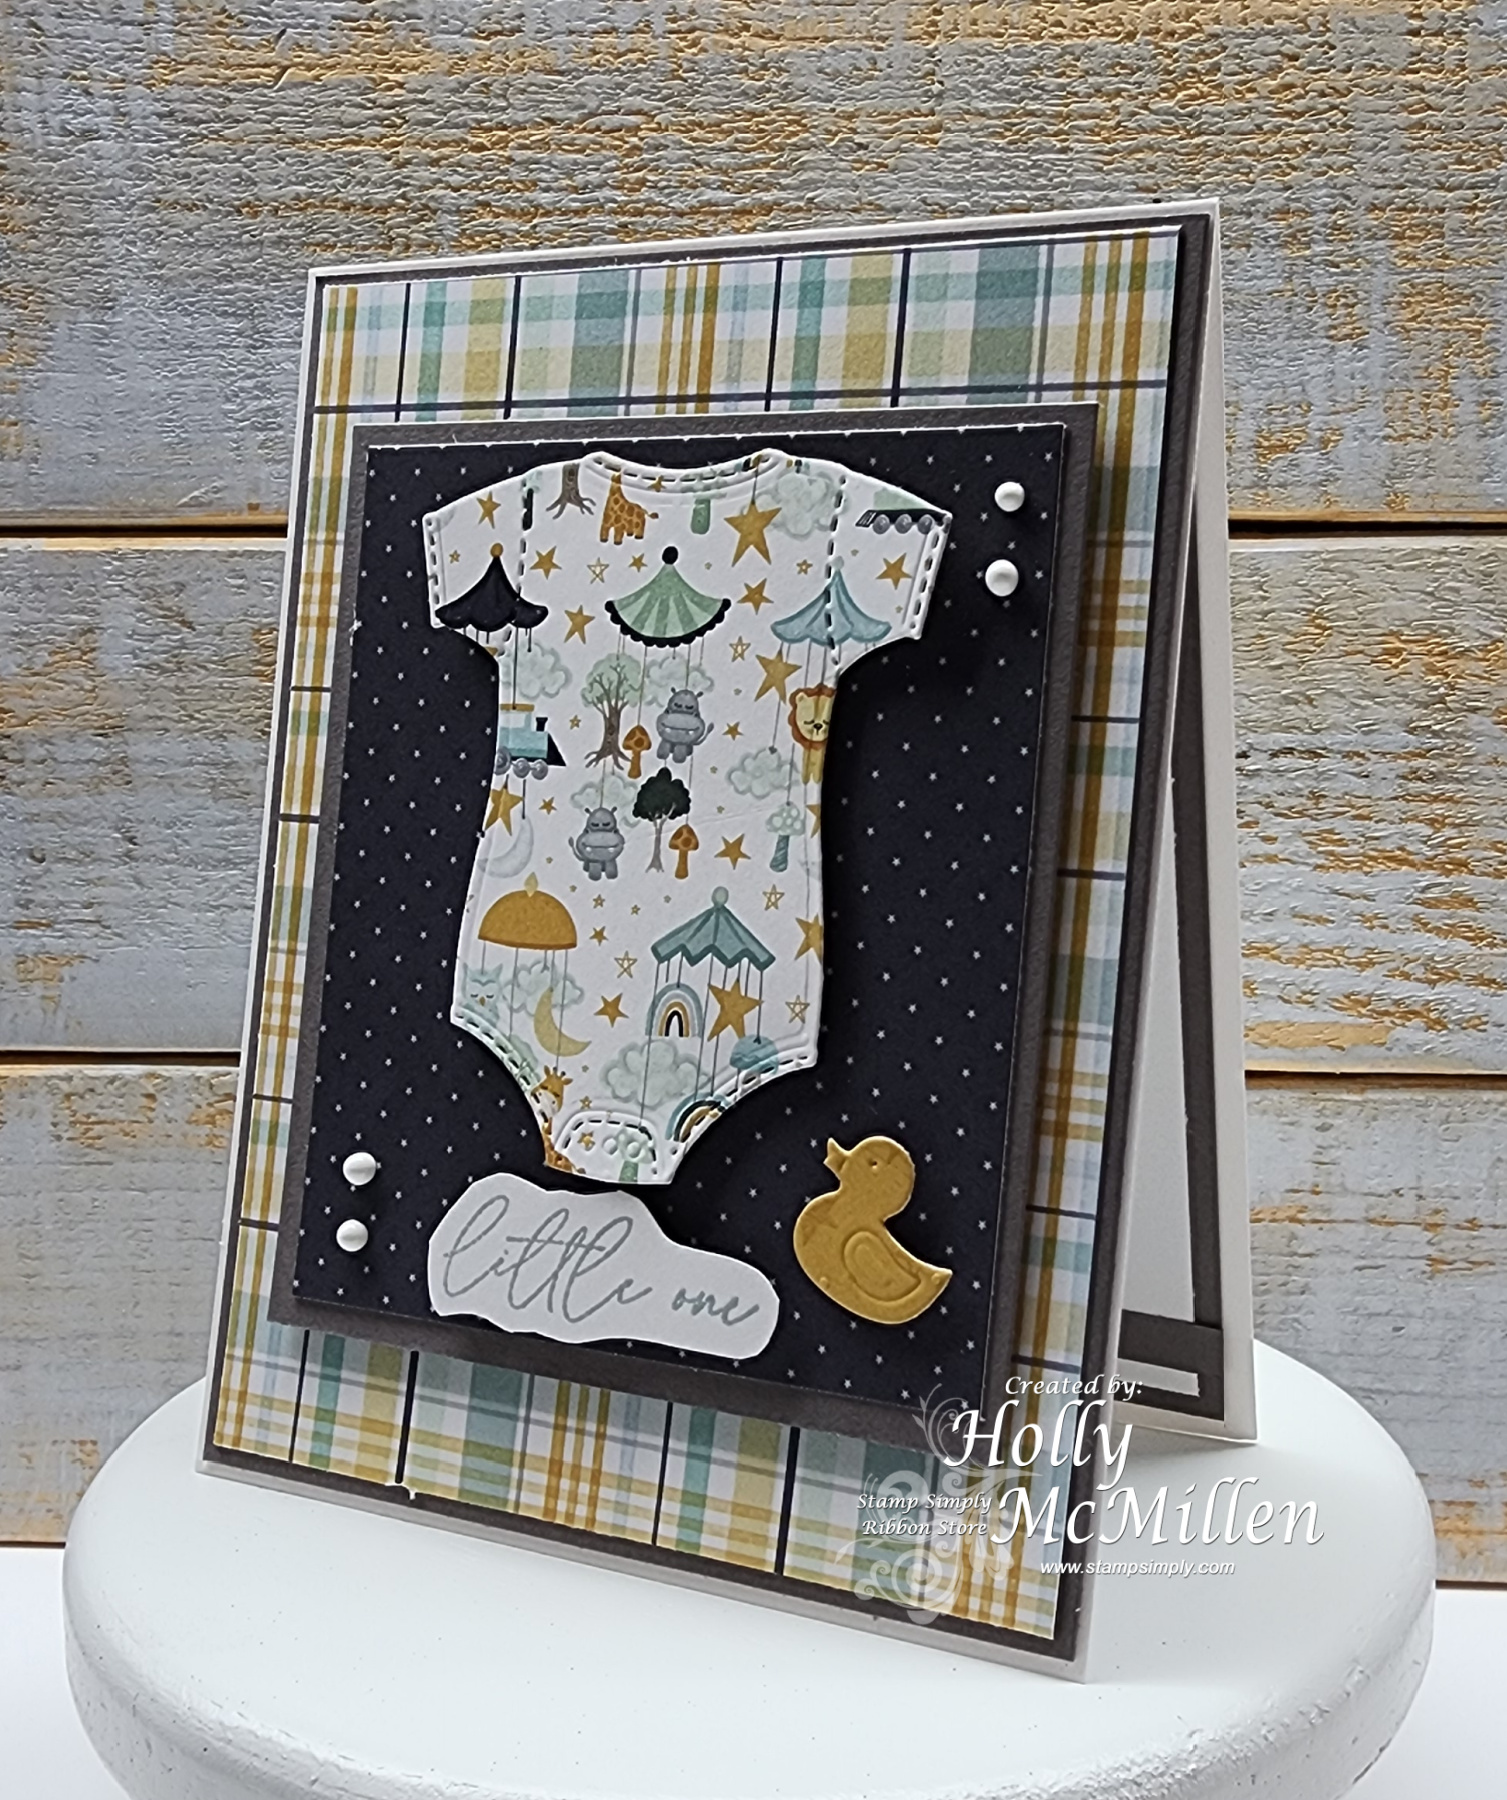
My share today is a baby boy card. Very simple. And we are not having another grandchild. LOL. Well, not that I know of, anyway!
However, my 2nd cousin just had her 3rd boy early last month. He’s a beautiful/handsome little peanut.
The designer paper really makes this card. I’m just in love with this plaid piece. Sentiment stamped in gray gives it a softer feel than a stark black (my usual).
~*~*~*~
I used:
Stamp Simply Clear Stamps – Welcome Baby
Stamp Simply Steel Dies – Welcome Baby Basics
Bundle – Welcome Baby
Echo Park 6 x 6 – It’s A Boy
~*~*~*~
Memento – London Fog
Nuvo Drops – White
Gray & White cardstock
~*~*~
Links provided are products courtesy of Stamp Simply.
Thanks for stopping by! ~ Holly
Posted in Uncategorized | No Comments »
March 27th, 2024 by Holly McMillen
Happy Wednesday! Spring is in the air! With that comes a great deal of outdoor activities. Every year we plan a family picnic somewhere between May and July. Then we are having a huge family reunion in August, as well. So much sun; so much food!
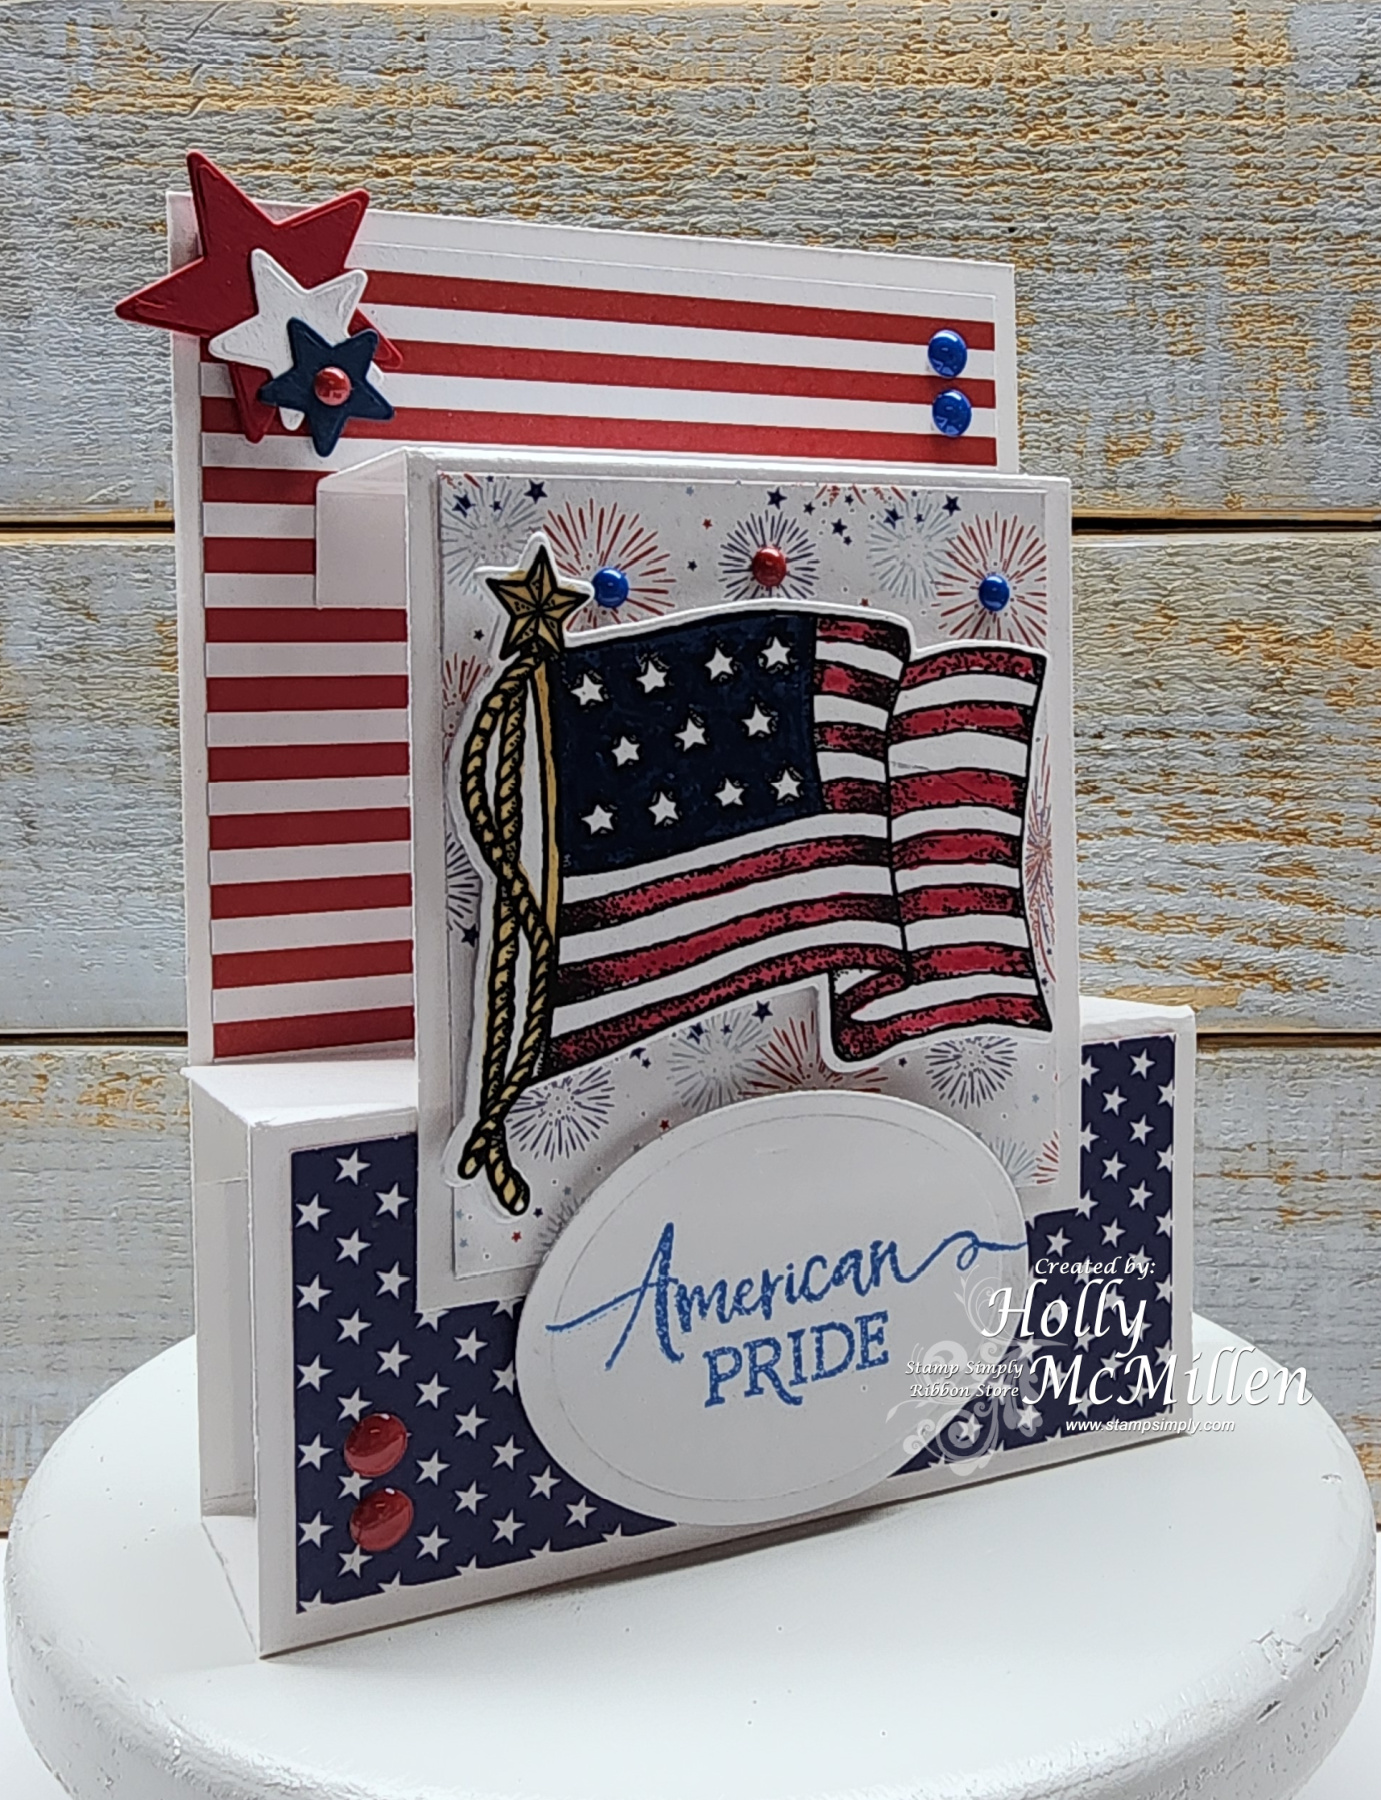
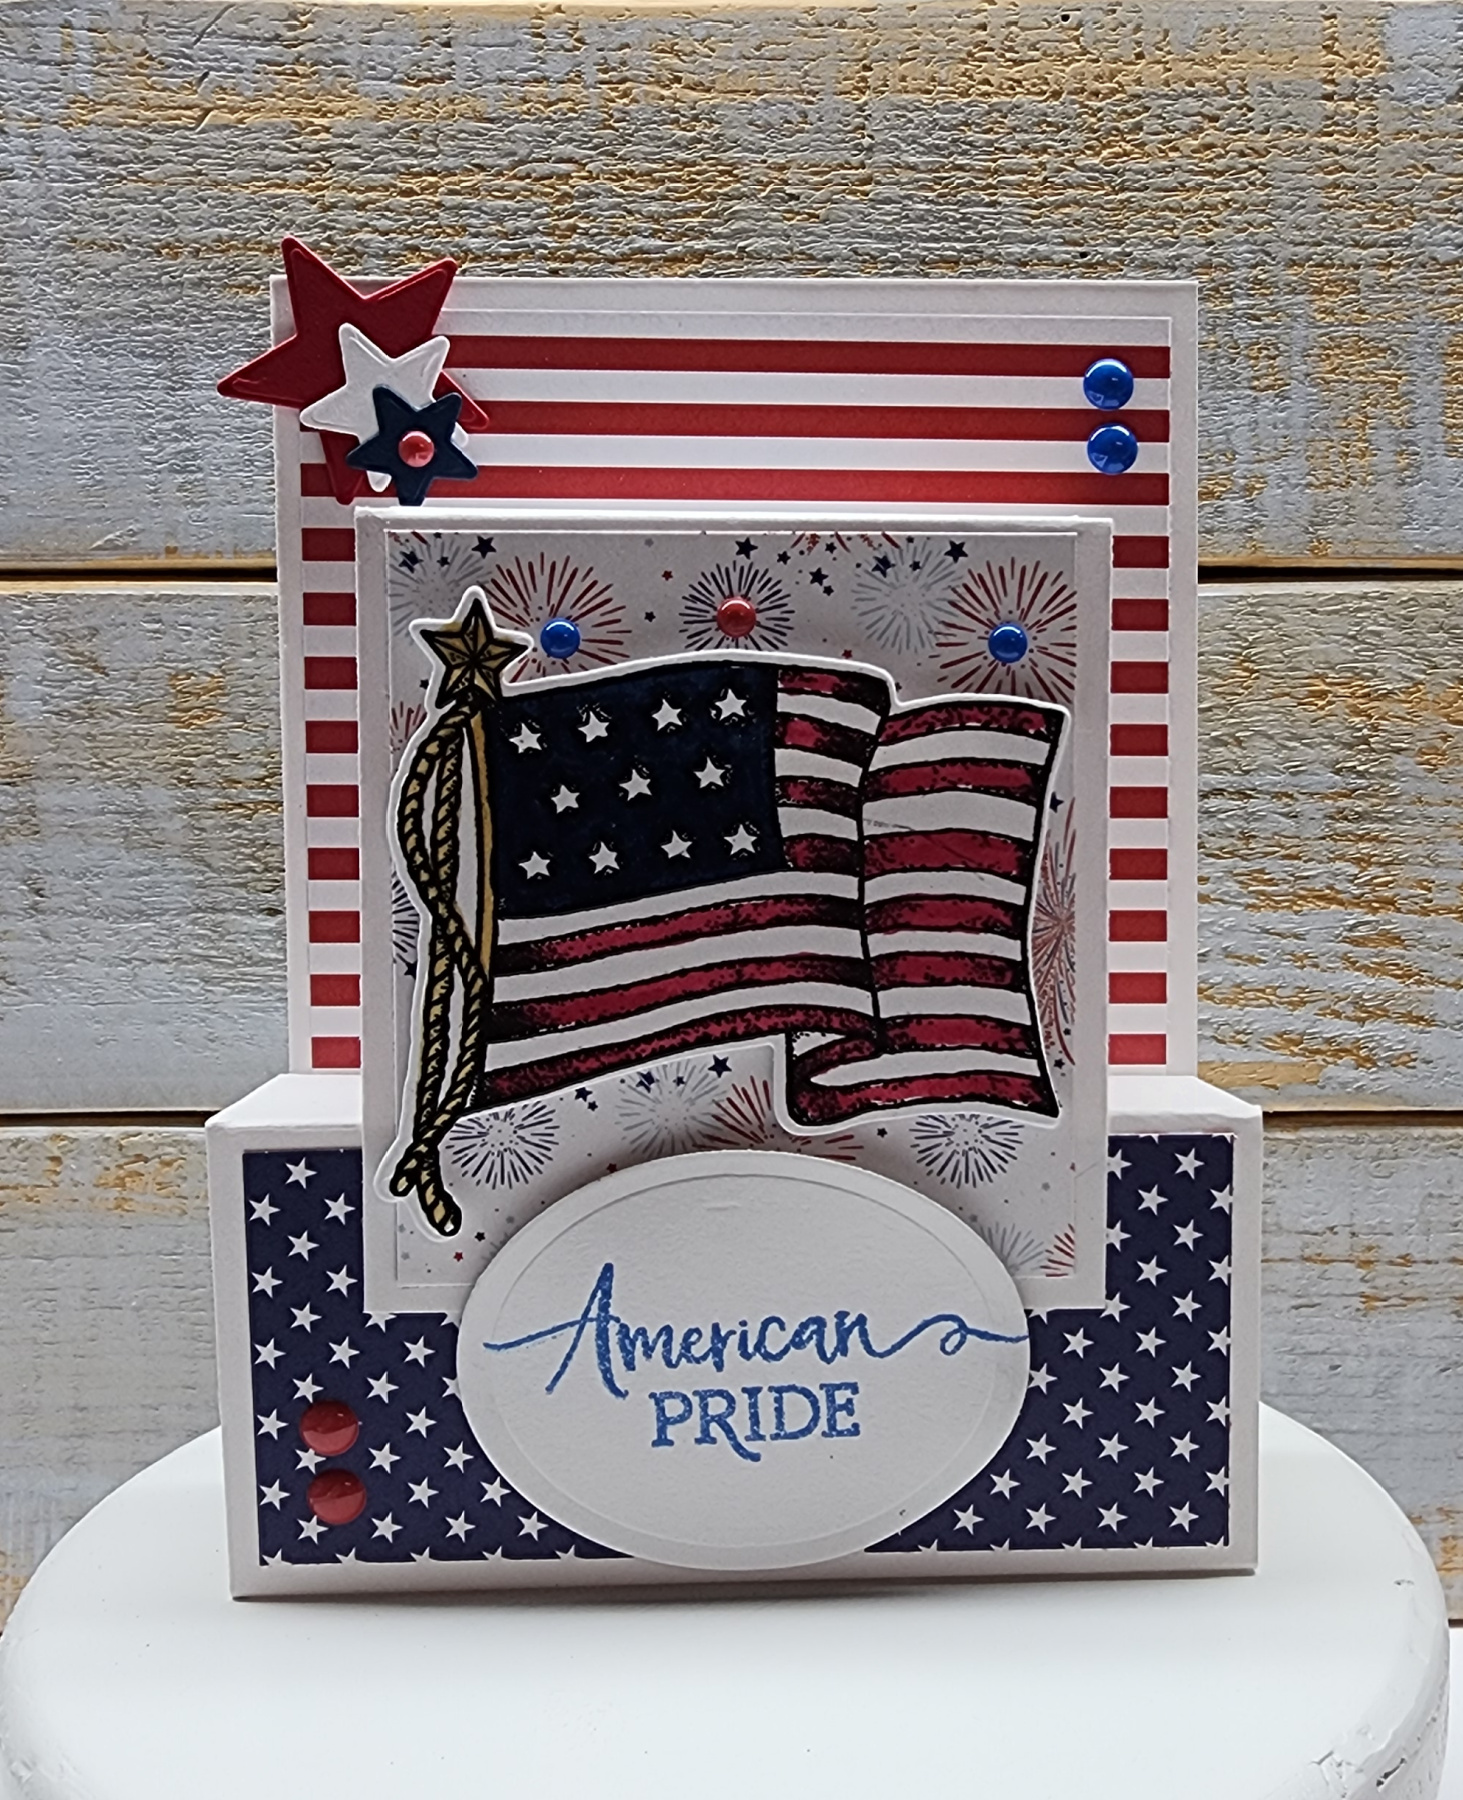
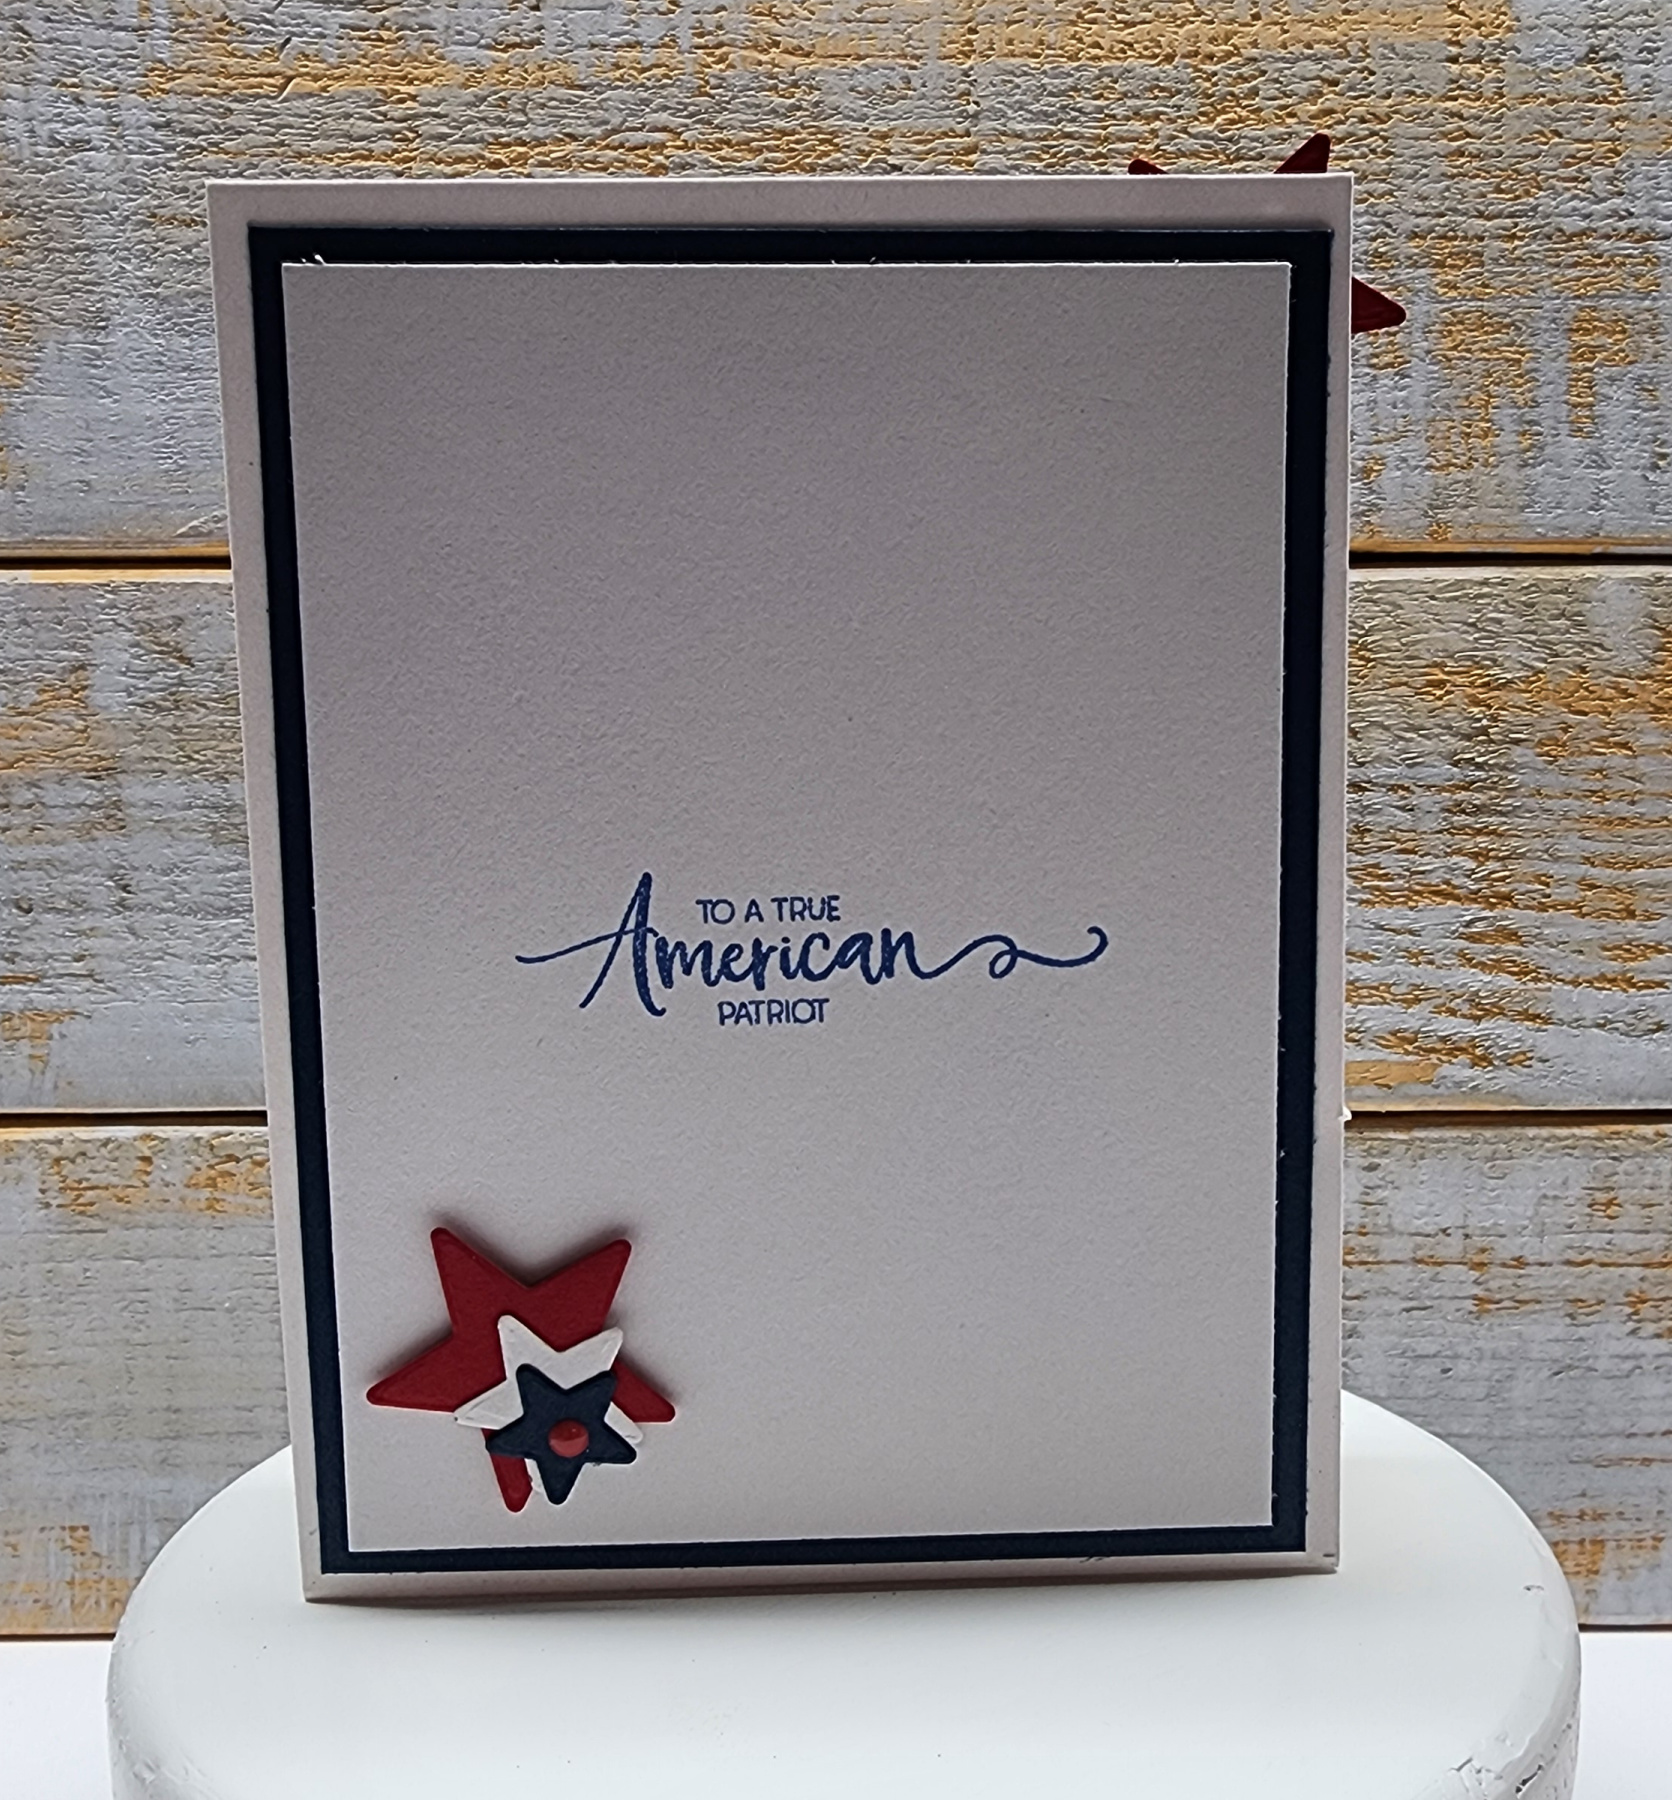
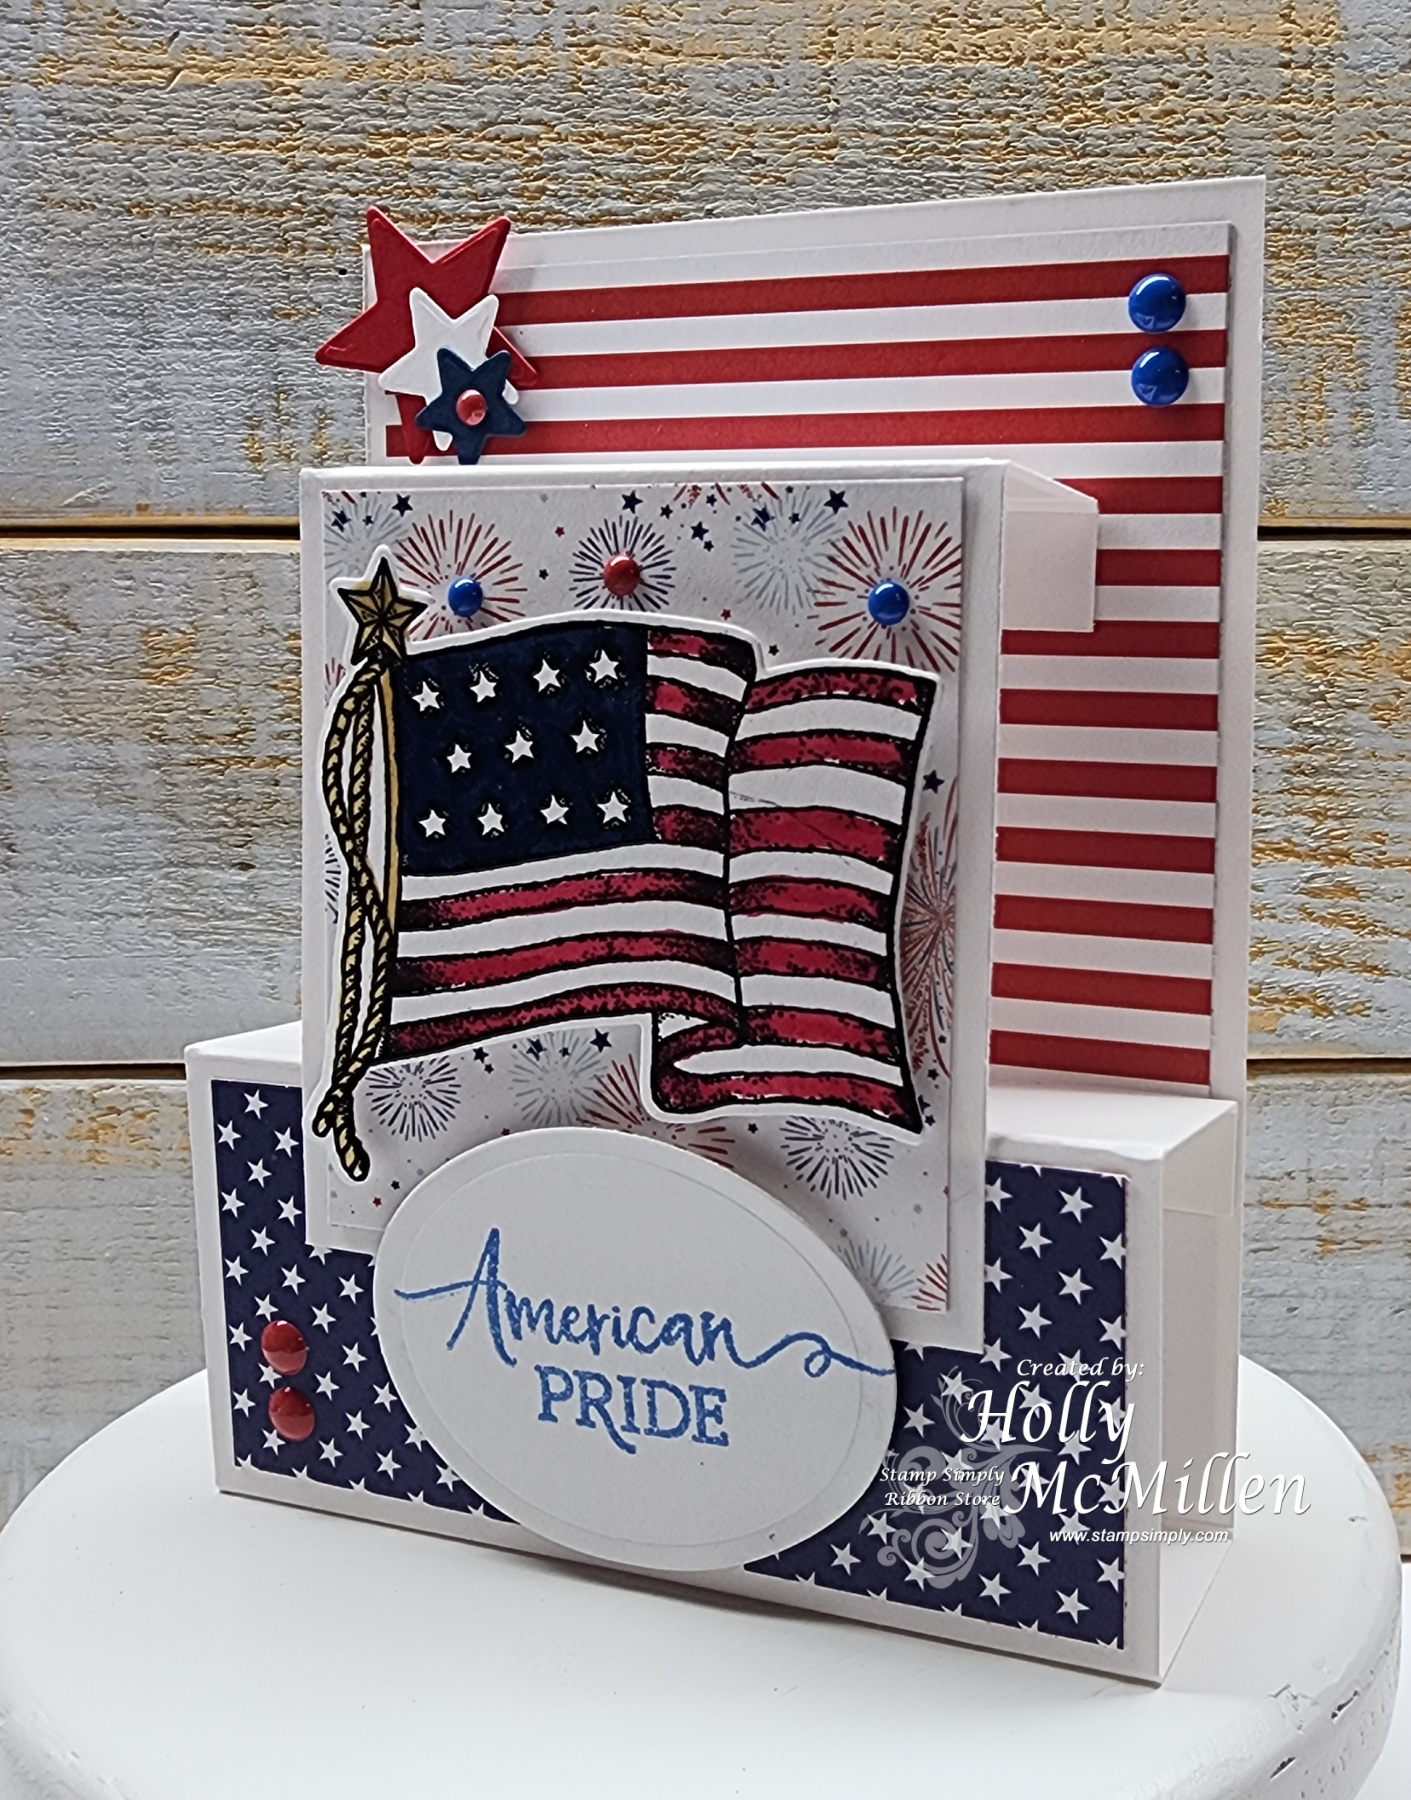
This week I’m sharing my favorite type of project… Patriotic! I’ve always been a fan of Americana, so it’s no surprise here!
This is a standing pop up card that folds flat for mailing. You can find the directions here on Splitcoaststampers.
I used:
Stamp Simply Clear Stamps – The red, white & blue
Stamp Simply Steel Dies – The red, white & Blue flag
Bundle
Stamp Simply Clear Stamps – Old Glory (reverse sentiment)
Stamp Simply Steel Dies – Old Glory (patriotic stars & stripes)
Bundle
Echo Park – 6 x 6 Let freedom ring
~*~*~*~
Spellbinders Nestabilities Small Ovals
Epoxy dots
Memento – Danube Blue ink
Red, white & blue cardstock
~*~*~*~
~*~*~*~
Items highlighted are courtesy of Stamp Simply.
Thanks for stopping by! ~ Holly
Posted in Uncategorized | 1 Comment »
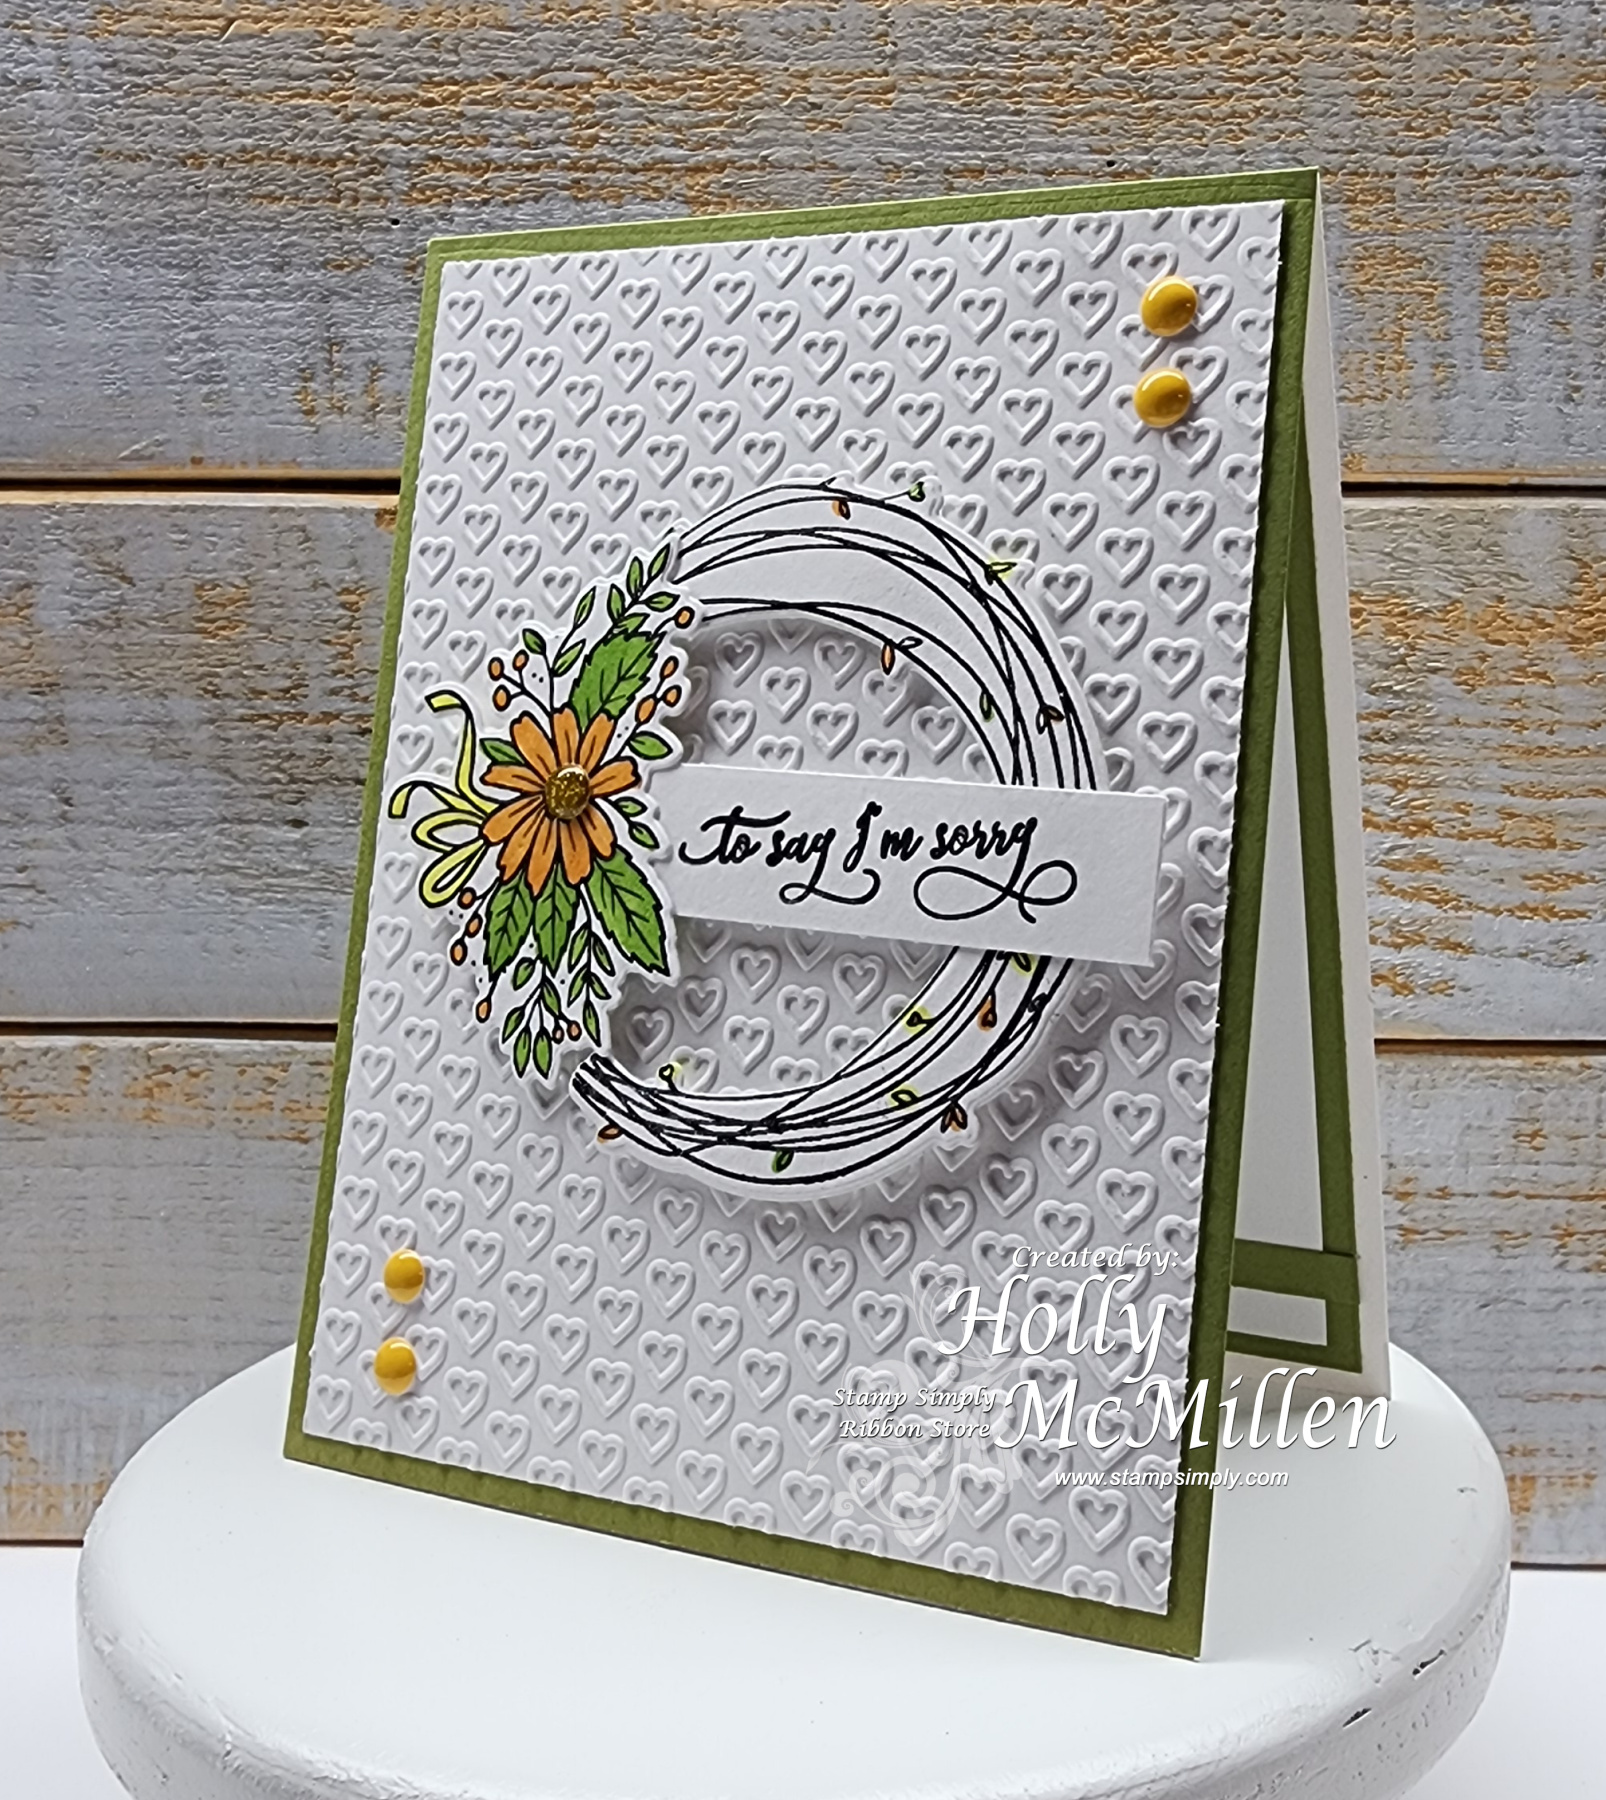
March 20th, 2024 by Holly McMillen
Happy Wednesday!
All is well here in Colorado. Our big snow storm has come and gone and now we’re in the 60s. Perfect weather for getting out and soaking up some Vitamin D!
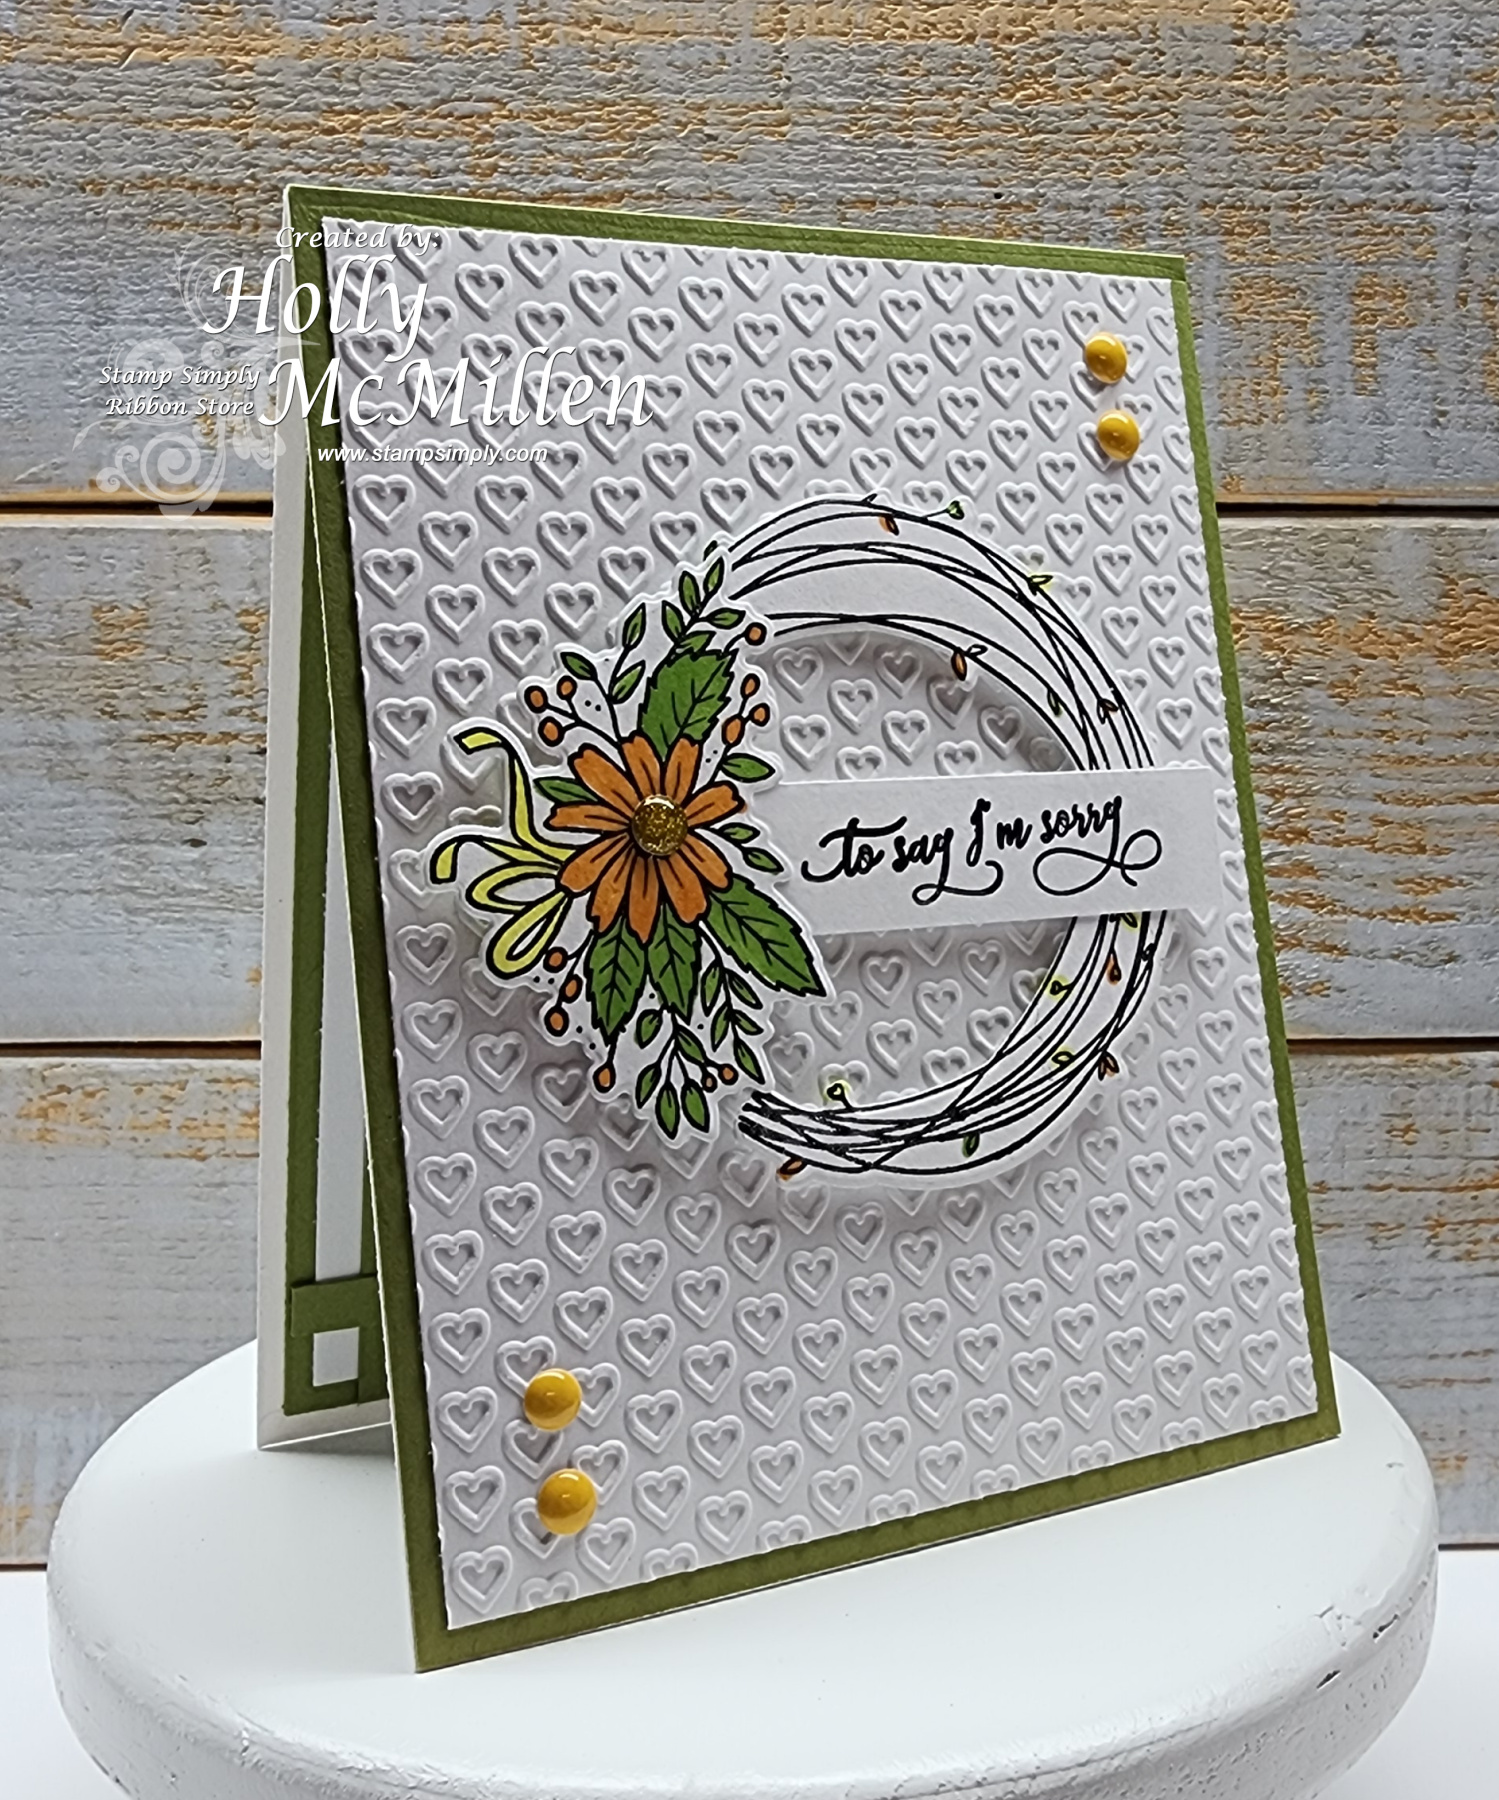
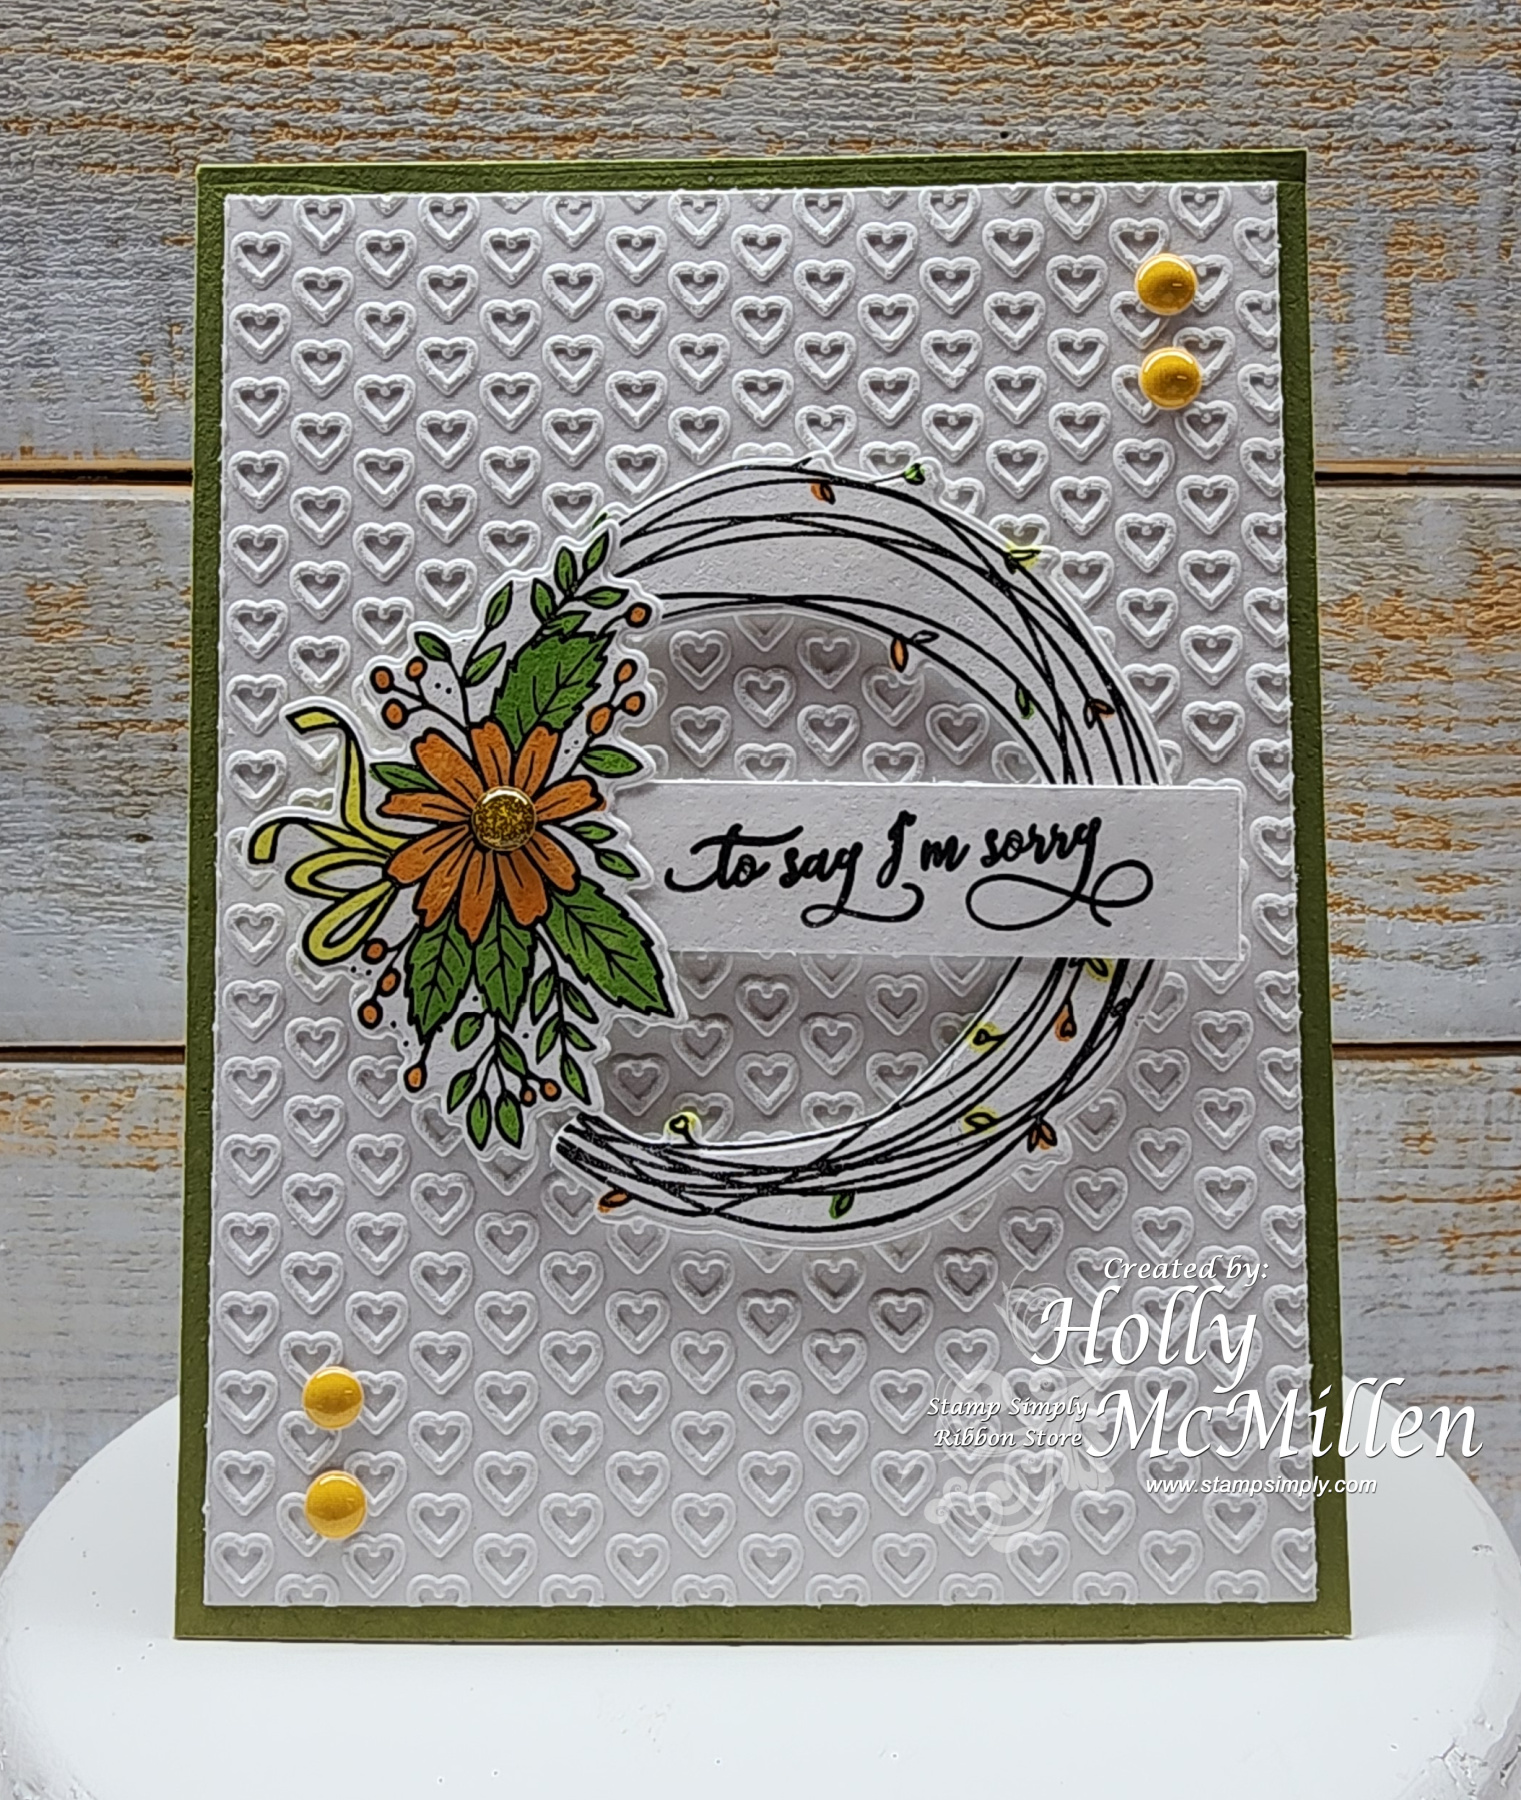
I struggle with Sympathy cards, as most of the time they’re dark and depressing. So this week, I have a cheery bright “To say I’m sorry” card. Unfortunately, this is a needed card.
A super simple card; flat for mailing.
I used:
Stamp Simply Clear Stamps – Seasonal Wreaths – Spring & Summer
Stamp Simply Steel Dies – Spring & Summer Seasonal Wreath
Bundle
Stamp Simply Clear Stamps – Floral Cluster – Spring Pansies (sentim…
Versafine Onyx Black
*****
Enamel dots
Heart embossing folder
copic markers
~*~*~
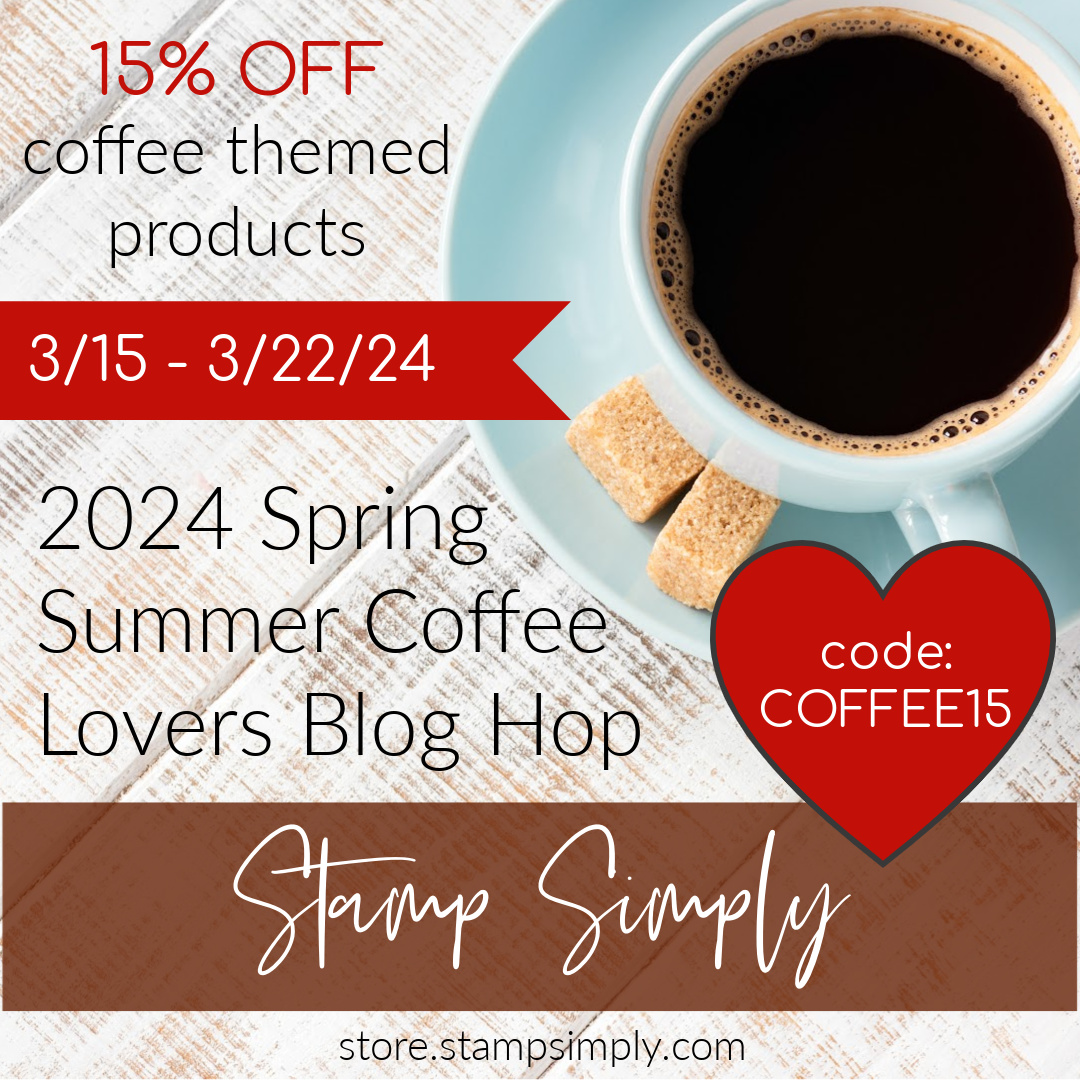
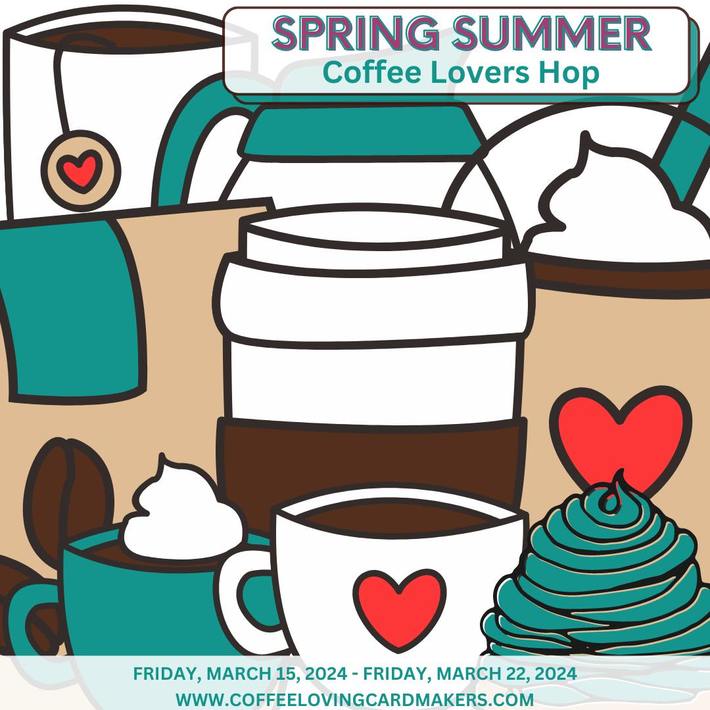
Don’t forget to jump on Stamp Simply and get 15% off coffee themed products.. now thru 3/22/24
Products linked above are courtesy of Stamp Simply.
~*~*~
Thanks for stopping by! ~Holly
Posted in Uncategorized | No Comments »
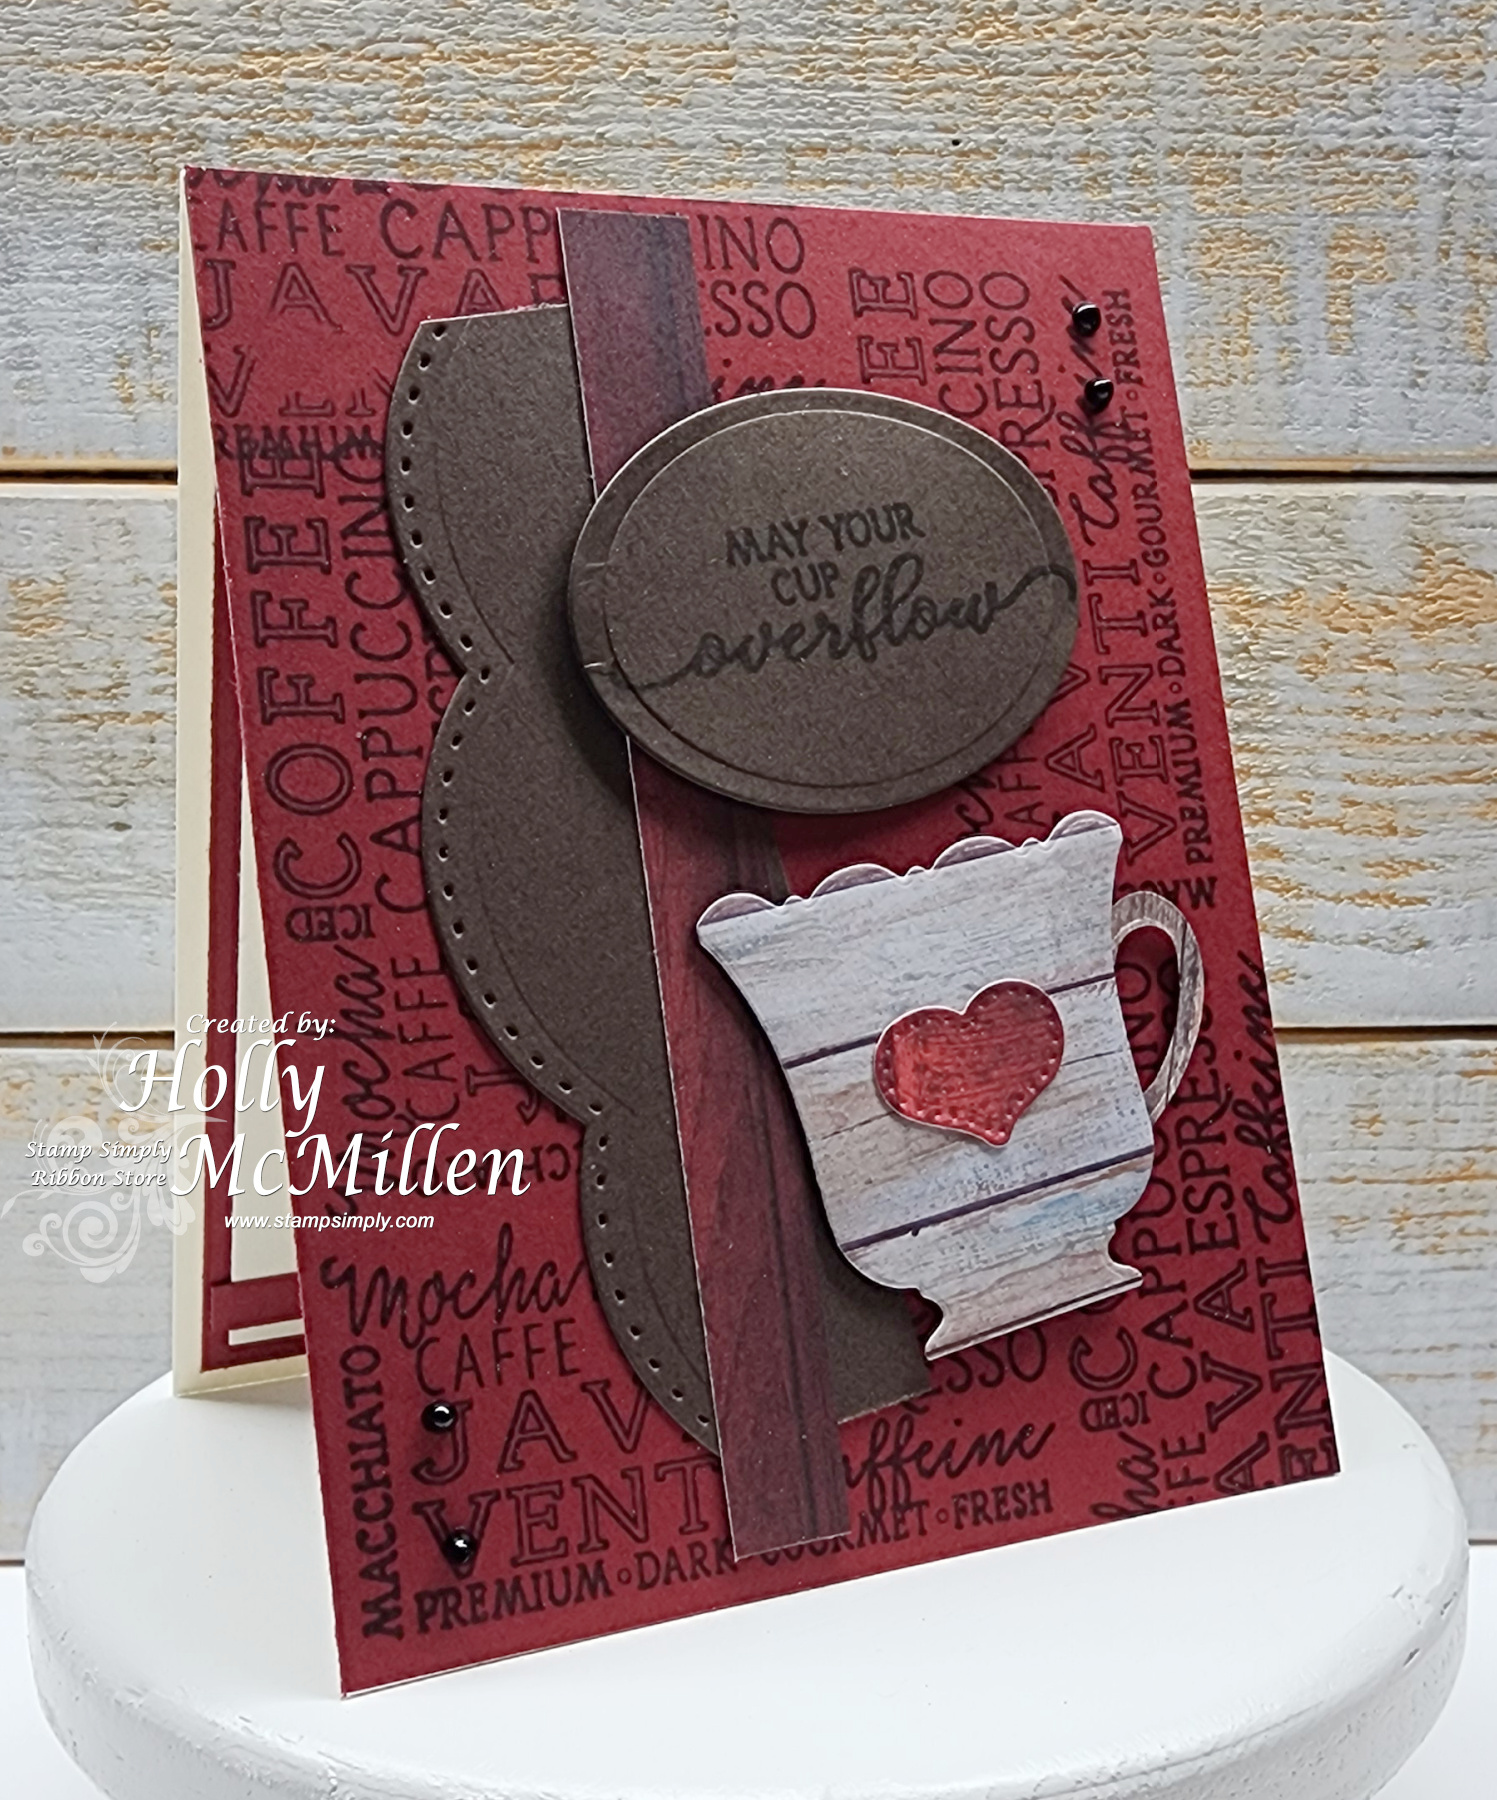
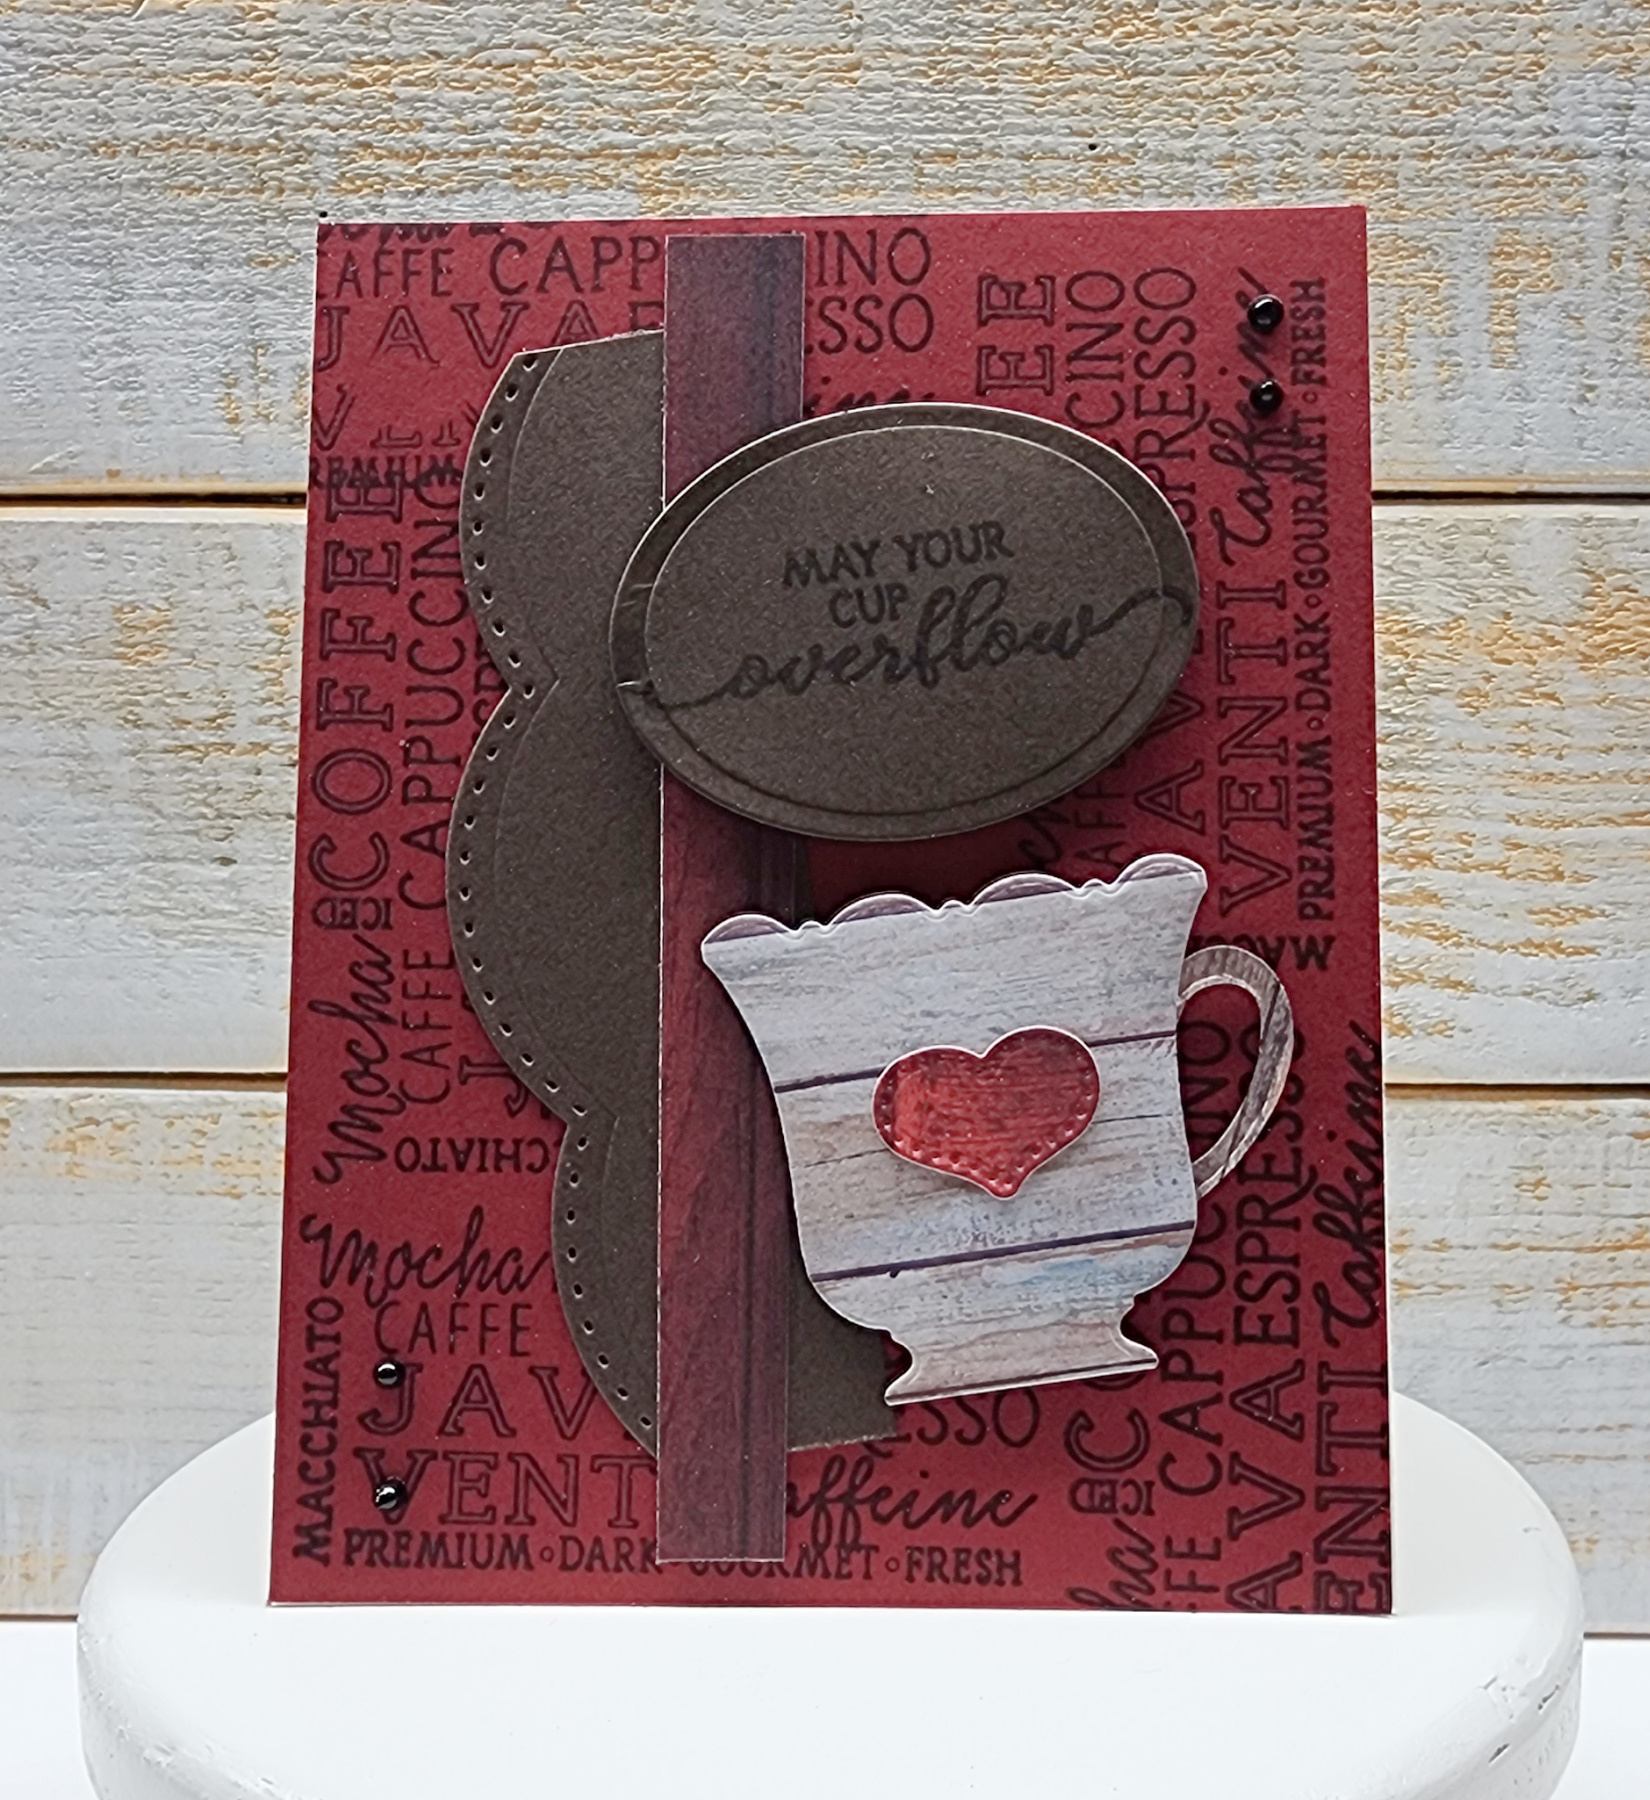
March 15th, 2024 by Holly McMillen
Happy Friday! I’m taking a time out today to play along with the Coffee Lover’s Hop! I love/need my morning coffee; that sometimes spills into the afternoon!
My cup is definitely full. I haven’t bragged on my grandchildren lately, so here goes! We welcomed #8 grandchild just one month ago today! Embry Briar Joy was born February 15th. She is our 6th granddaughter; accompanied by 2 grandsons. She was a tiny 5#er, but continues to grow healthy.
Just look at this beautiful child. What a precious gift from God. Ok, ok.. now on to the Coffee hop!
I went with a warm feel here. We’re in the midst of a snow storm, so we’re cuddled up and waiting for the sun.
~*~*~*~
I used:
Stamp Simply Clear Stamps – A Cup of Java (script)
Stamp Simply Clear Stamps – Have a Cup on Us (sentiment)
Stamp Simply Steel Dies – Coffee or Tea?
Stamp Simply Steel Dies – Farmhouse Pierced Nested Hearts
Craft Consortium – 6 x 6 – Beach Hut
Spellbinders – A2 Scalloped borders one
Versafine – Onyx Black
*******
Spellbinders Nestabilities – standard ovals
Nuvo Drops – Black
Red/Brown cardstock
Links above to products courtesy of Stamp Simply.
~*~*~*~
~*~*~*~
Thanks for stopping by! ~Holly
Posted in Uncategorized | No Comments »
March 13th, 2024 by Holly McMillen
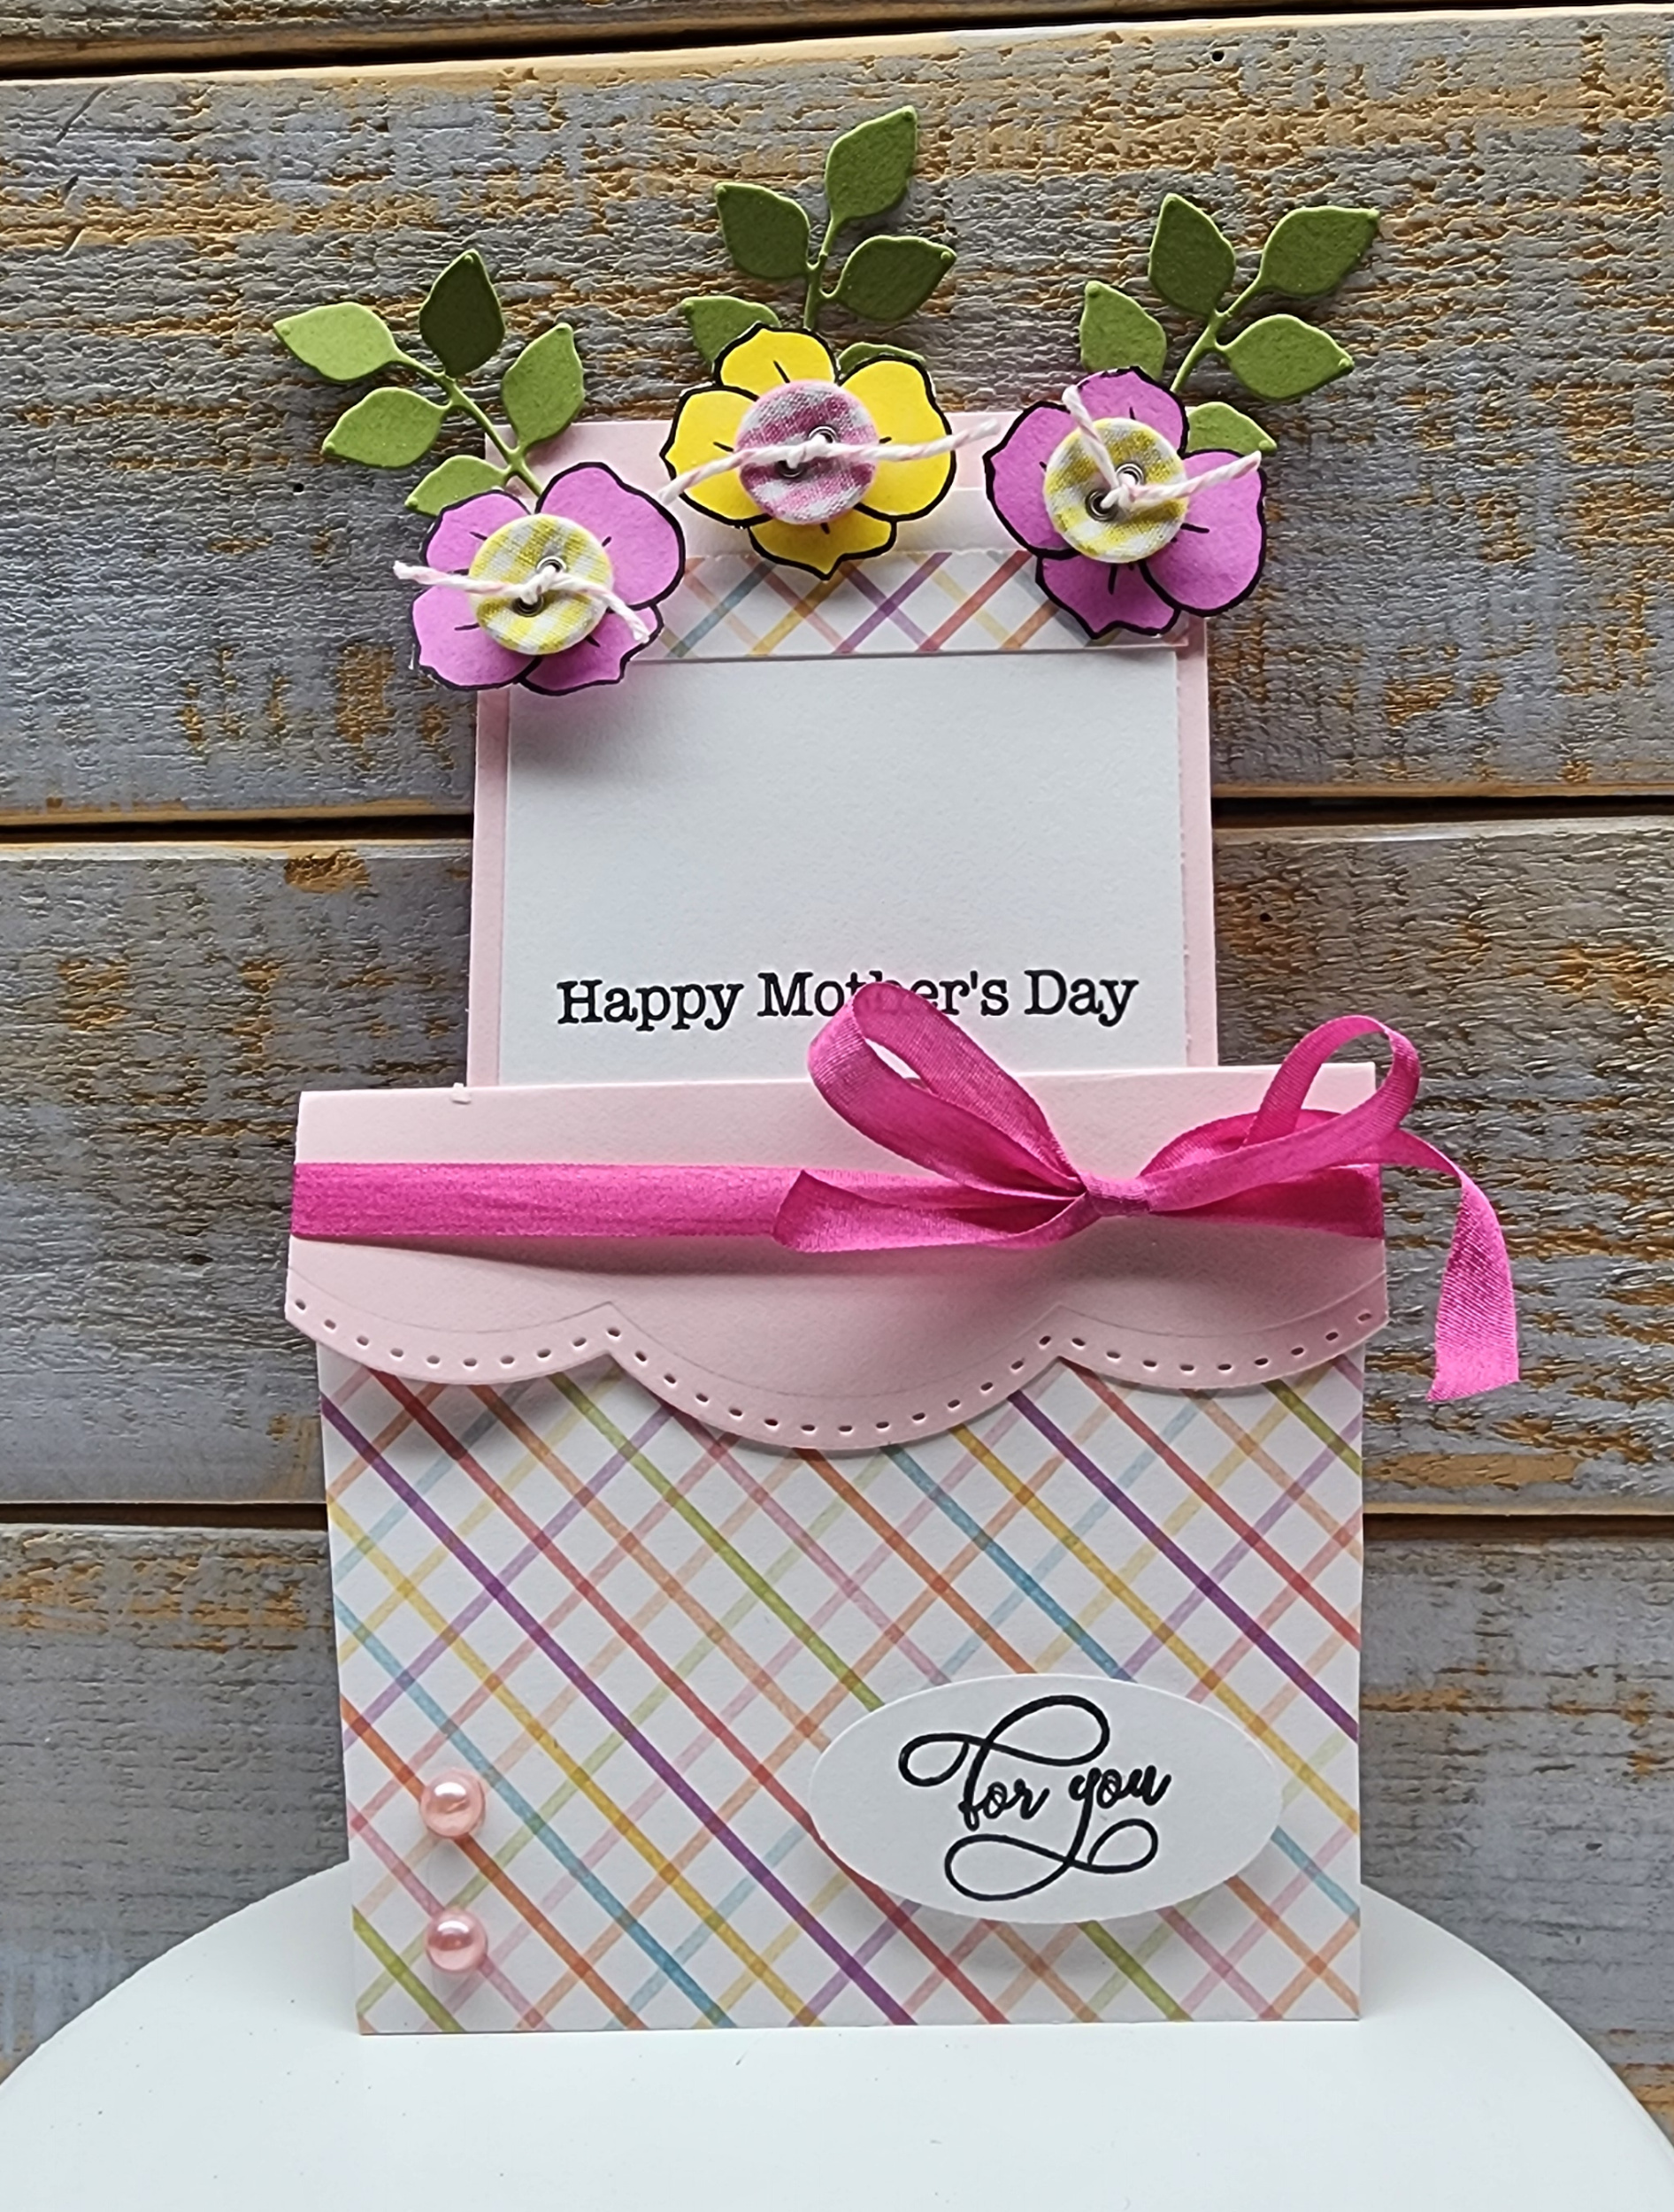
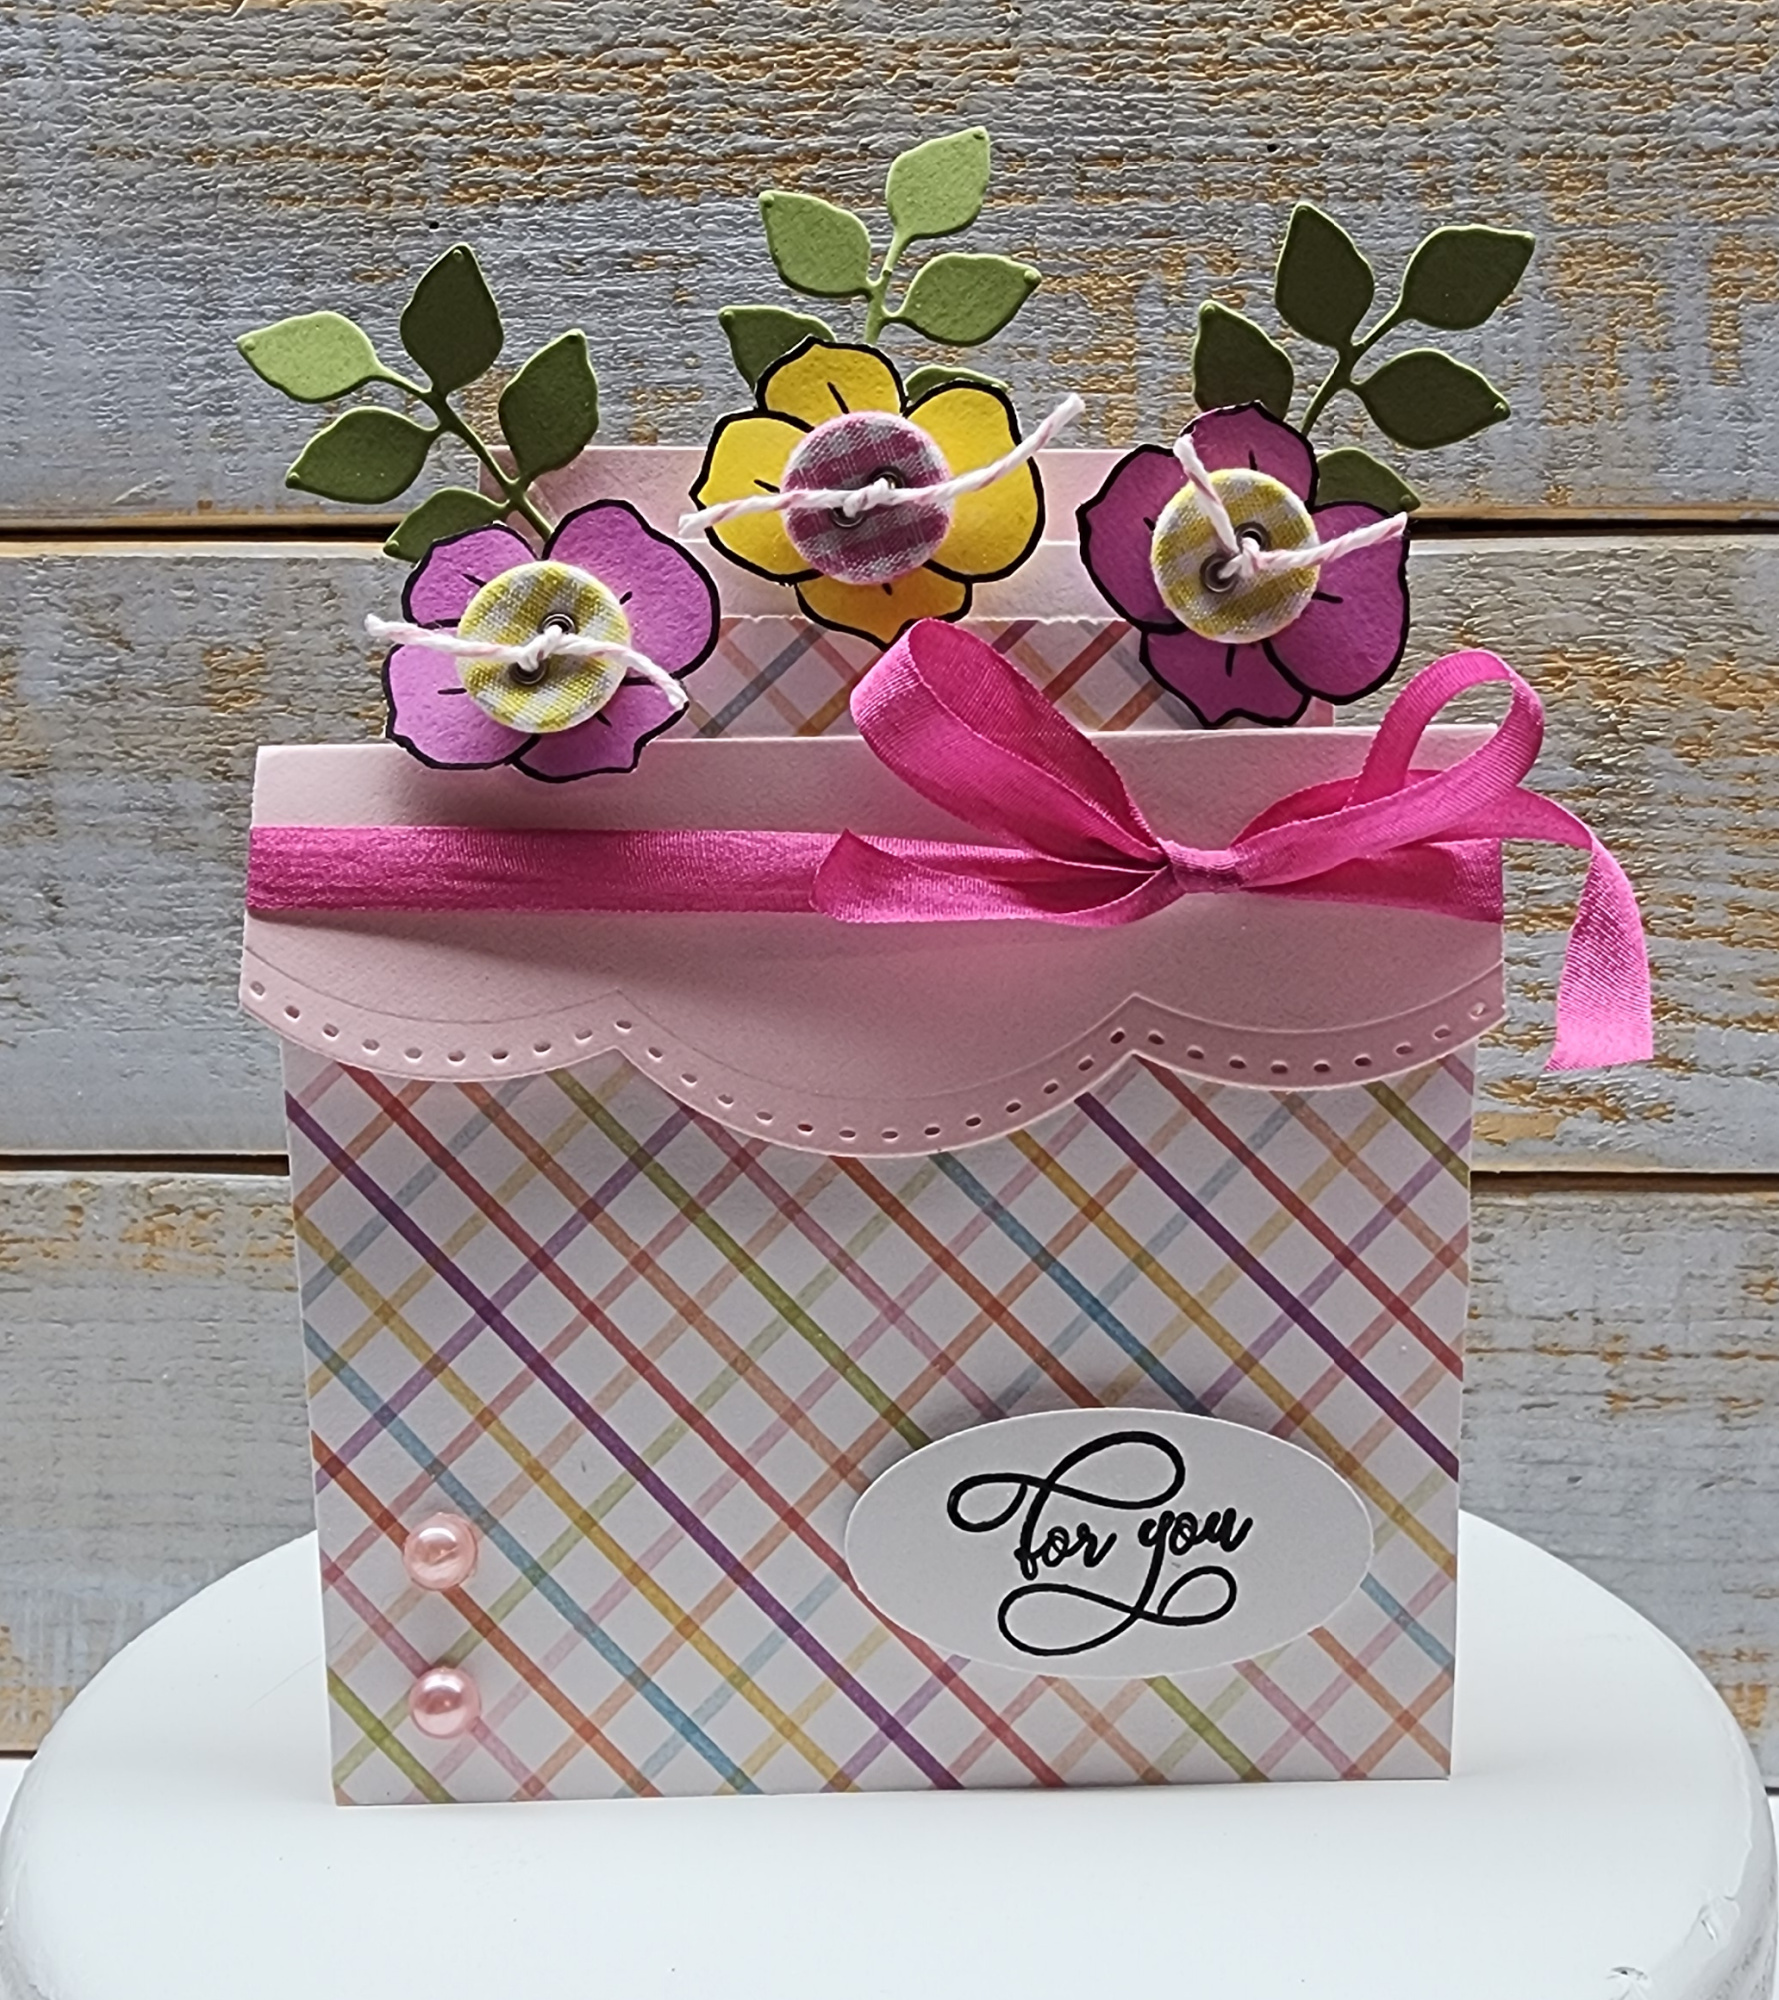
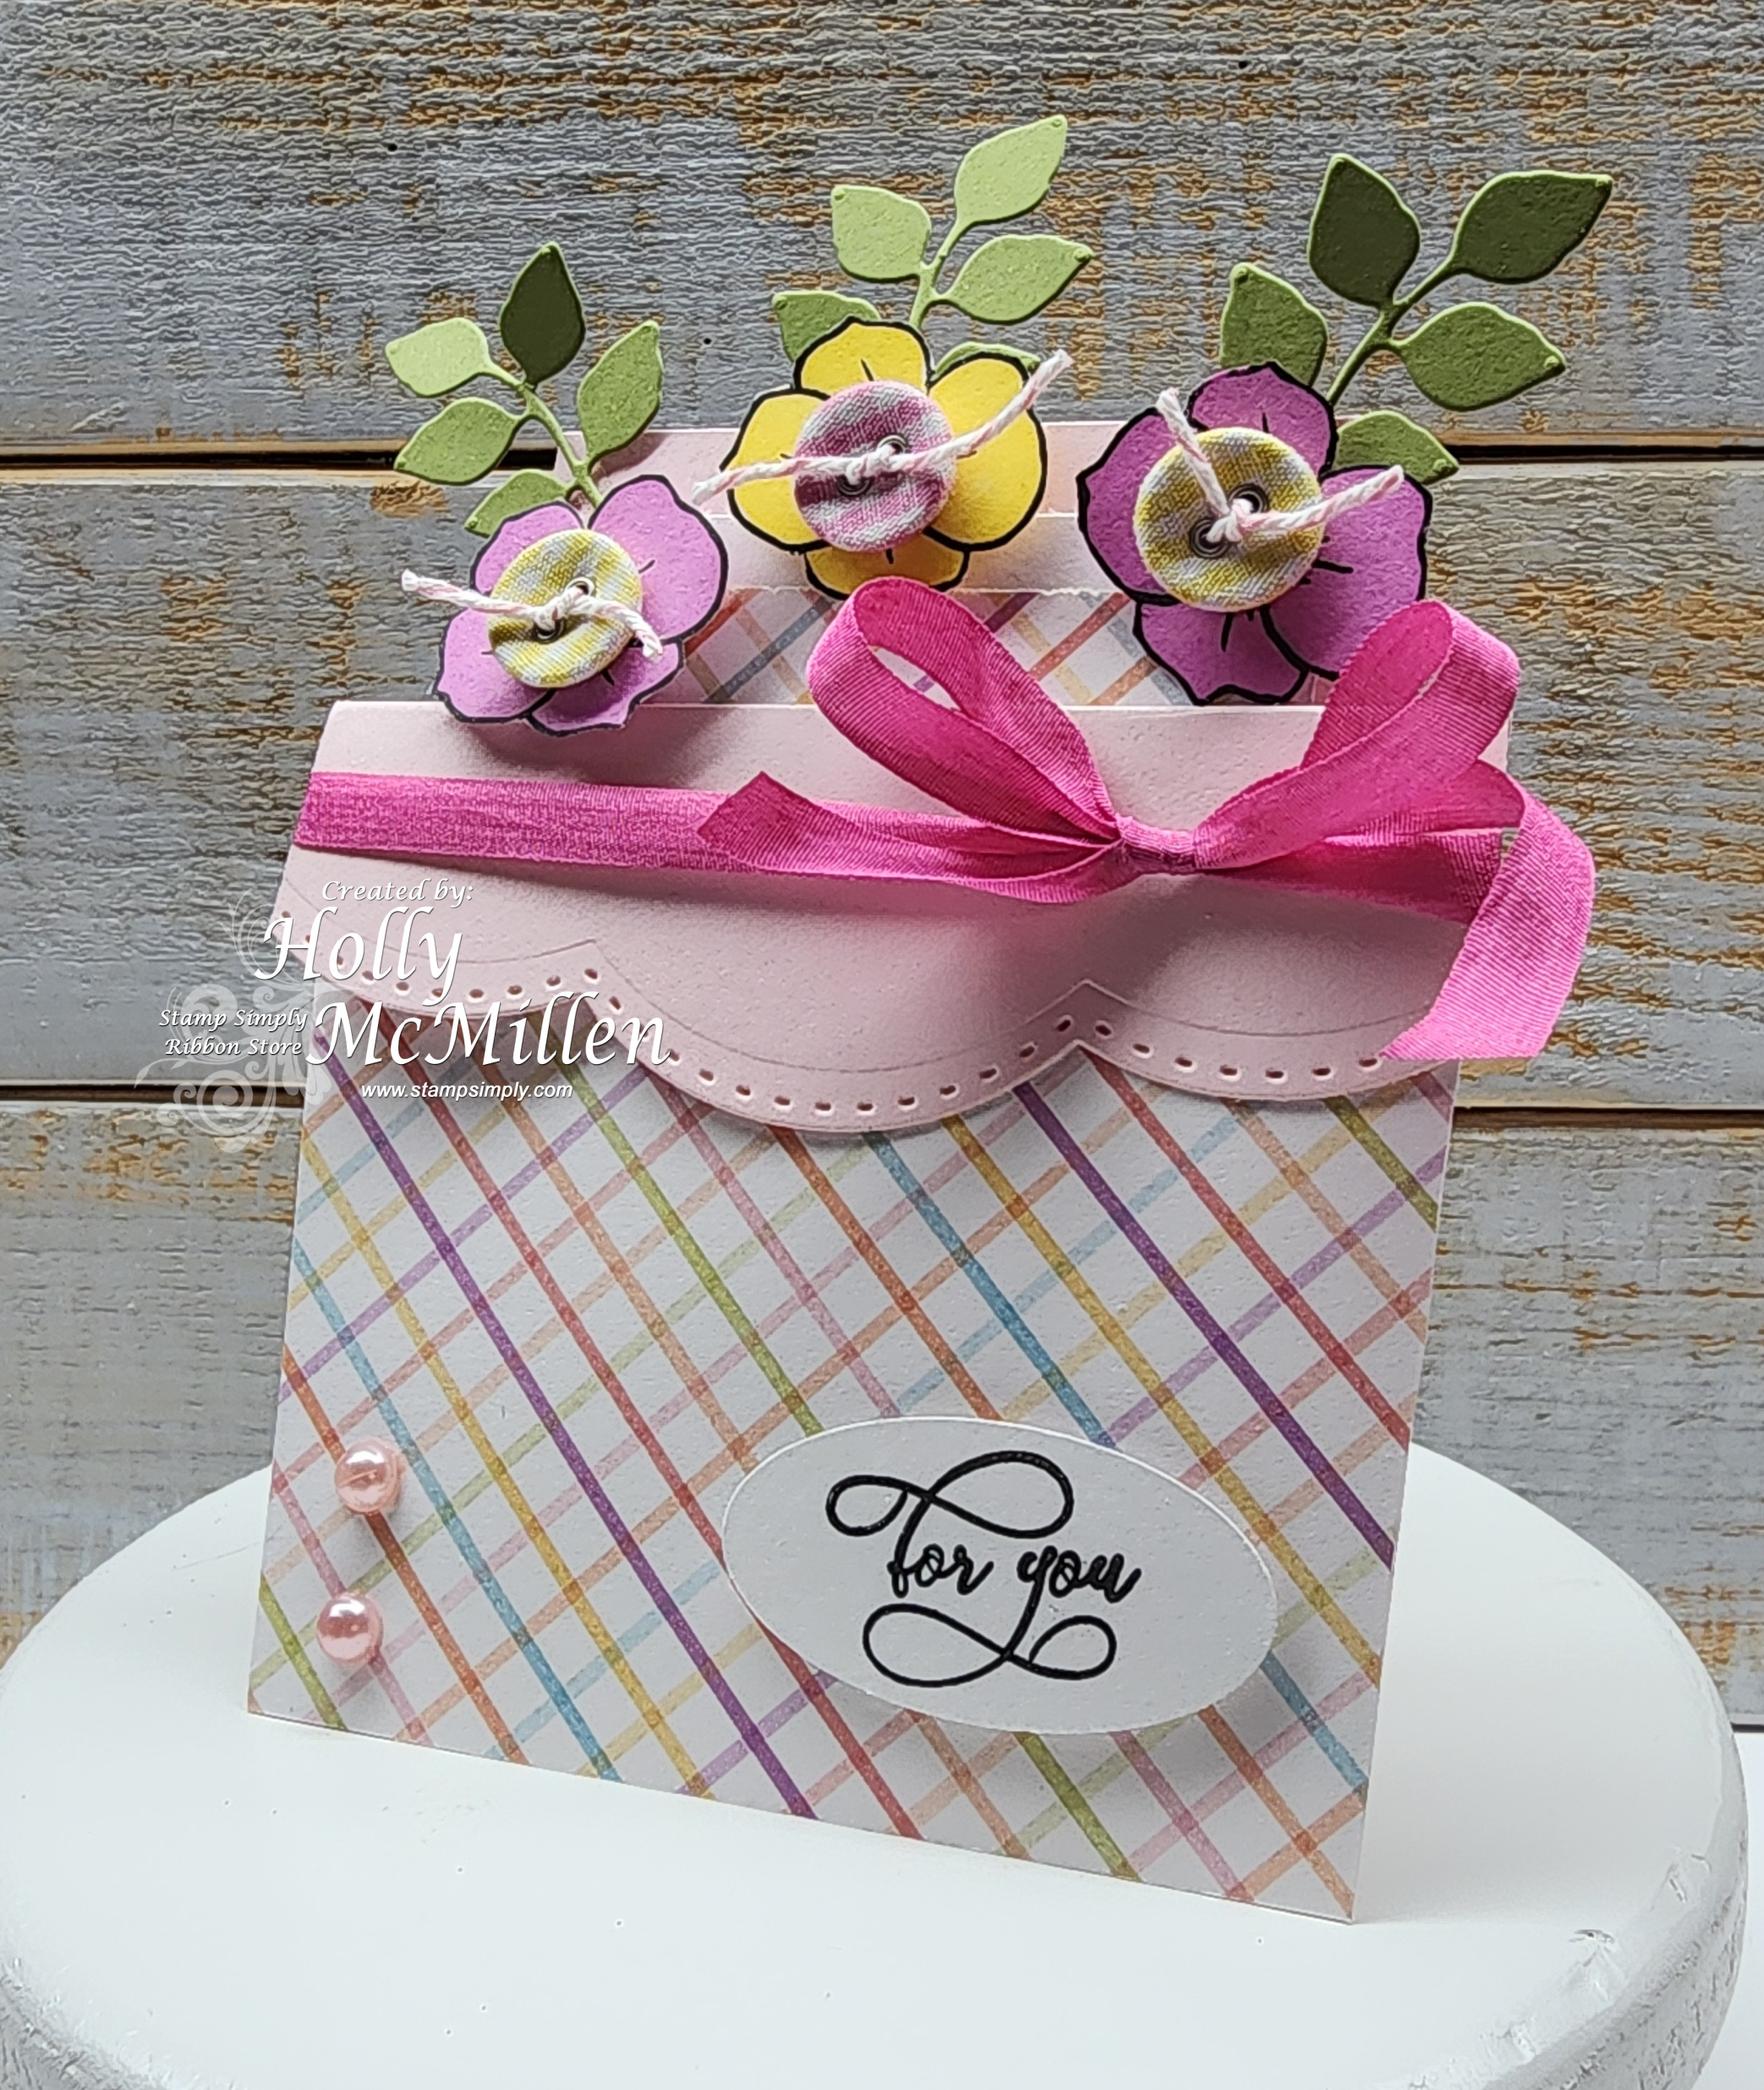
Happy Wednesday! Today I am sharing a different type of card. Lately, I’ve felt stuck making the same type of card over and over. When I get in a rut, I start looking around for inspiration. That could be Facebook, Pinterest, or Splitcoaststampers. What do you use for inspiration?
My theme this week is Mother’s Day. Now, my own mother and my mother-in-law have since passed, I do have 2 daughter-in-laws that are pretty terrific and deserve a nice card.
For this particular card, I went to my go-to.. Splitcoaststampers’ tutorial section.
I used:
Stamp Simply Clear Stamps – Floral Clusters – Spring Pansies
Stamp Simply Steel Dies – Floral Clusters & Sprigs
Stamp Simply Clear Stamps – Typewritten Year Round Greetings
Echo Park – 6×6 – My Favorite Easter
1/4″ Silk ribbon – watermelon
Bakers Twine – Pink/White
Melissa Francis – Pink Pearls
Spellbinders – scalloped borders one
Versafine – Onyx Black
*****
Buttons
Oval Punch
I fancy cut the flowers from the pansy cluster for a smaller flower.
Highlighted links are products courtesy of Stamp Simply.
Thanks for stopping by! ~ Holly
Posted in Uncategorized | No Comments »
March 6th, 2024 by Holly McMillen
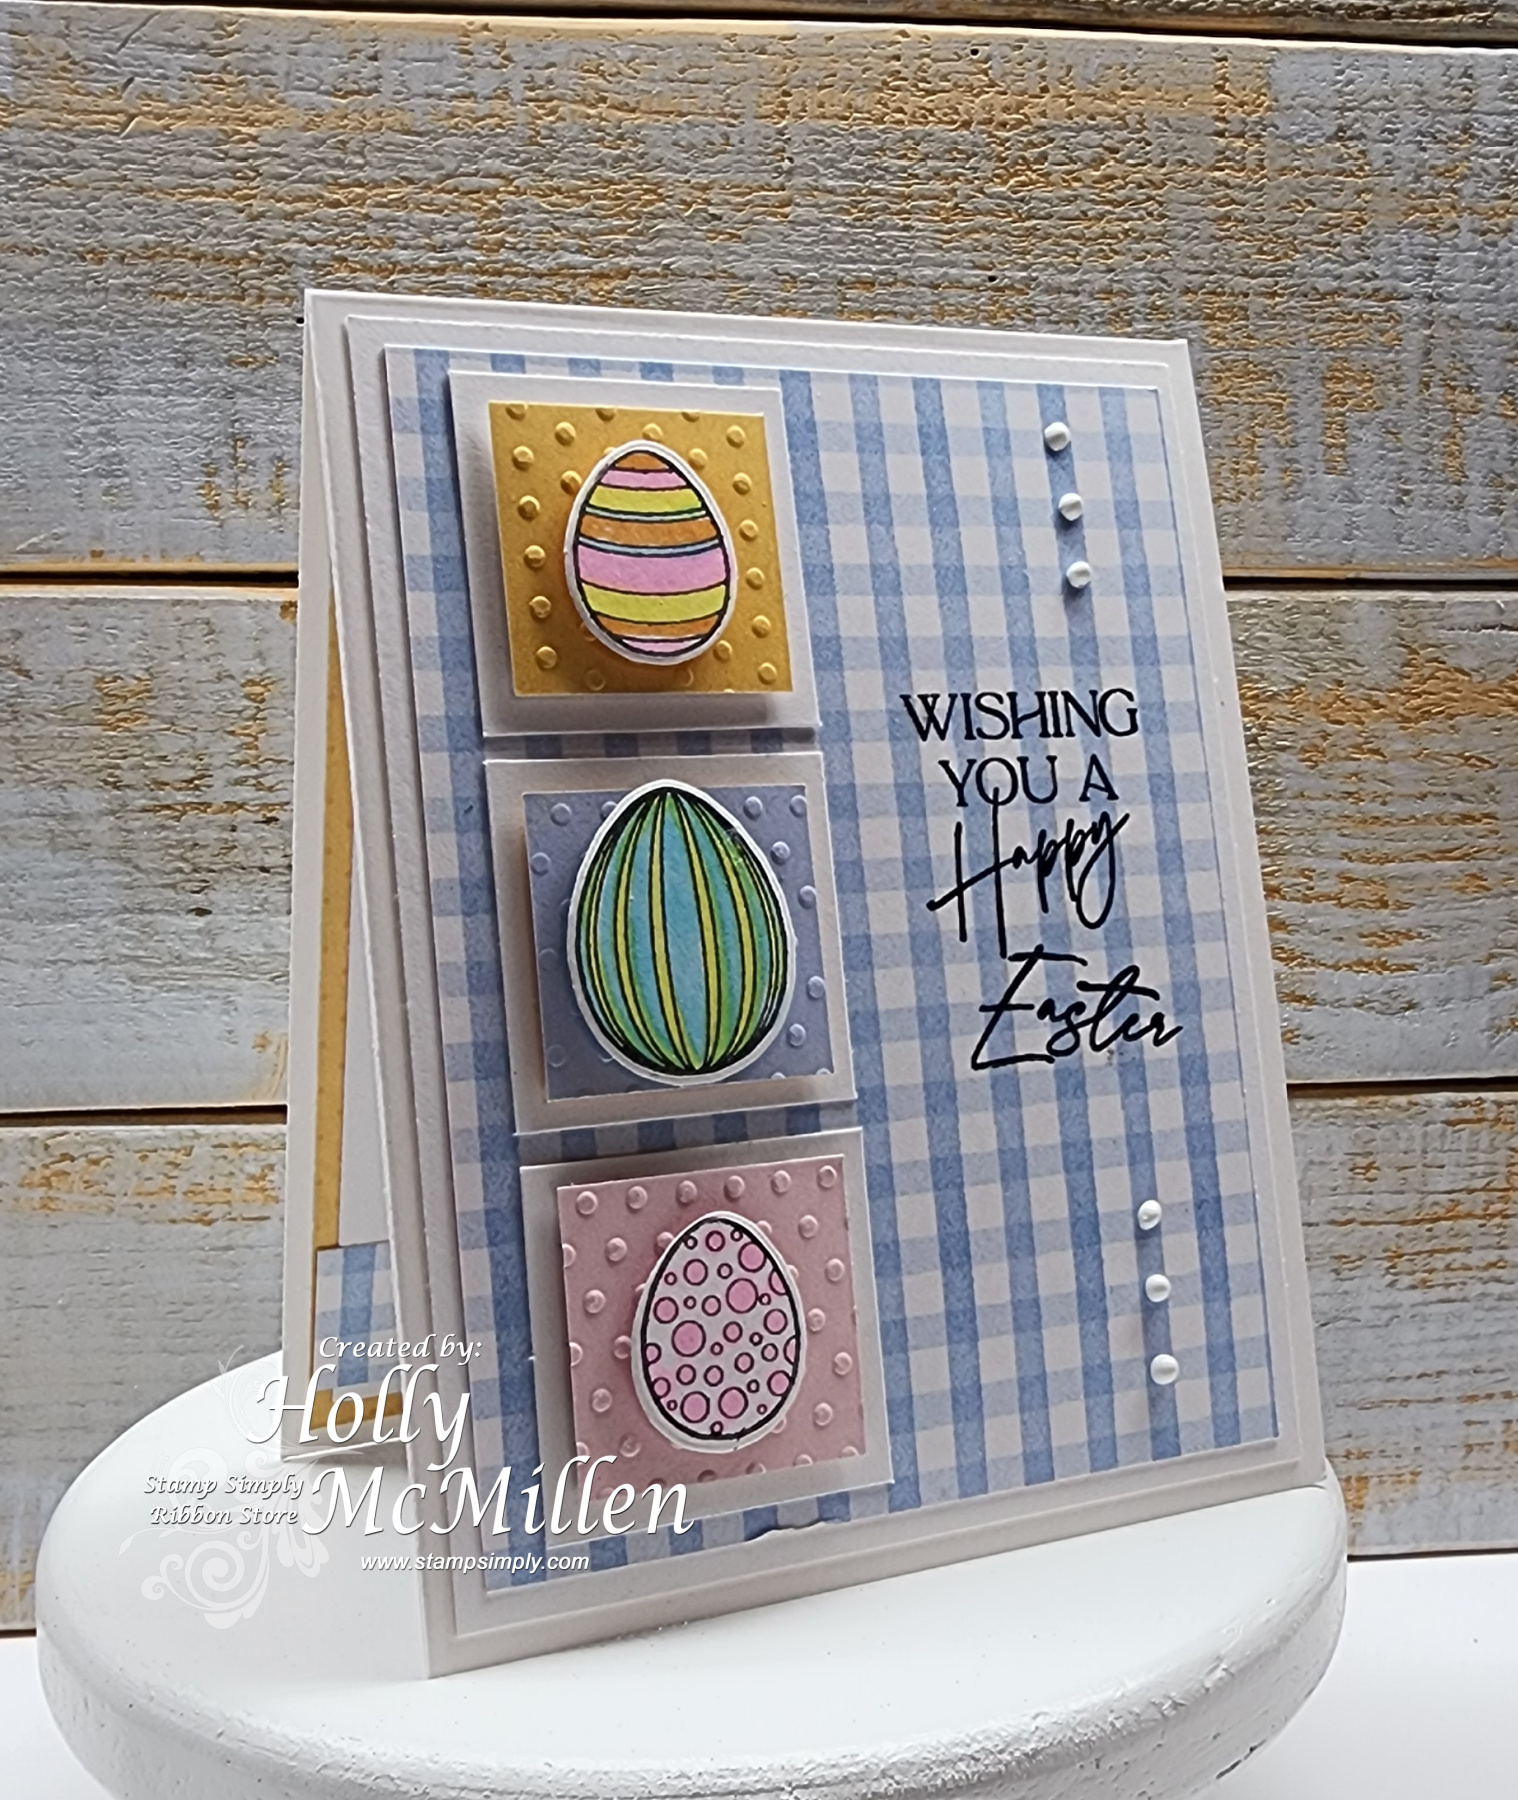
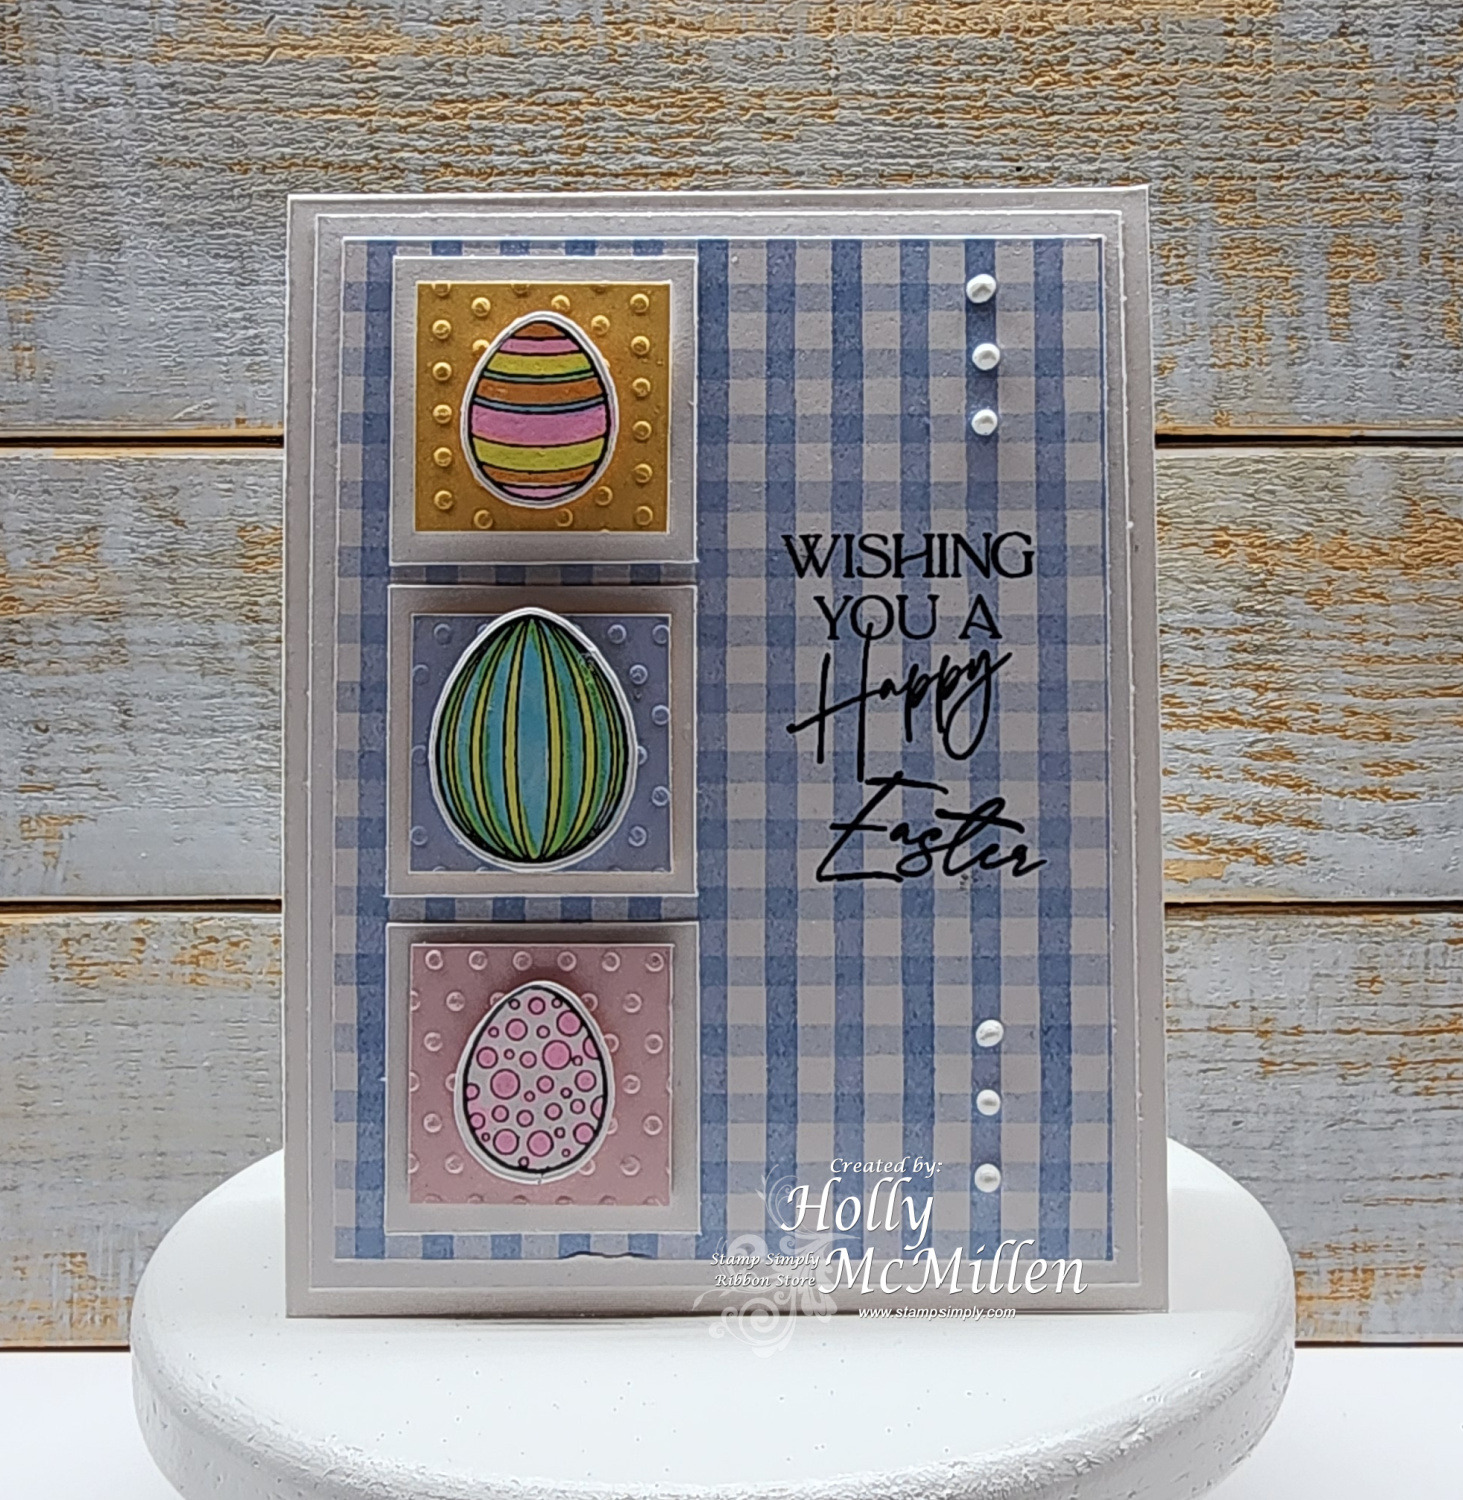
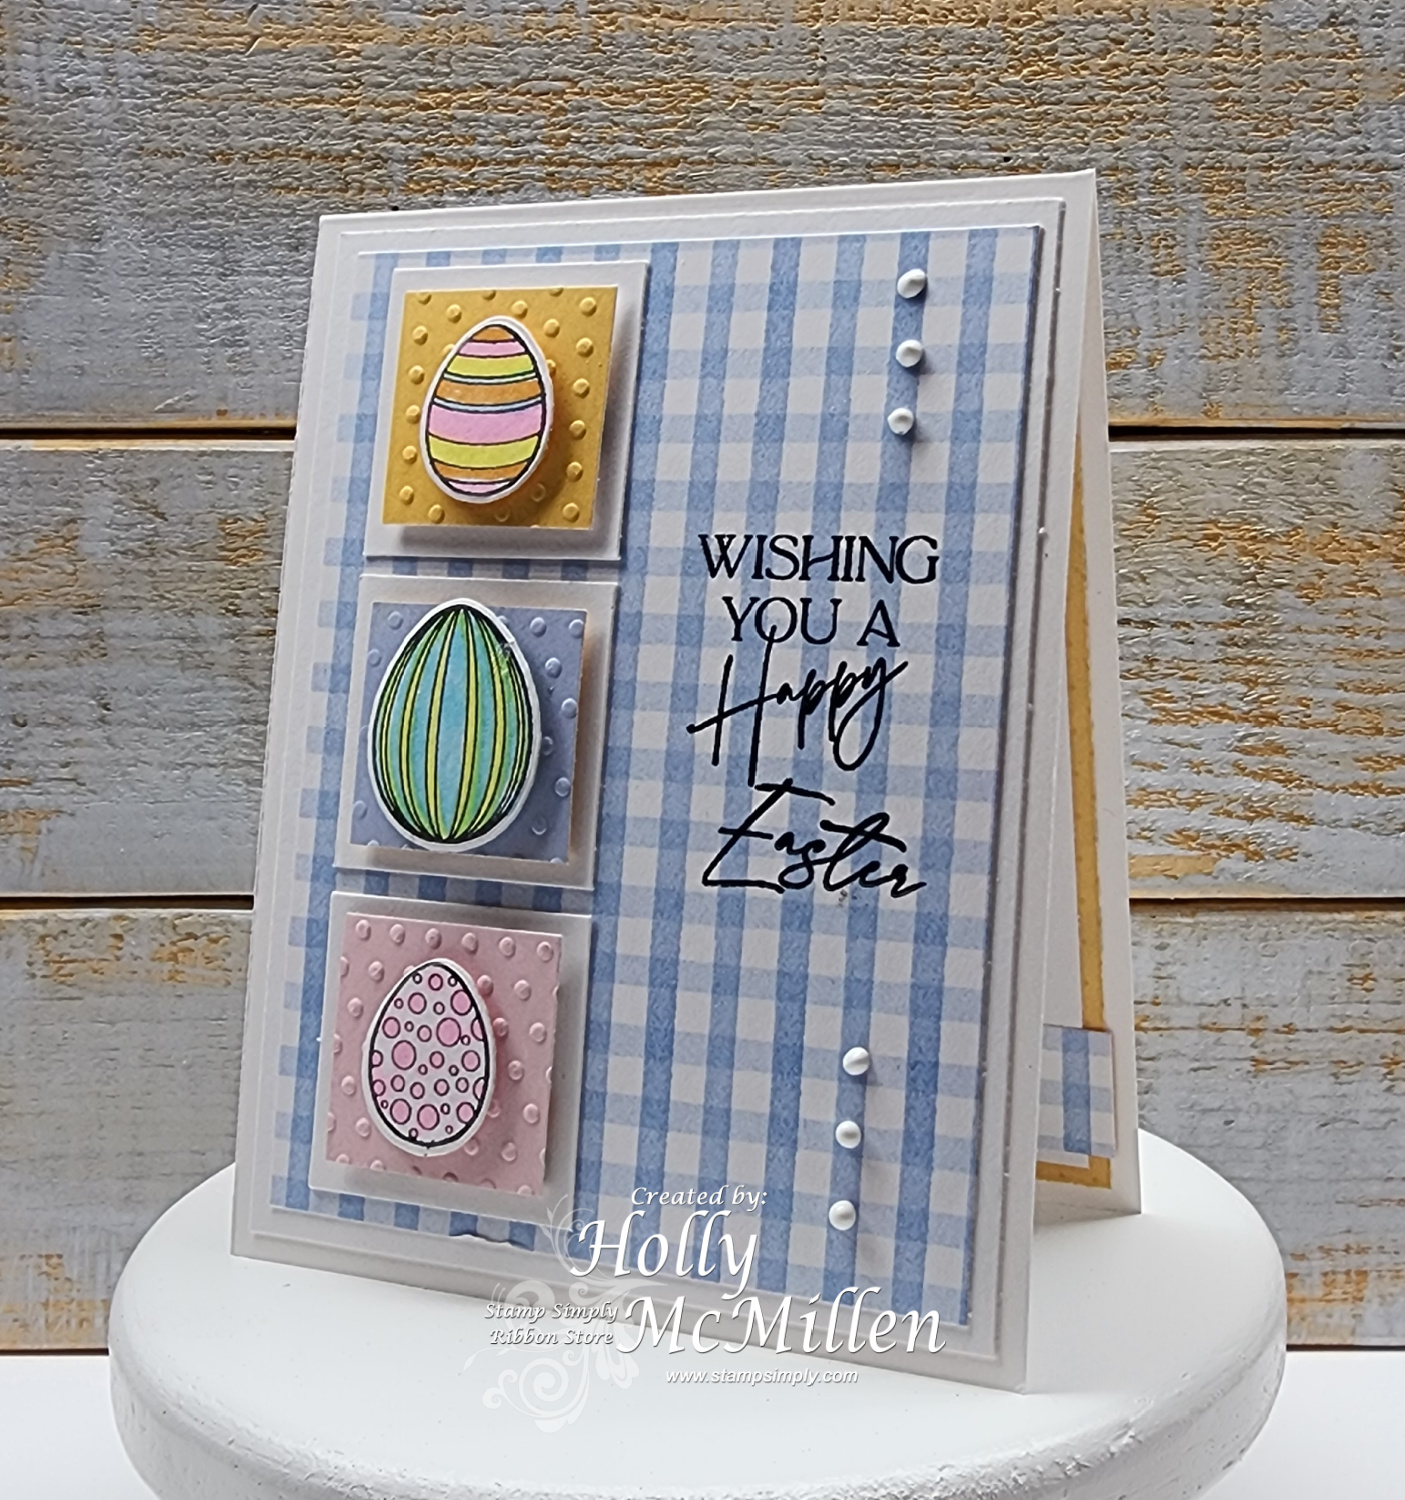
There’s still time to get your Easter cards/projects made! With 3 and 1/2 weeks until the big day, I’ll be making more cards right up to the last minute!
I have birthdays and an anniversary left in this month, as well. It seems that the older I get, the more people I send cards to. And a couple are kid birthday cards… some of the hardest for me to make!
This week I went for the Easter eggs. For a long time, I struggled to find the connection between eggs and Easter… until I went to Google.
Eggs represent new life and rebirth, and it’s thought that this ancient custom became a part of Easter celebrations. In the medieval period, eating eggs was forbidden during Lent (the 40 days before Easter) so on Easter Sunday, tucking into an egg was a real treat!
I used:
Stamp Simply Clear Stamps – Easter is for Jesus
Stamp Simply Steel Dies – Easter is for Jesus
Easter is for Jesus – bundle
Echo Park – My favorite Spring
Versafine Onyx Black
******
Dots embossing folder
Nuvo drops
~*~*~
Linked products provided courtesy of Stamp Simply.
Thanks for stopping by! ~ Holly
Posted in Uncategorized | No Comments »
February 28th, 2024 by Holly McMillen
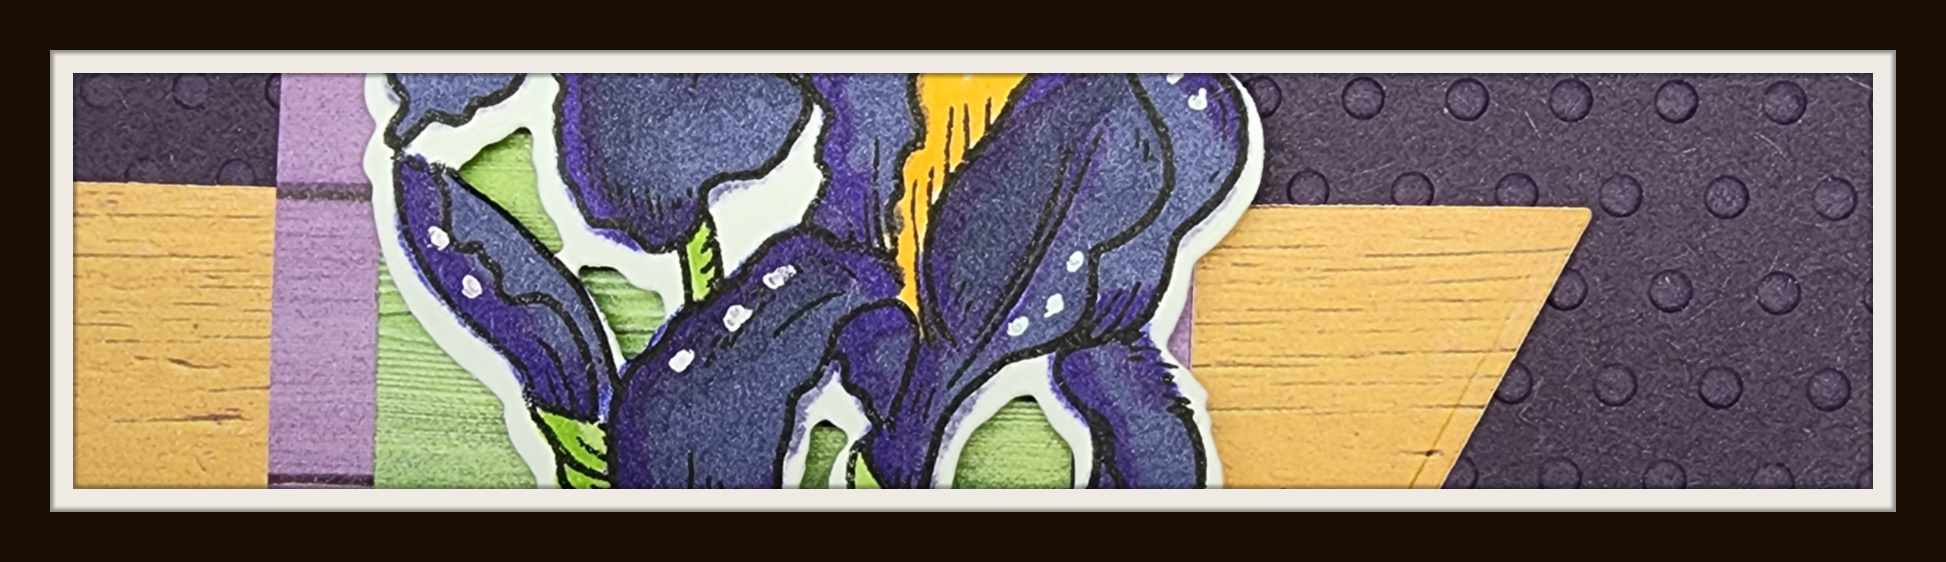
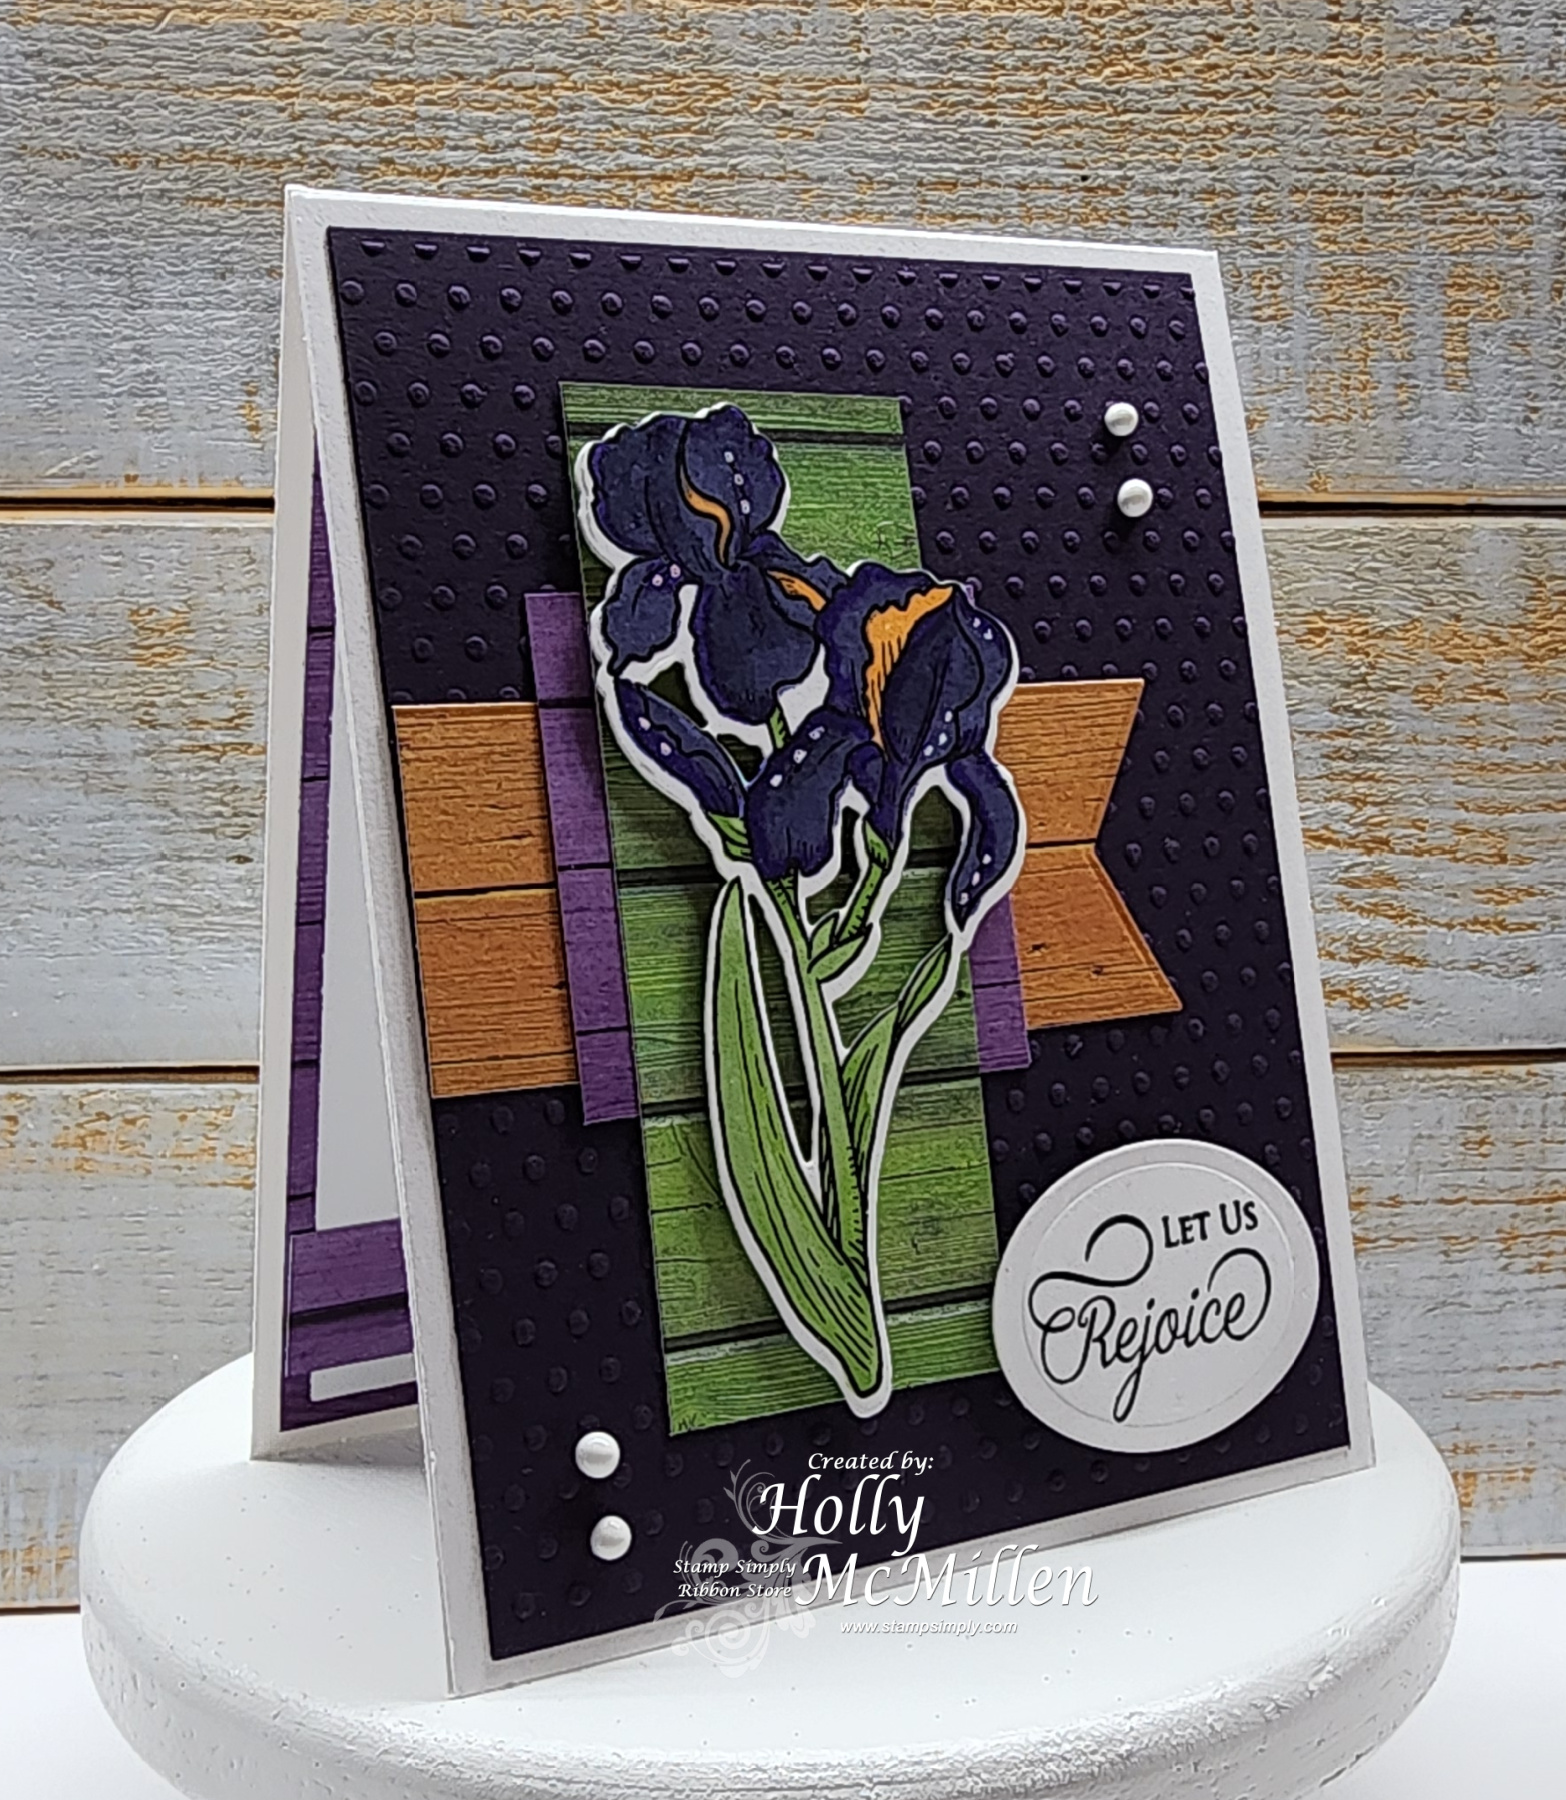
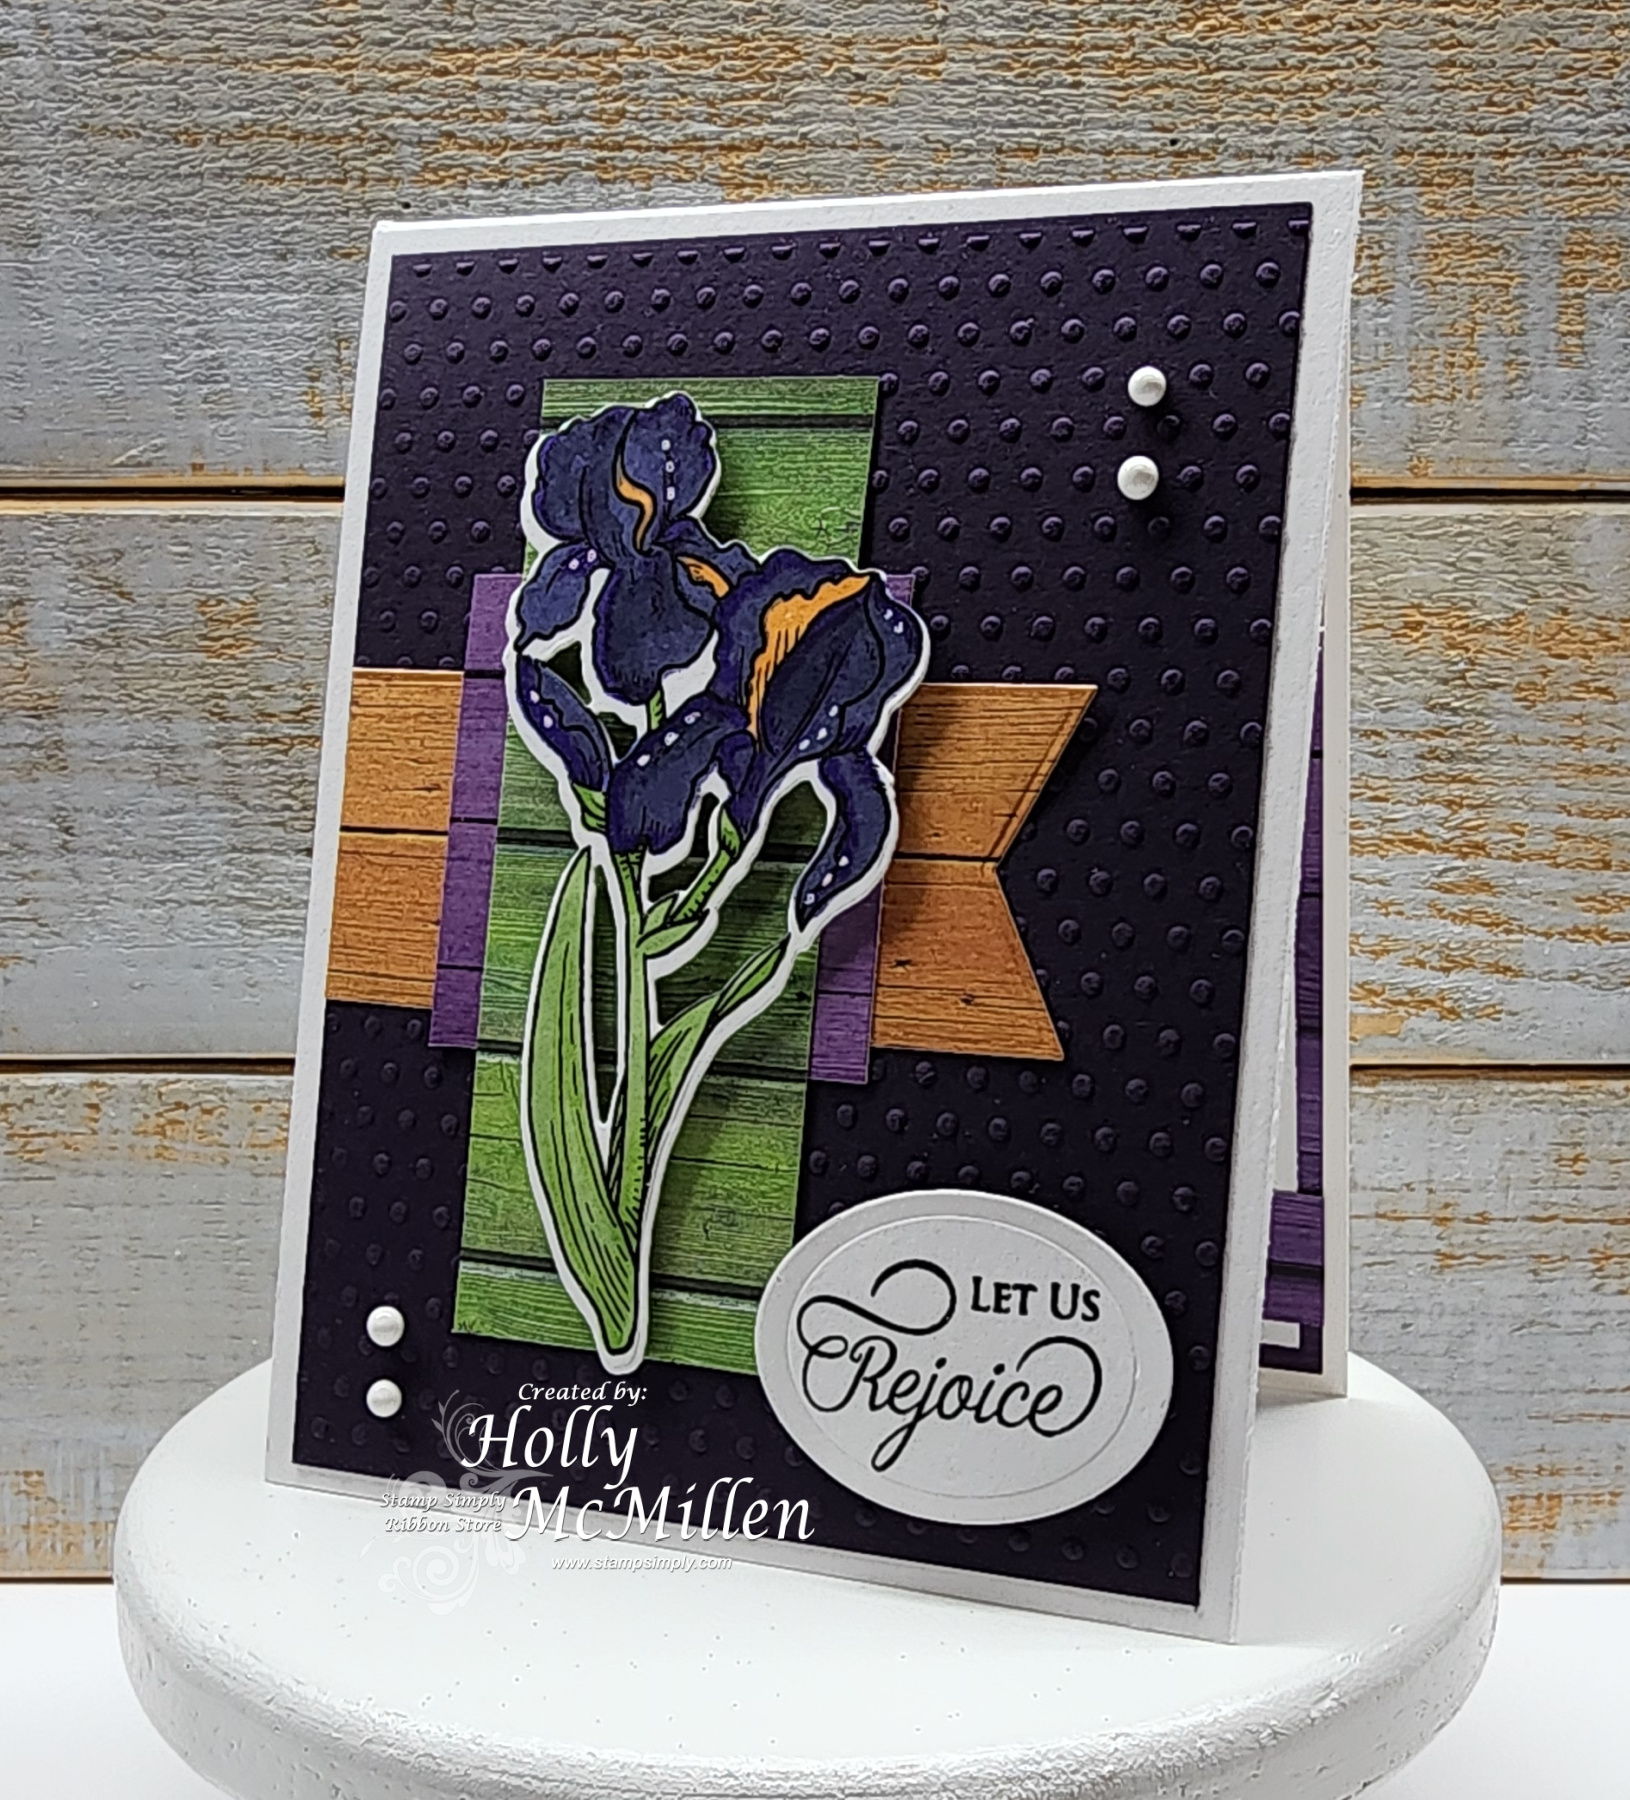
Oh Happy Day! Easter comes early this year… are you ready? I am! Easter is my favorite holiday (followed closely by Christmas!).
Today’s Easter card is full of drama. The idea is to keep it solemn until Easter day, then… Hallelujah! Let’s rejoice.
The layers behind the iris represent the cross on which Christ was hung.
I used:
Stamp Simply Clear Stamps – Happy Day Iris
Stamp Simply Steel Dies – Happy Day Iris
Happy Day Iris – bundle
Stamp Simply Clear Stamps – Easter
Stamp Simply Steel Dies – Fishtail Sentiment banners
Craft Consortium – Beach Hut
Versafine Onyx Black
*******
Dots embossing folder
Nuvo drops
Spellbinders Nestabilities – standard ovals
Items linked are courtesy of Stamp Simply
Thanks for stopping by! ~Holly
Posted in Uncategorized | No Comments »