~November Dirty Challenge~
November 20th, 2008 by Holly McMillen
 Yup, we’re at it again!
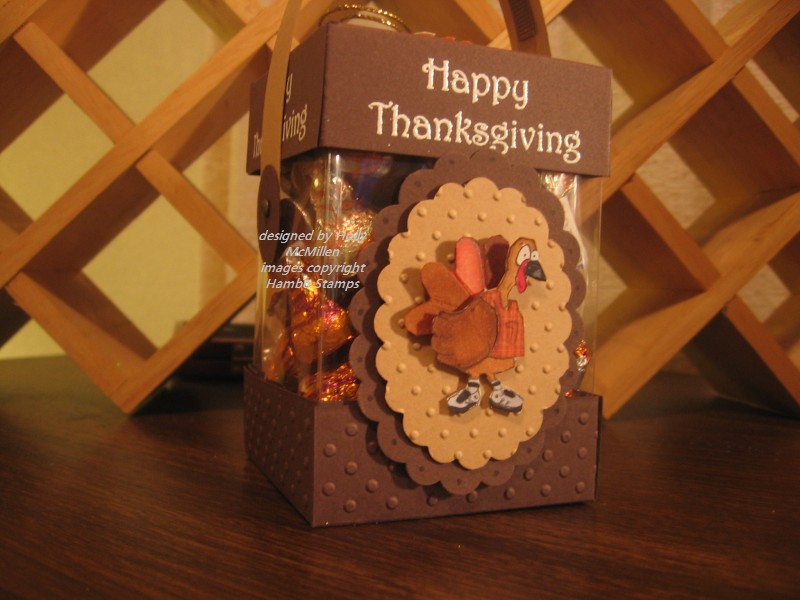
The Dirty Dozen and Alumni have challenged each other once again. This month’s challenge was to make a Thanksgiving card, placecard, gift holder, etc… with one catch. There had to be a heart somewhere in the design. Can you find mine? 🙂
I decided to make another one of these adorable acetate treat boxes. They are so easy and fun to make. I cut two pieces of cardstock at 4.75″ x 4.75″ and score on all sides at 1″ to make the top and bottom. The acetate is 4″ x 11″ scored at 2 5/8, 5 1/4, 7 7/8, 10 1/4 inches. It makes a 2 3/4″ square box. Perfect for candies or other small goodies.
Have you found the heart yet? 🙂
Here are the deets on my box:
Stamps: Hambo Stamps Turkey and Happy Thanksgiving sentiment
Colors: Chocolate Chip, Creamy Caramel, GP White
Ink: Brilliance Graphite Black, copics, versamark
Accessories: scissors, dimensionals, gold cording, brads, scoring blade, oval scalloped punches, swiss dots EF
TFL!~
********************************************************
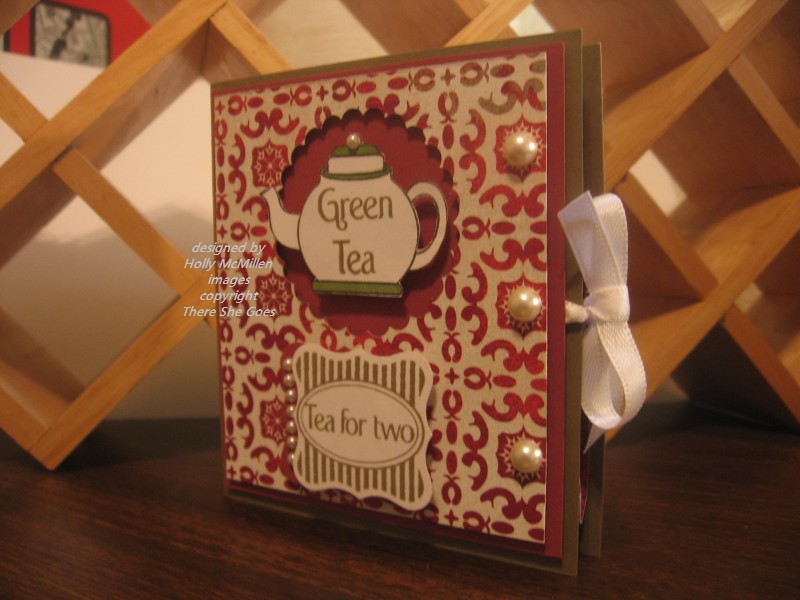
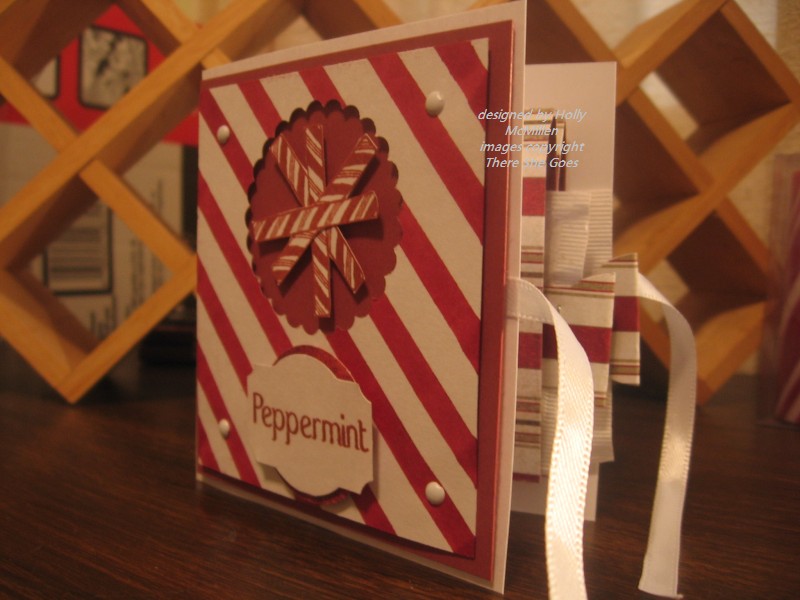
 For WT193 (Pearls). I went to stamp club with Cindy Motherway (Mothermark on SCS) last night and I saw this little chocolate holder. I never even got to hold it, but I knew I wanted to make something like it, so this is it!
If you want the instructions, I will measure it and post to this blog post later today. I eyeballed the entire thing!
My deets:
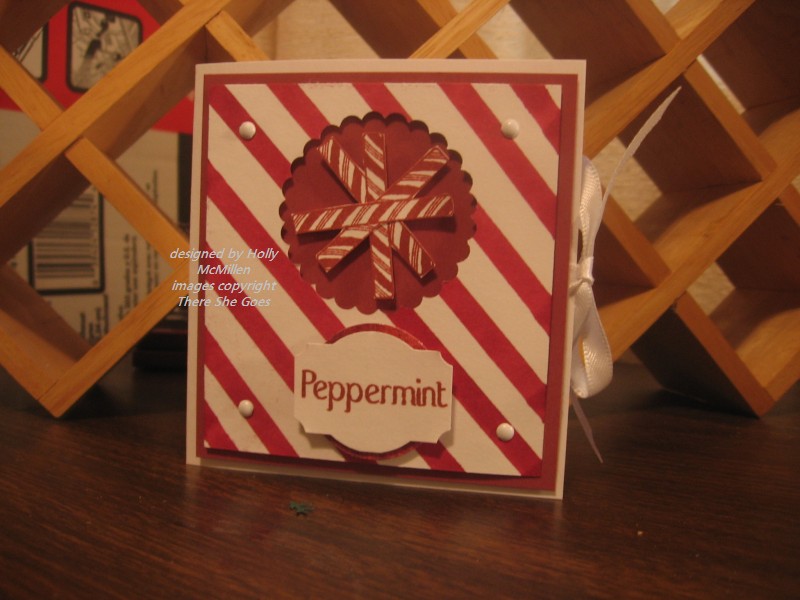
Stamps: There She Goes’ Tea For Two, Curvey label bundle
Ink: Brilliance Graphite Black, True Thyme, copics
Colors: True Thyme, Cranberry Crisp, GP White and BG Wassail
Accessories: 1/2 pearls (small and large); scissors; xacto knife, small scallop punch, dimensionals, ribbon, scoring blade, sticky tape, curvy label punch
Teabag Holder Measurements and general instructions:
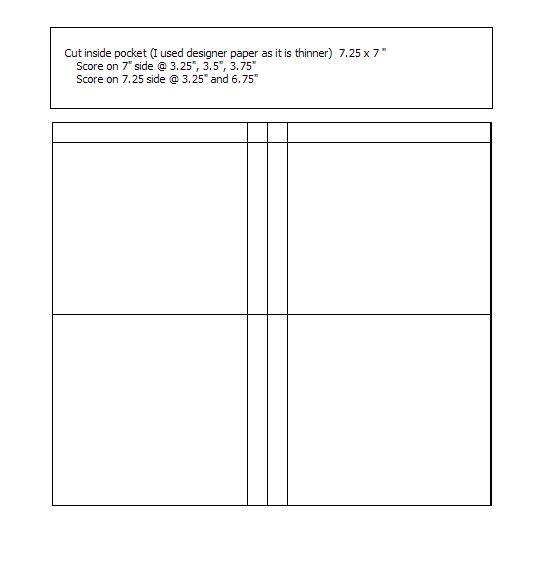

Step 1: Cut inside teabag holder (I used DP as it is thinner and easier to manipulate) 7 1/4 x 7″
Step 2: Score on 7″ side at 3.25, 3.5, 3.75″ , use bone folder to get crisp folds
Step 3: Score on 7 1/4″ side at 3.25 and 6.75″
Step 4: Fold 7 1/4 ” side first, using sticky tape on the small tab to create a pocket.
Step 5: Fold the 7″ side and set aside
Step 6: Cut Outside teabag holder 81/2″ x 4 1/4″ (I used cardstock)
Step 7: Score on 8 1/2 ” side at 4″ and 4 1/4″…. fold
Step 8: Decorate your outside however you wish.
To assemble: after you fold your inside pocket, you will have 2 pockets. Put adhesive between the two so that they will stick together. Fill with teabags or square candies. Adhere your inside to right side of your outside (I put the ribbon down first…. between inside and back of outside. I also put ribbon on front before I attached my layers. You could also wrap your ribbon all the way around under the top layers, if you wish) Tie a bow and you’re finished!
TFL!~


It’s his FEATHERS!!! Took me a minute, but I found it!! So cute!!!!
How clever is THAT?? Love it Holly!
Great idea, would appreciate you posting the instructions.
Took a while, but I finally realized the turkey has very shapely feathers 🙂 Well done. I have to make one of these acetate boxes. They are too cute. May try to make one for each of my daycare kids as a Christmas gift. Thanks for the dimensions.
The tea holder card is adorable. Well done on the eyeballing! Wouldn’t mind the instructions either as it is a wonderful little gift. Glad you made it out with Cindy too. I always enjoy the club nights I go to. Have a great day.
Great projects, Holly! I love the box and clever turkey *feathers*! The teabag holder is wonderful–love the paper you chose and the elegance with the pearls!
Way to convert this little project! Adorable and fun and I love that little teapot stamp! I may have to get that one from Thar She Goes! You know how a tea pot sorta jumps out at me! Hee! Its so awesome with the pearls too! Good job!