~ Think INK Tuesday ~
September 1st, 2009 by Holly McMillen
Good Morning, ya’ll!
The Inkgirls of Artful Inkables have a new bi-weekly challenge. Every other Tuesday, one of the Inkgirls lays down a challenge to the team and to our friends and fellow stampers! Well it’s my week!
This week, I challenge you to make a box or bag. You can make one up on your own, or you can find a pattern either on the internet or at the resources section on Splitcoaststampers.
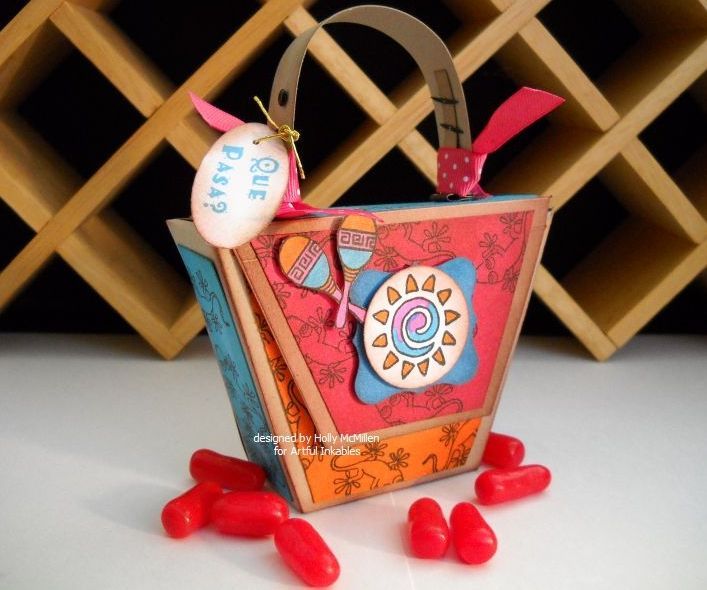
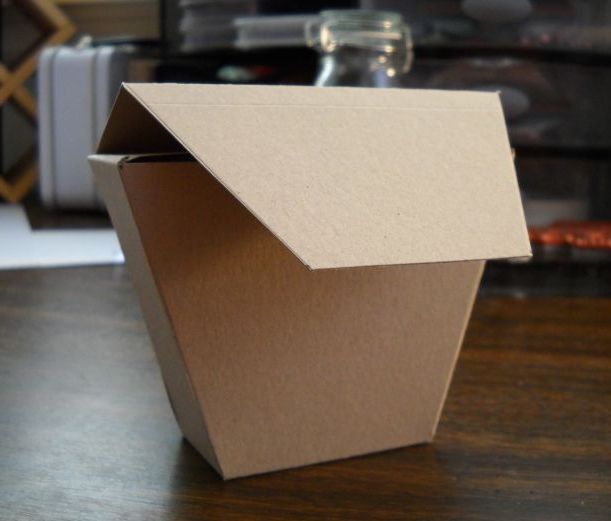
A few months back, I found this awesome little chipboard box/bag on clearance at Hobby Lobby. It was a V shape and had a cool patten leather handle. I covered it in pretty pink designer papers and a bunch of girly images and gave it to my little neighbor Lil. I wanted to recreate that box in a smaller size, so I have created this tutorial. Here is the box I made:
You will need:
1 piece of cardstock or heavy designer paper cut to 10 3/4″ x 10 3/4″ (yup, this requires a 12 x 12 sheet)
scoring blade and bone folder
ruler and pencil
sticky tape
velcro dot
papers and stamps to decorate
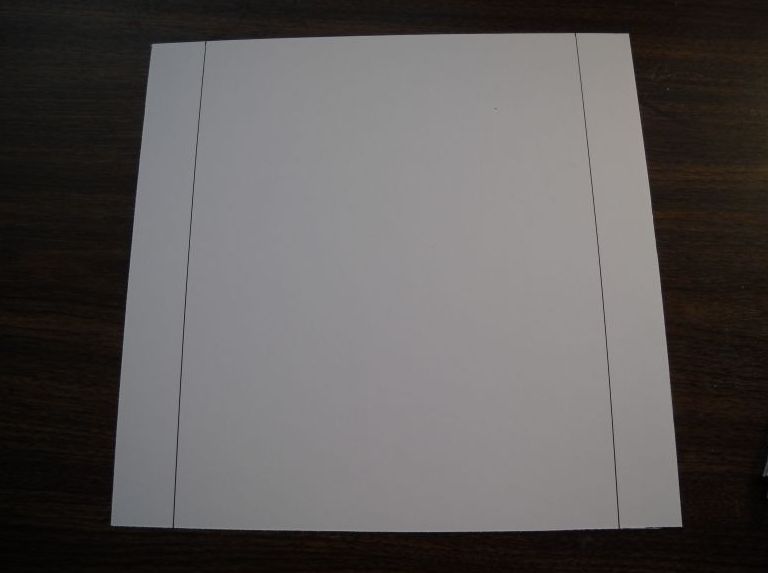
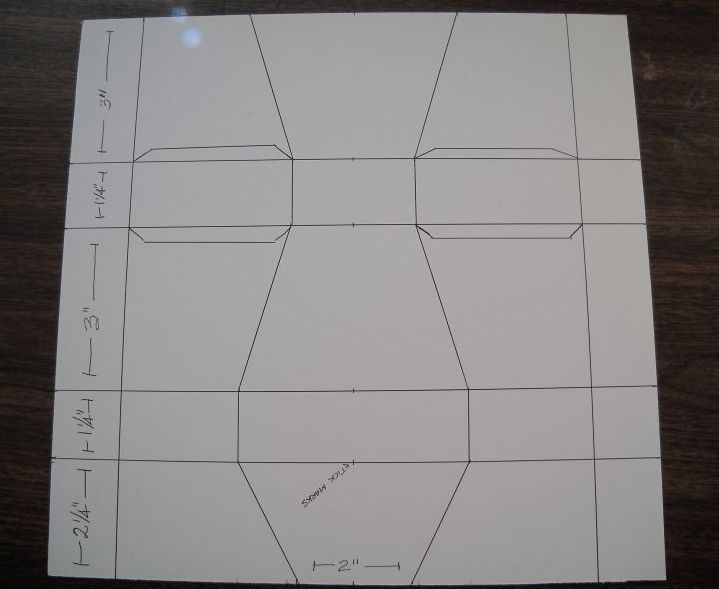
Step 1: Score your 10 3/4″ x 10 3/4″ square at 1 1/4″ on two opposing sides.
Step 2: Turn your paper a quarter turn and score at 3″, 4 1/4″, 7 1/4″ and 8 1/2″.

Step 3: Turn your paper back a quarter turn. Find the center with your ruler and make a ‘tick mark’ with your pencil. Turn your paper a half turn and find your center and make a tick mark with your pencil.
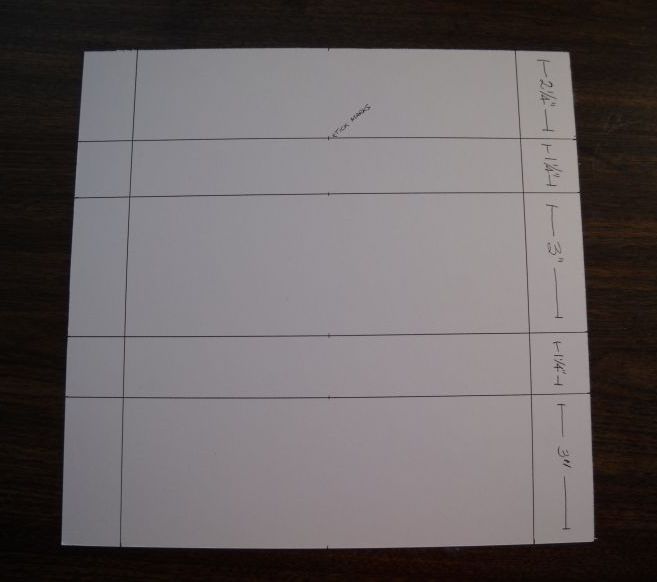
Step 4: Placing the ruler in the center of your paper vertically at the tick marks, make a mark at each score line all the way down to the bottom. (This process helps you to center your lines)
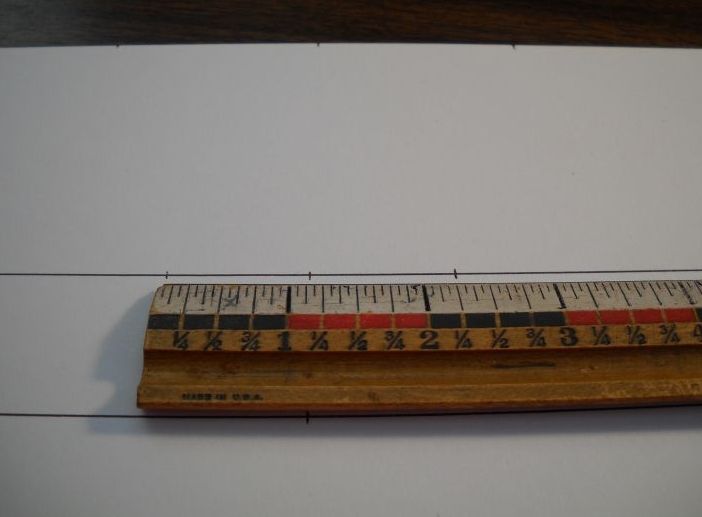
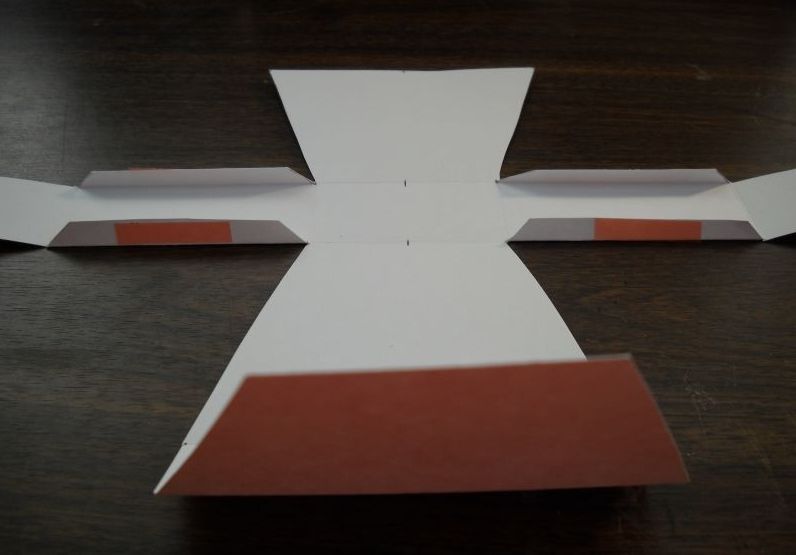
Step 5: Now comes the tricky part! 🙂 Find the top (it is the side with the 3″ section (not the 2 1/4″ section!) From there you are going to create more tick marks to create the shape. Your box top is going to be 4″ wide, so with that in mind, line your ruler up at the top tick mark with the 2″ marking on your ruler. Move down to the next line. This is going to be your box bottom. Keeping in mind that it will be 2 1/4″ wide, line the tick mark up with the 1 1/8″ mark on your ruler and create tick marks at the end of your ruler and the 2 1/4″ marks. (see the picture for visual). Continue this process all the way down your paper and then use a ruler to connect the tick marks. You should end up with this:
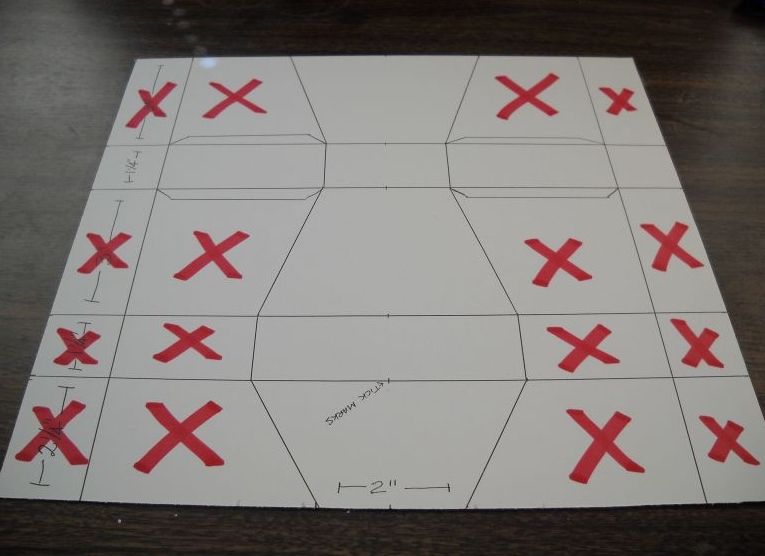
Step 6: Following the picture below, cut out the excess pieces until you end up with this:
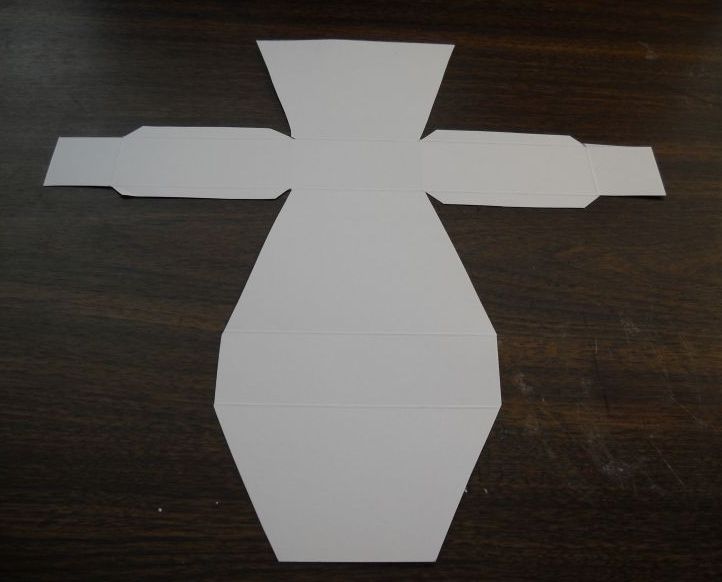
Step 7: Condition your score lines (fold them back and forth). On the small tabs, place a piece of sticky tape and remove the backing. Carefully fold your box into shape!
Now you are ready to decorate your box 🙂
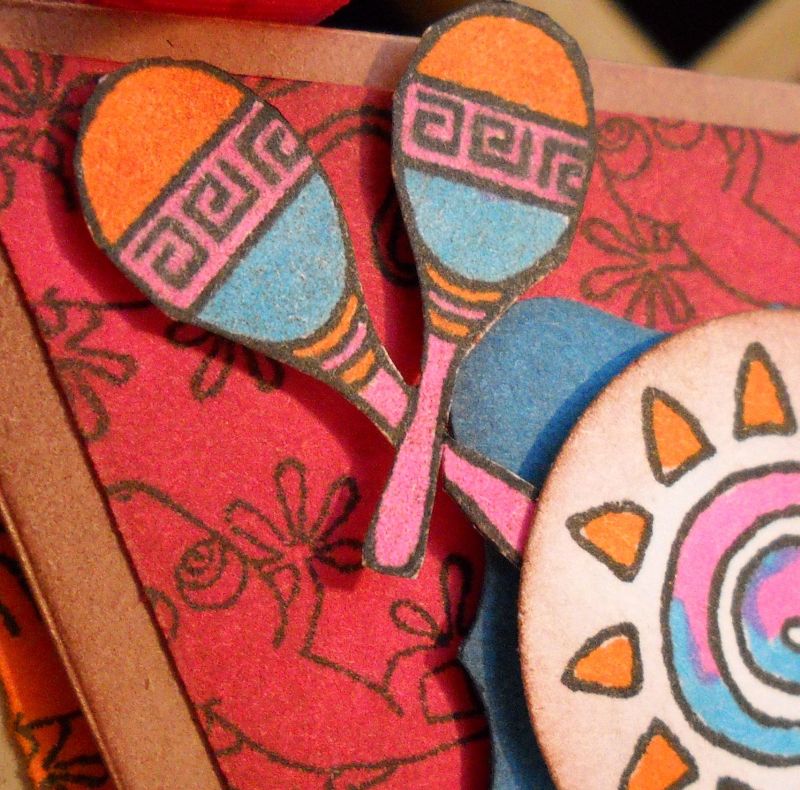
Here are my deets:
Stamps: Artful Inkables‘ South of the Border
Colors: Kraft, Tempting Turquoise, Only Orange, Melon Mamba
Ink: Tempting Turquoise, Only Orange, Melon Mamba, Soft Suede, Versafine Black Onyx
Accessories: brads, hardware, ribbon, circle punch, curvy label punch, oval punch, sticky tape, velcro dot, scoring blade, scissors, ruler, pencil, bone folder, dimensionals, sponge
~*~*~*~*~*~*~*~*~*~*~*~*~*~*~*~*~*~*~*~*~*~

Now it’s YOUR turn! Go make something!! 🙂 Make sure you link your creation to the Artful Inkables blog so we can all see and who knows, you might just win something ;).
Thanks for stopping by! I hope you have a blessed day 🙂
~~ Holly ~~


What a FANTASTIC Box! Thanks so much for showing us how it was made, I’ve GOT TO try it. Also I love how you decorated it the little lizard tails and feet give the background you made a cool look! Your color choices are great too, I love the ‘rainbow colored’ sun image.
I saw the box on SCS this morning and I just had to make one. I had to tweak a few measurements, but I got it done. I used the colors of the color challenge today. I’m looking forward to making another soon with my own colors, thanks for the tutorial, Much Appreciated, Irene
Holly, it’s slammin’! I can’t wait to try it! You’re so creative. Thanks for the tutorial and for the inspiration!
Super cute box!! I love the colors you used!
Air jordan 22 shoes
jordan basketball shoes 3.5
OMGosh, this is fabulous! I love the cool shape and the way you used the stamps! So cute!
What a great box! Thanks for the tutorial! Love it! 🙂
You ROCK Holly!!!! I LOVE this bag – I am so going to have to try this!!! Thanks so much for the instructions!!! 🙂
Wow – you should have a Ph.D. in Paper Engineering – what
a fabulous job !! Thanks so much for sharing your hard
work.