~ Paper Buttons ~
May 15th, 2011 by Holly McMillen
Howdy, Friends!
I am all about saving a dime. Just today we paid $4 a lb for bacon. $4!!!! Gas is at $3.67 a gallon and my husband’s truck has a 32 gallon tank. You do the math. My budget is getting a major squeeze!
So, being a crafty person, I love the idea of making my own buttons for cards. Not only can I make them in just about any size, shape and color, but they can be customized in any number of ways. Just this past week, Lynn Pratt (lpratt) posted a cool tutorial on the Splitcoaststampers website in the resources section. Now, I’ve made paper buttons before, but the idea of coating them with crytal effects or similar medium had not occurred to me! Go Lynn!
Now, I did do a couple things a little different. For one, I made my buttons 5 layers thick. I just felt they were a little more sturdy. Instead of putting my coated buttons directly onto the wax paper, I took toothpicks and poked them through the holes and then into the wax paper that I had put over a mat pad. The toothpicks stick nicely in the pad and keep the buttons from sticking to the wax paper. The toothpicks also keep the holes open.
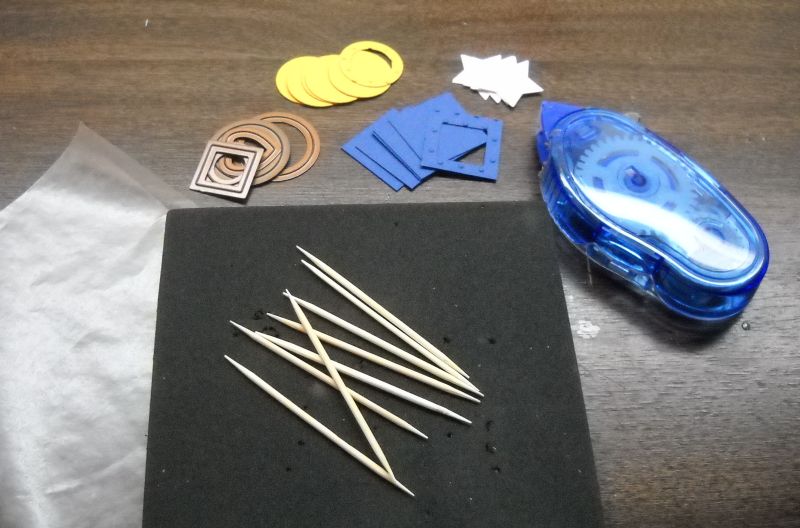
I also added some glitter to the white star after I put the tacky medium on.
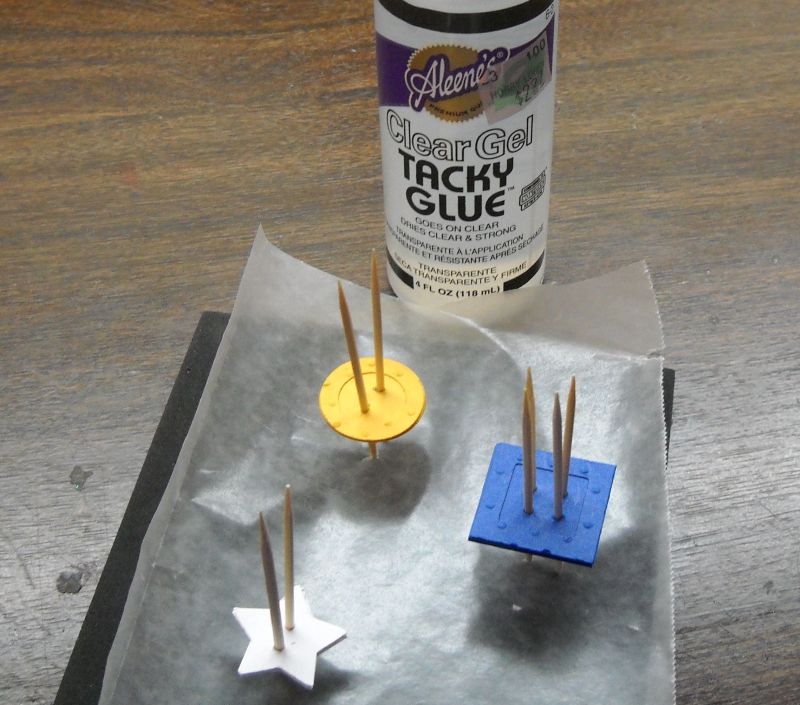
I will give you a big *HINT*~ make sure you put a thin layer of the gel on as it takes awhile to dry!
Here’s my card using the round button:
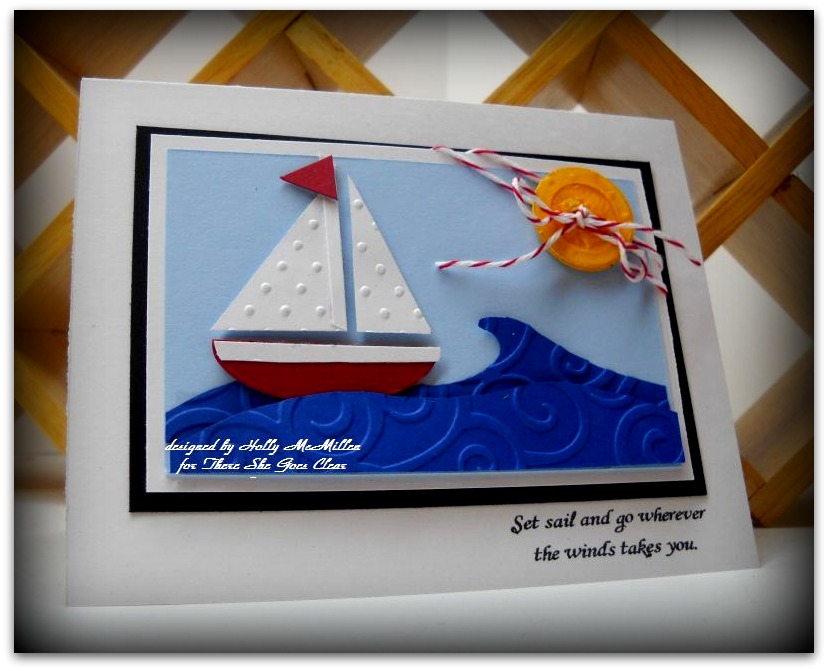
The boat is made with 1/2 of a medium oval punch. The waves and sails are hand cut.
I’m going to use this for my son’s graduation card. Yes, my #3 baby graduates from High School this coming Saturday!!
Here are my deets:
Stamps: There She Goes’ By the Sea (sentiment)
Colors: Brilliant Blue, Bashful Blue, Cherry Cobbler, GP White, Summer Sun, Basic Black
Ink: Memento Tuxedo Black
Accessories: Divine Twine Baker’s Twine, Charm Dies, Swiss Dots embossing folder, Swirls embossing folder, Aleene’s Tacky Gel, dimensionals, sticky tape, medium oval punch
~*~*~*~*~*~
There you go! I hope you’ll stop over to the SCS challenge forums and play along!
Hugs!
Holly


Absolutely adorable card! Love the ocean waves with the EF on them and swiss dotted sails 🙂 Too cute!!
Just to make you feel better, we are paying around $5/gallon up here for gas. Needless to say, many of us near the border are hopping over to fill up in the US.
Popped over from SCS to see your modifications, Holly….Great ideas! TFS.
Love your waves…very creative!
Tried these yesterday and had some trouble with the overage on the glue. I wasn’t nuts over them. I like your idea better for the holes and all. The glue wouldn’t form a pool around the edge of the buttons. Great idea! Maybe I’ll try them one more time.
this is such a cute card holly -love the sail boat and your waves-thanks for the tip on your paper buttons. I hear you about gas & food. our gas here in pittsburgh was $4.09 last thursday
I love the boat! What a great idea. I love the card too!
Your card is gorgeous! I love the colours and the embossing. Your ‘button’ looks great and that’s a great tutorial.
Thanks for sharing! 🙂
Those buttons are fabulous!! Love the idea of coating them with CE. This is a perfect grad card/sentiment. Congrats to your son, Holly.
Very cute!! Great idea!
Take care and STAY POSITIVE!
Adorable – like this so much!!
My budget is getting a major squeeze!