~ Puffy Tags ~
November 27th, 2011 by Holly McMillen
Hi Friends!
I hope all of you (USA) had a memorable Thanksgiving! It was a gorgeous day here in CO. It led to a nice quiet birthday for me on Saturday. Unfortunately, I managed to get a sty in my left eye sometime over the holiday, so I’ve been nursing that for a few days. Makes it very difficult to stamp, I tell ya! 🙂 I’m on the mend, though. I’ll be so happy when my plague of illness in 2011 ends and pray for a healthier 2012!
This week for our Technique Lover’s Challenge, we’re going to do easy to reproduce gift tags. I picked this challenge because I came up with a really fun idea for tags that do double duty!
I call them “Puffy Tags”… and here’s why…

I cut the shapes with nesties (label 2 ~ 2nd and 3rd smallest ~ used here). You need two of the larger and two of the smaller… Cherry Cobbler cardstock was used for my base. I then cut strips of tissue (kleenex or bathroom tissue will work) and placed them on the backside of one die cut.
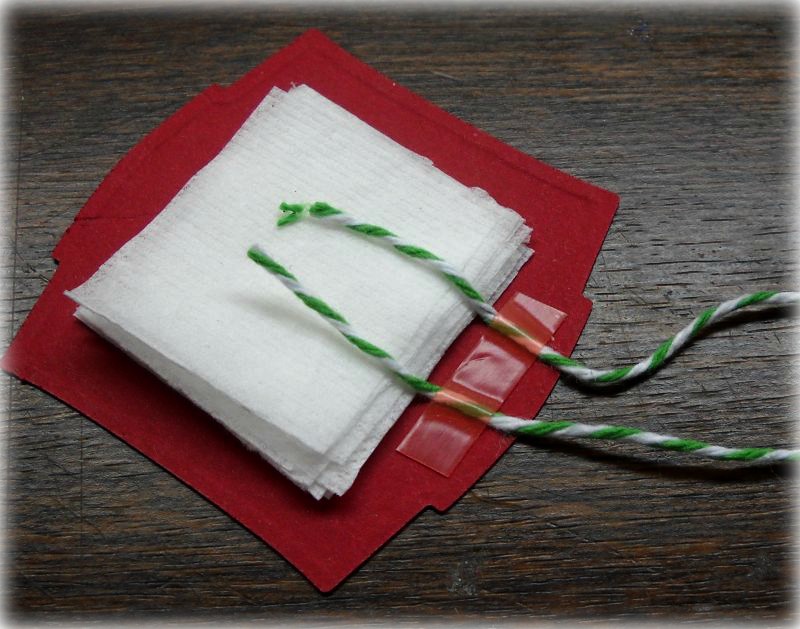
Then I took a piece of twine and laid it on top as shown above. I used a small piece of stick tape to hold it in place.
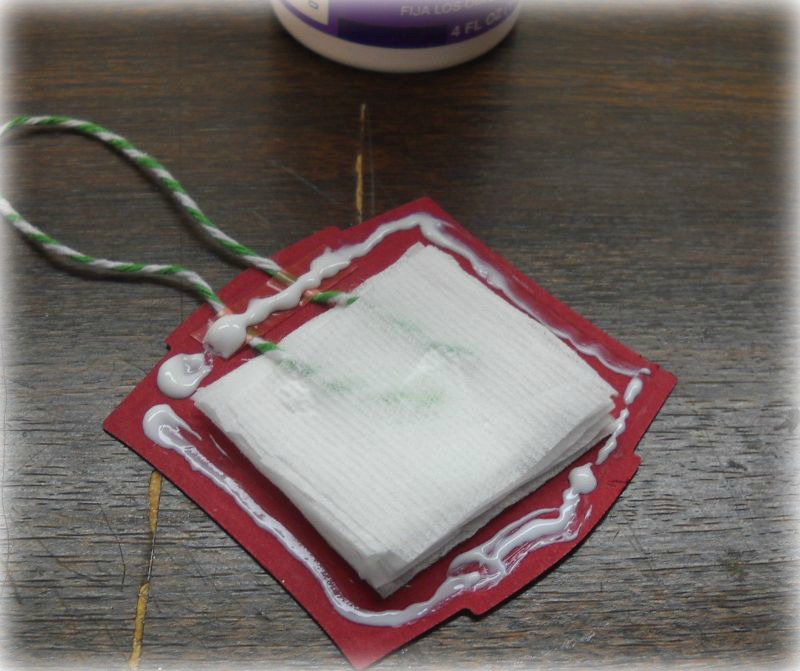
Then I ran a bead of Aleene’s Fast Grab tacky glue around the edge. I then put the back (other Cherry Cobbler piece) on top of this and sandwiched the tissue between the layers. It only takes a few seconds for the tacky glue to hold and then it’s on to decorating!

I ran the 2nd smallest Label 2 die cuts through the cuttlebug with various embossing folders and decorated the fronts with images from There She Goes’ Warmest Wishes set.
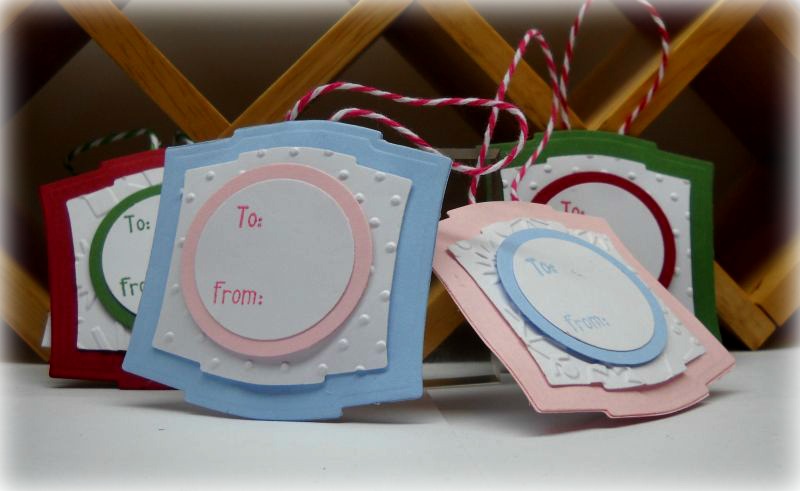
Then I turned them over and added the “To…From…” sentiment from There She Goes’ Holly Jolly set.
The tags can easily be attached to a giftbag, box, etc., and when they’re through doing that duty, they can be hung on the tree!
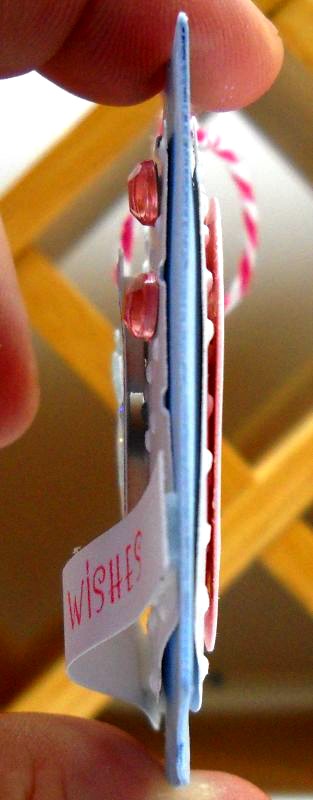
Here’s a side view to show the puffies…
What do you think? Cute? 🙂
Here are my details:
Stamps: There She Goes’ Warmest Wishes, There She Goes’ Holly Jolly
Paper: Cherry Cobbler, Garden Green, Pretty in Pink, Bashful Blue, GP White
Ink: Versafine Black Onyx, copics, Riding Hood Red, Garden Green, Regal Rose, Bashful Blue
Accessories: The Twinery red/white, pink/white, and green/white twine, various colored rhinestones, Label 2 nestabilities, circle punches, tissue, Aleene’s Fast Grab tacky glue, sticky tape, stickles, cuttlebug christmas ornaments die, embossing folders, dimensionals.
This can be done with so many different nestabilities sets! The possibilities are endless!
~*~*~*~
Thanks so much for stopping by today. I hope you’ll take time to drop by the Splitcoaststampers’ challenge forum and play along! I have a wonderful guest designer helping me out today and she will knock your socks off!
Hugs!


Cute idea, Holly. Love your samples 🙂 Glad your birthday was enjoyable 🙂
Very cute tags! Love the shape, colors and designs. At first I thought the stuffing was cotton balls or quilt batting. I was surprised to see that it was t.p. or tissues. That’s clever, especially for someone that doesn’t have batting on hand. Neat project! 🙂
I love all the things you do. Amazing creativity!
Holly these are adorable and thanks so much for the how to’s……….I know what will be decorating my gifts this year.
I think these are cute as can be !! I’m constantly telling myself that I need to make some tags and if this isn’t inspiration, then I don’t know what is. !!
Your little tags are sooo cute, Holly….how clever to add the *stuffing* to make them puffy!!! Thanks for the great challenge, gf!!!
Love your tags-neat idea making them puffy. Will try some. tfs
The puffy tags are so cute, a very different take on tags, the ribbon is beautiful.
I just had to take a minute to comment on your project and instructions. You are AWESOME to take the time to break your project down so that anyone can understand it and recreate it. I very much appreciate the level of detail you provide. Thank you!!
You made a great point in this post.I just spent some time reading all your posts and I must say you are a genius who always throws out smart opinions. Now you have me as your loyal reader. Keep writing great posts. I am looking forward to them.thank you
The OBD-II standard specifies the type of diagnostic connector and its pinout, the … Unlike the OBD-I connector