~ Flip Album Tutorial ~
March 30th, 2016 by Holly McMillen
Flip Album Tutorial
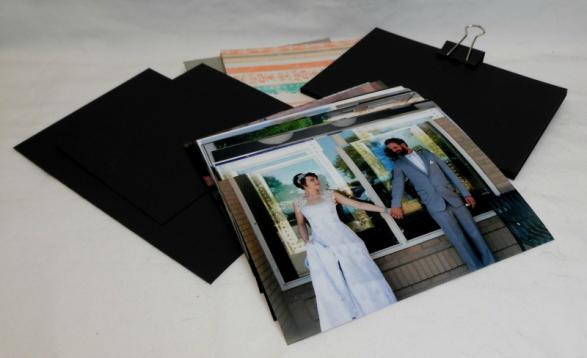
I have something fun today… a tutorial! As many of you know, my oldest son was married last October. I’m working on their wedding album and it quite an undertaking. So, in the meantime, I made them a smaller keepsake album to share until I’m through.
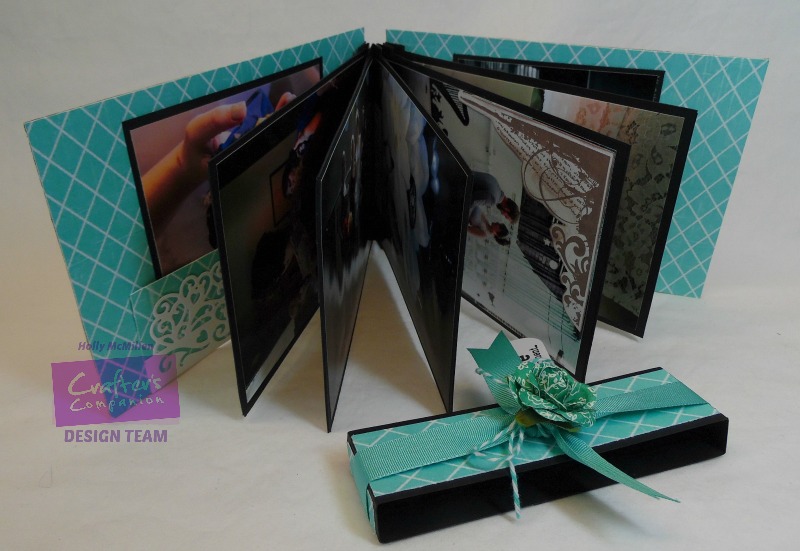
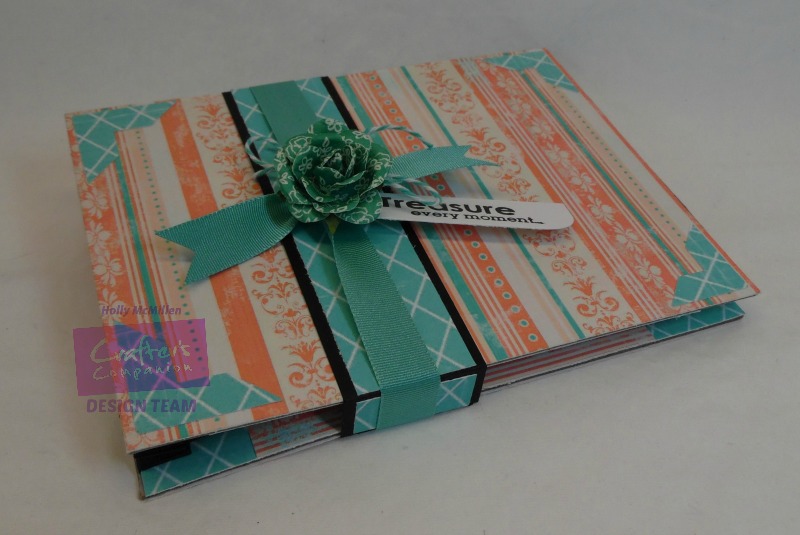
Here’s what we’re shooting for:

Supplies needed:
- List of cut pieces needed:
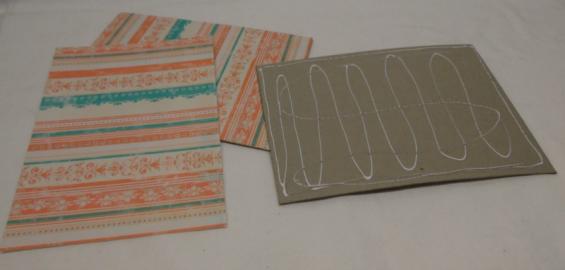
Chipboard – 2 pieces cut 7” x 5” (album cover and back
Patterned paper – 4 pieces cut 7” x 5” (front, back and inside covers)
Cardstock – 2 pieces cut 7” x 4 1/2” (to contain accordion front and back)
Cardstock – 1 piece cut 5” x 4 1/2” (accordion piece)
Cardstock – 10 pieces cut 6 1/4” x 4 1/4” (inside photo mounts)
Cardstock – 1 piece cut 12” x 1 1/2” (belly band)
Other Supplies:
- Binder clips (optional)
- Assorted items for decorating
Step 1:
Adhere patterned paper to front and back for album (do not cover inside of chipboard yet!) Set aside to dry. It’s best to sandwich the pieces together with clips so that they do not warp.
Step 2:
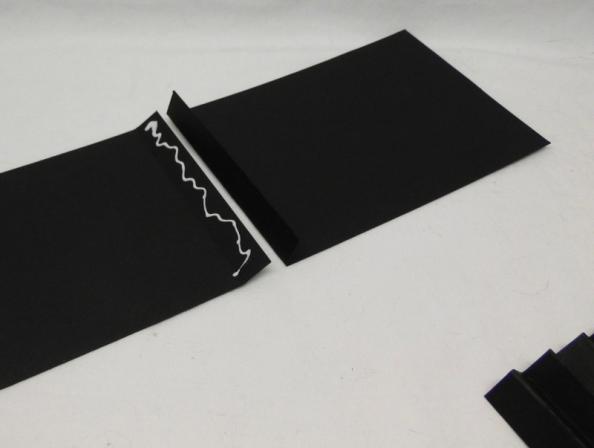
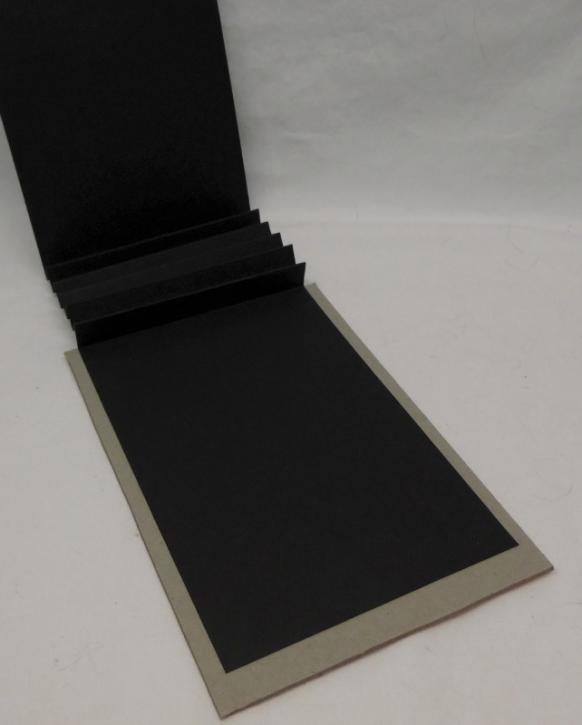
Score the 2 pieces of cardstock measuring 7” x 4 1/2” at 1/2” along the 7” side. Set aside.
Score the 5” x 4 1/2” piece every 1/2” along the 5” side. Take the two 7” x 4 1/2” pieces and lay flat with the scored ends toward each other. Bend the scored ends up. Apply adhesive to the inside of the score. With the 5” x 4 1/2” piece positioned with the scored ends down, adhere to the two pieces, sandwiching the accordion piece between. Clamp the accordion piece together and let dry.
~*~*~*~
~*~*~*~
~*~*~*~
~*~*~*~
Step 3:
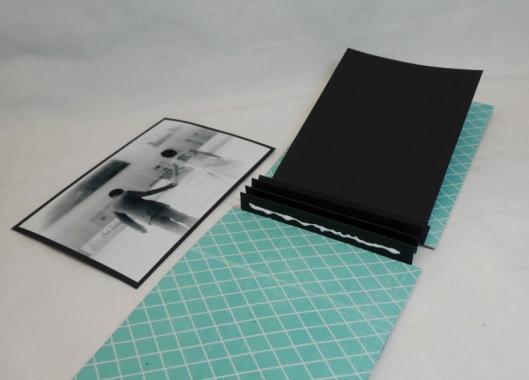
Adhere photos to photo mounts (or mats). Set aside to dry.
Step 4:
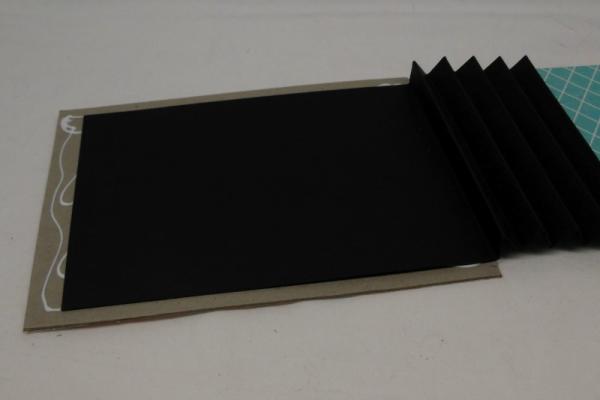
Lay front and back chipboard pieces unfinished side up and end to end. Adhere the accordion sandwich to them by butting the edge to the edge of the chipboard. Repeat on the other side.
Finish the inside covers of the chipboard with patterned paper, covering the accordion flaps.
Step 5:
Begin adhering pictures to the accordion. Place one picture on either side of each “mountain” fold. You will get 10 pictures into the slots. Photos that are back to back can be adhered together by placing a small amount of adhesive inside the top where they meet. This keeps them from curling.
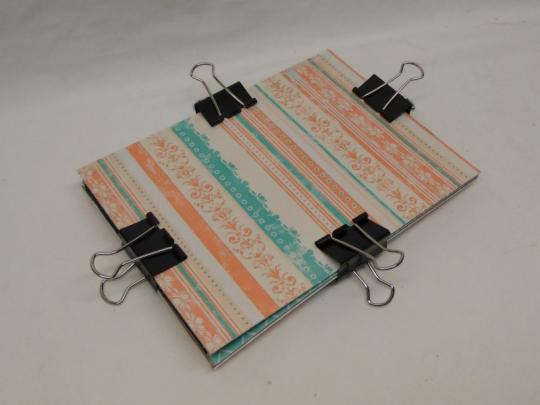
Clamp together and leave it rest for a few hours. This will keep the album from curling.
Step 6:
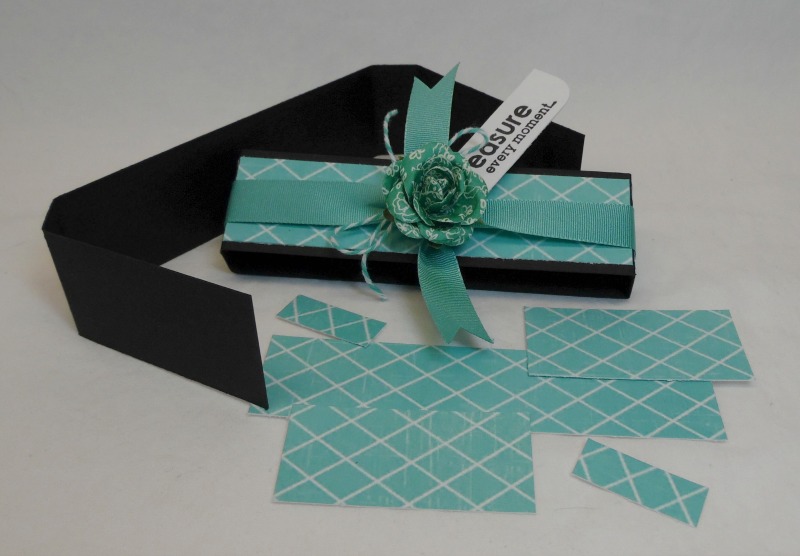
(Belly Band) :
Create a belly band using the 12” x 1 1/2” piece. Score the piece at 3”, 3 5/8”, 8 5/8” and 9 1/4”. Adhere at the overlap and decorate as you like.
~*~*~

Decorate as desired.
~*~*~*~
~*~*~*~
I used:
Textures – Words of Wonder /Set 1
Die’sire Edge’ables – Renaissance die
Spring themed free downloadable paper
Cardstock (black used here)
Other Supplies:
Binder clips (optional)
Assorted items for decorating
~*~*~*~*~
I hope you enjoy this! Thanks for stopping by!
~*~*~*~
~ Holly

