~Toy’s Haven Card Box Tutorial~
March 4th, 2008 by Holly McMillen
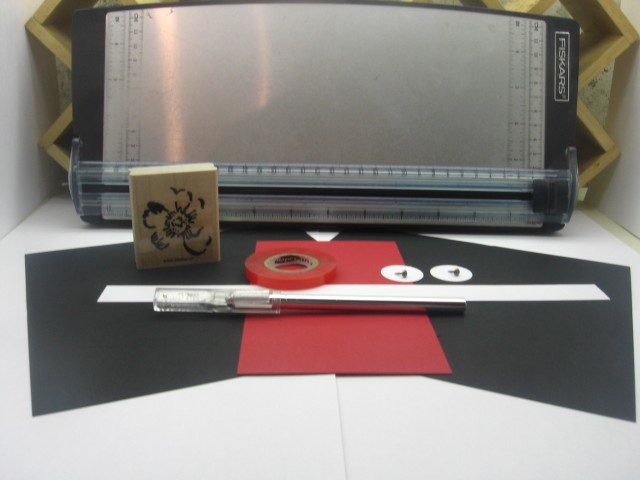
2 pieces of cardstock cut 7 1/2 x 7 1/4 inches
(for the box)
1 piece of coordinating cardstock cut 6 1/4 x 3 5/8 inches
(for lid)
1 piece of coordinating cardstock 8 1/2 x 1 inch
(for strap)
2 1 inch circles (optional)
2 brads
sticky tape
cutter
scoring blade
Assorted cardstock / images for decorating
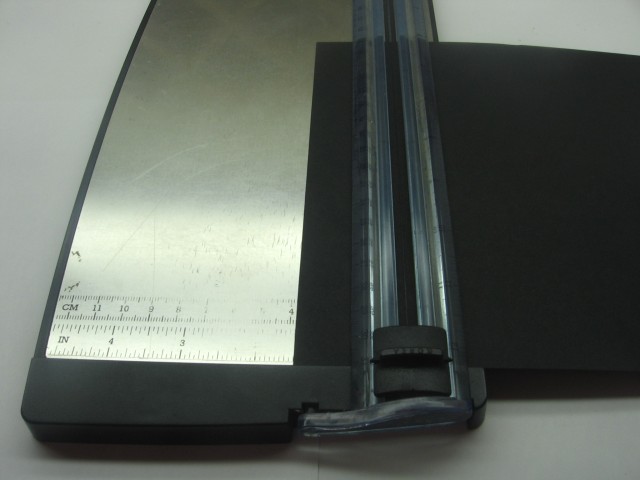 Step 1: Score your box pieces at 1 1/2 inches on each of the 7 1/2 inch sides. Score again at 1 1/2 inches on the 7 1/4 inch side.
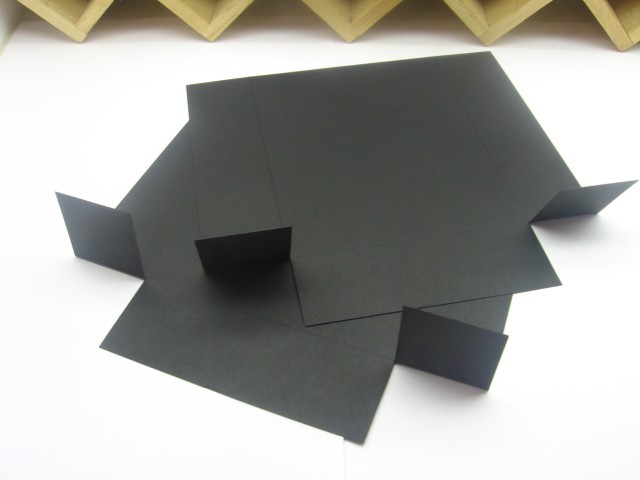 Step 2: Cut along the scorelines on both pieces as shown. (Note: it’s better to cut UP from the bottom as this will reinforce the bottom of your box).
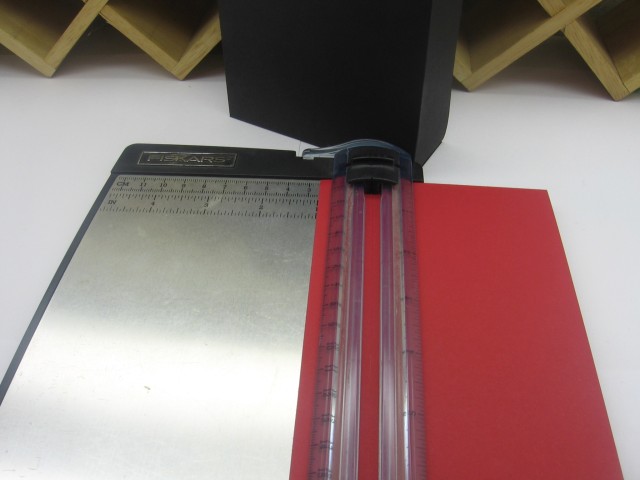
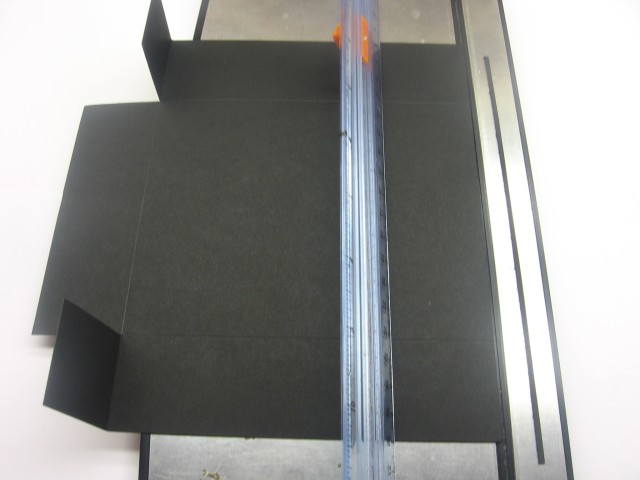 Step 3: This is important! On the piece you designate as the back piece (you choose), you will want o cut a 1/16 inch strip off the top (the side that isn’t scored) as this will ensure that the box fits snuggly together and lines up properly.
 Step 4: Apply sticky tape to the flaps and fold under to make each 1/2 box.
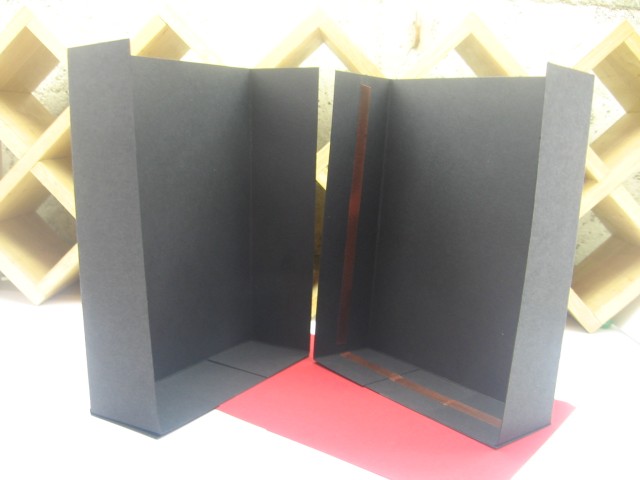 Step 5: Line the 3 inside edges of the front piece with sticky tape and slide them together. I position the pieces together so they line up properly, then smooth them out from the inside.
 Step 6: Score your box top piece at 1 inch on all four sides.
 Step 7: Cut corners to create flaps as shown. Apply adhesive and assemble.
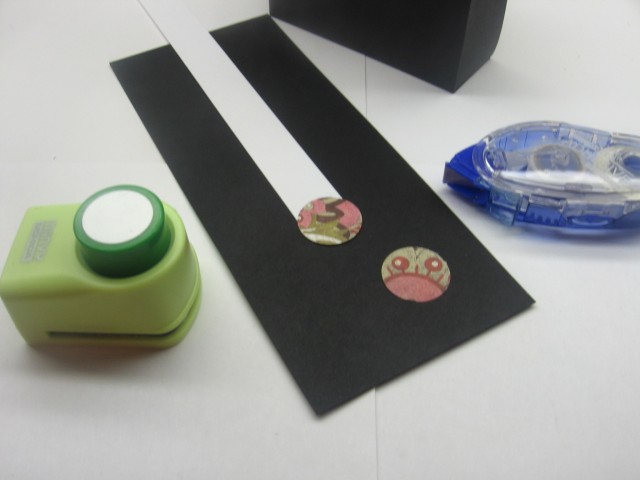 Step 8: Assemble strap as shown and affix to box with a brad. This allows the strap to swivel… making it easy to remove the box lid. (Ignore the black cardstock here.. I just used it so you could see what I was doing 🙂 )
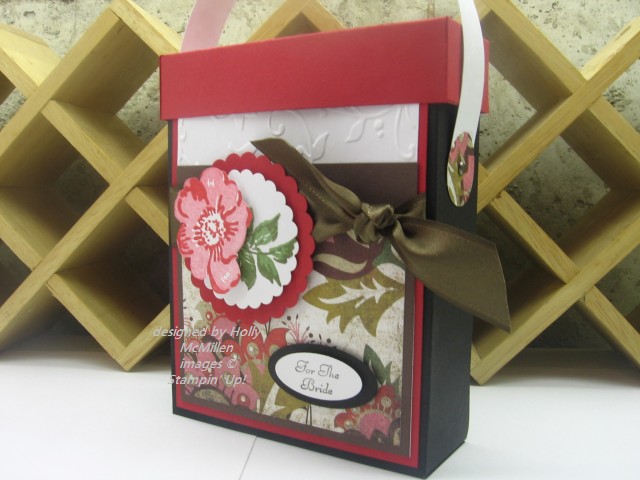
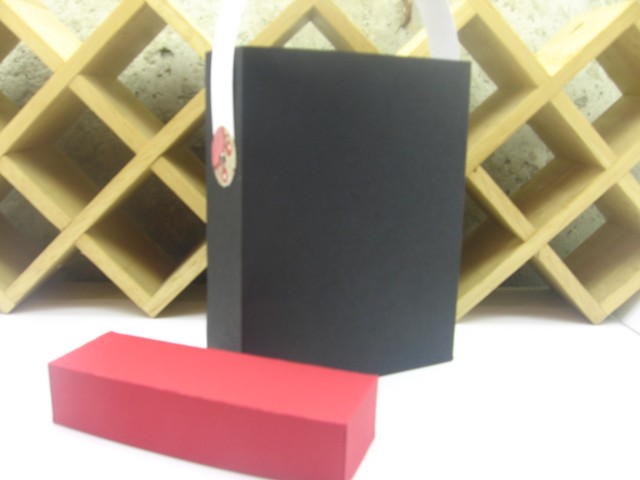 Step 9: Decorate your box!
 That’s it! Happy creating 🙂
Deets on this box:
Stamps: Wild Rose DD, Fancy Flexible Phrases
Colors: Basic Black, Real Red, GP White, Chocolate Chip, Infuse DP
Ink: Brilliance Graphite Black, Regal Rose, Real Red, Wild Wasabi, Old Olive
Accessories: brads, ribbon, dimensionals, scallop circle punches, oval punches, birds & swirls EF, scoring blade
***********************************************************************
They’re calling for a severe ice storm here tonight, so in anticipation of being out of power tomorrow, I thought I would get this posted today.
TFL!~ and have a blessed day.


[…] wanted to make a box (see this post for instructions).. I intend to fill it with thank you cards (it will fit up to six cards) and […]
Thank you for the excellent tutorial! Your finished box is gorgeous!!
Thanks again for taking the time to post this. TFS
Holly – great tutorial. I’m wondering, though, if there’s two measurements that you typed incorrectly as I’ve just finished making one of your boxes and had to adjust it. Did you mean for the bottom of the box it should be 7 1/2 and not 7 1/5? Also for the lid, 6 3/4 made the lid for my box too long but 6 1/4 fit perfectly. Thanks again. Love the box.
eek! Sue.. thanks for the heads up. You are right, I did make those typos! Thanks for the headsup! Fixing them now. You rock Sue!
Very cool and clever! Thanks for taking the time make the tutorial and to share!
Awesome! I love the box! I know you posted the dimensions of the cardstock before but this was great to see the whole process!! Thanks!
Holly! This box rocks! I loved it when I saw it on SCS and was in awe of it…lol
Thanks so much for sharing the tutorial with us! I hope to have some spare time later this week to work on it!!
Hope the storm isn’t as bad as they are calling for. Stay warm and safe 😉
What a beautiful box and great instructions. Thanks so much for sharing.
I’m so glad I found your blog over at SCS!
The box is so cute! Thanks for the intruction!
Holly,
Thank you for this great tutorial and for adding the box lid to the instructions. I made one and posted it on my blog with a link to your blog and instructions. Thank you for sharing!
Becky
http://www.inkingidaho.blogspot.com
I was wondering what correct measurements for top were if sides measure 7 1/2 x 7 1/4?
Thanks for posting this great tutorial. It seems very easy and thanks for sharing!
Yah! I finally had a chance to try your tutorial! It is fabulous! I’ve kept the top lid at 6 3/4 long as the 6 1/4 was too small. Wonder if it depended what side was scored on the box itself. No matter…it worked wonderfully for me!!! hehe!
Here is a link to mine. I was sure to give you credit and link them here! Thanks again…I can see me making TONS of these!
http://treasureoilerdesignz.blogspot.com/2008/04/boxed-card-set.html
[…] Isn’t this a pretty box? I found it here! http://toyzhaven.blogs.splitcoaststampers.com/2008/03/04/toys-haven-card-box-tutorial/ […]
Oh!! It’s great toys box tutorial…Thanks for this post!!
[…] basic box instructions, see this post. You will have to adjust the size according to the size of your […]